Posted by Kathy Torrence on Feb 27, 2007 in
Cards I finally got my artist’s comp copy of the Spring Stamper’s Sampler Take Ten issue – apparently, they had the wrong zip code for my address which delayed my copy…
Anyway, after looking through it, I noticed that I have 8 cards in this issue! Not bad!
I sent these cards in a LONG time ago…but here are my photos of them:
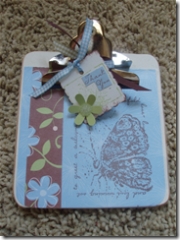
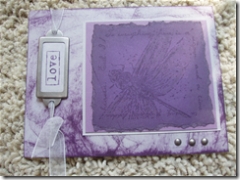
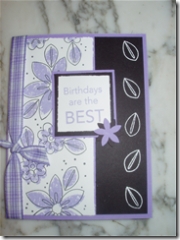
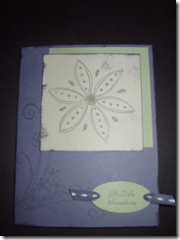
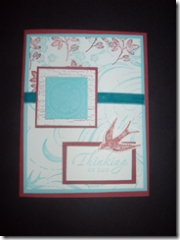
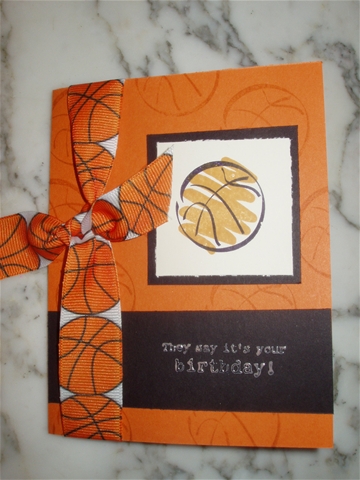
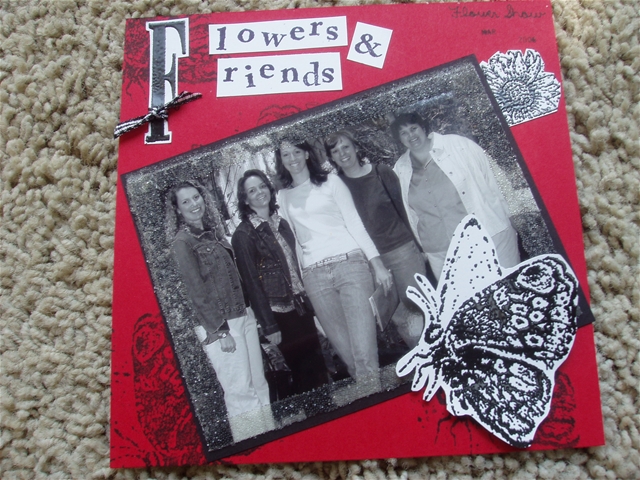
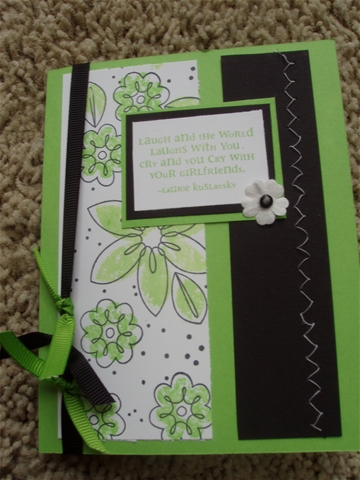
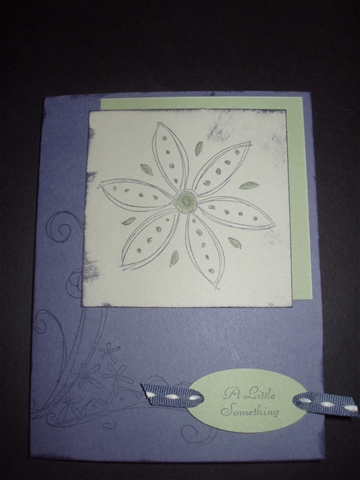
This card is on page 40:
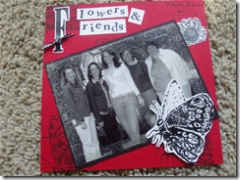
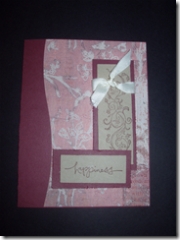
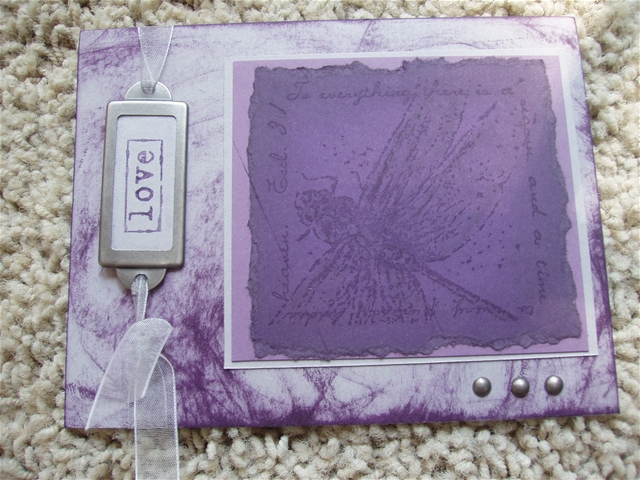
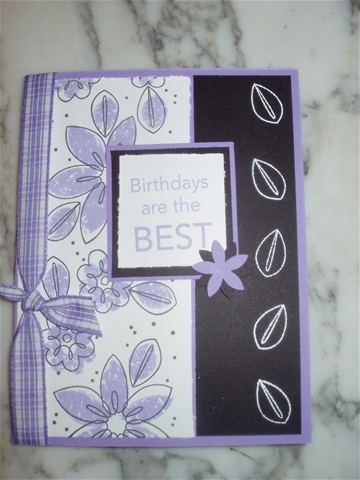
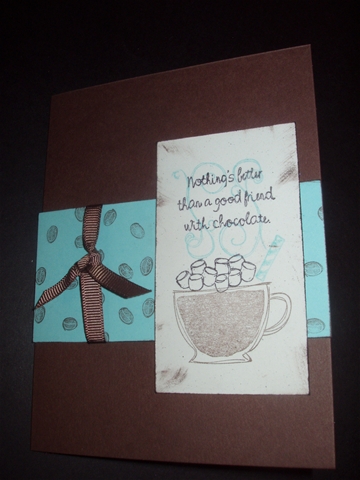
This card is on page 52:
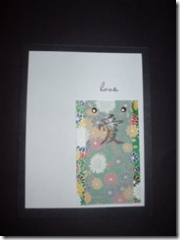
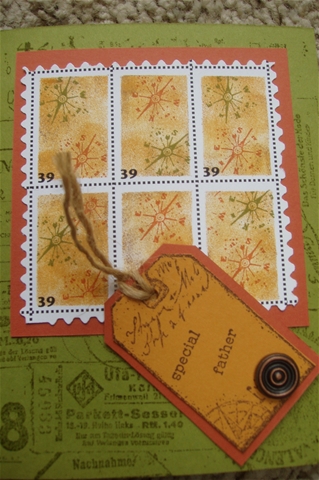
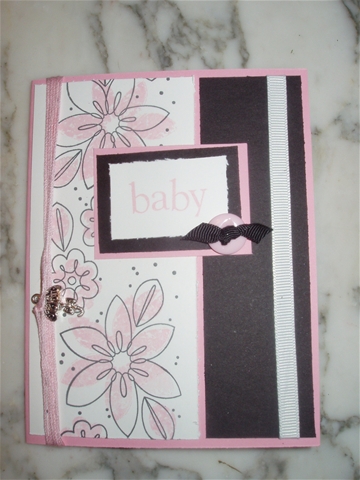
This card is on page 49 (except for some reason, in the magazine it only has 2 shrinky dinks on it…I wonder if one was lost or broke during shipment…)
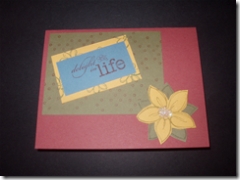
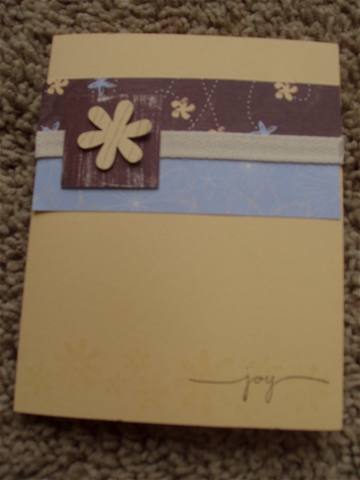
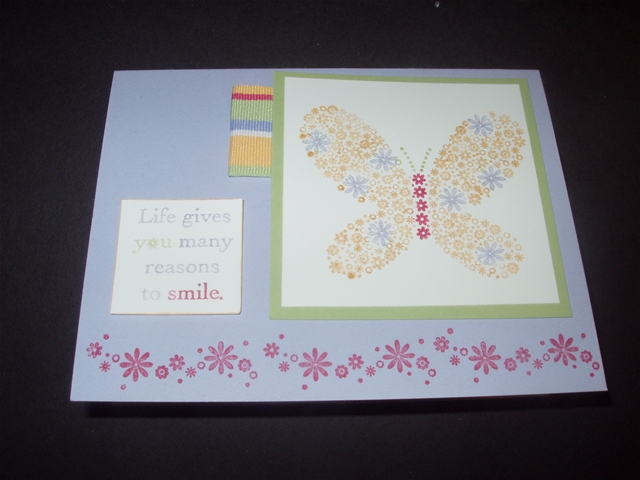
Page 53:
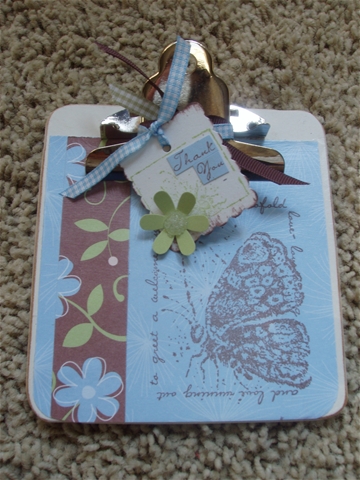
Page 64:

And for some reason, I can’t find the photos of the other three here on my computer. So you’ll just have to buy an issue of Take Ten at www.stampington.com to see them, won’t you? 😉
(And if you do, the others are on pages 7, 52 and 120)
And while I was searching the depths of my card photos, I found some others that I haven’t shared because I was entering them into contests. But since by now, I’ve obviously lost or the magazine decided not to use them, I’ll show them here…
Here are a few small projects that I entered into a Stampin’ Up! contest last year (these apparently were all LOSERS!) – all use the Measure of a Life stamp set:
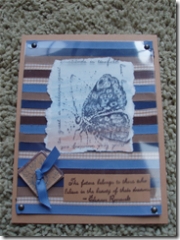
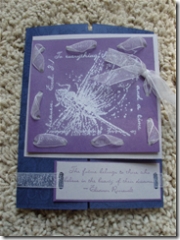
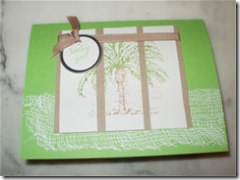
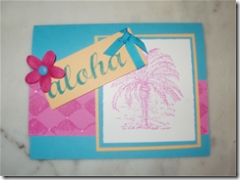
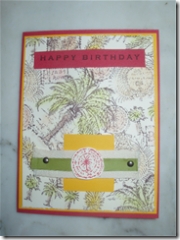
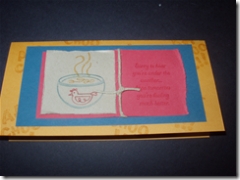
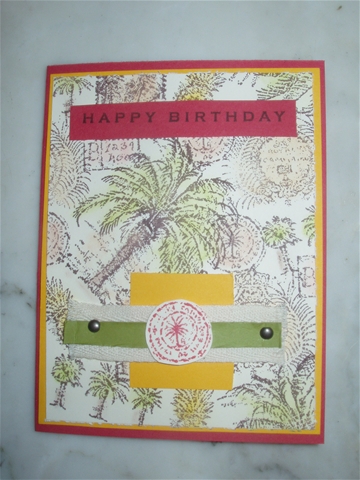
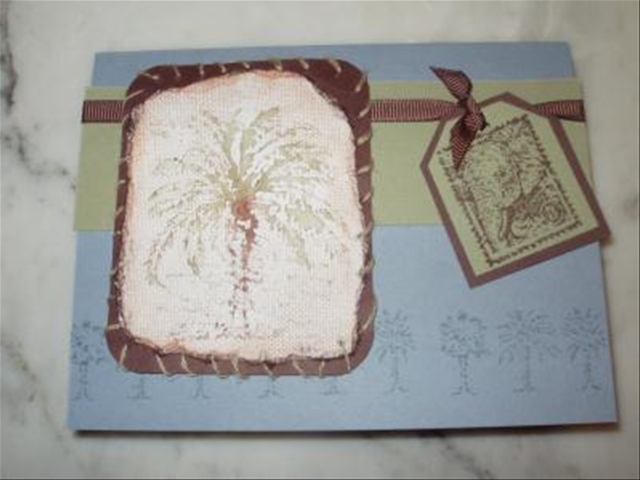
Then these are a few that I submitted to Take Ten for the “Different Point of View” feature (same stamp several different ways). It’s been so long, I doubt they’ll use them now. But if they do, you get to see them here first! These samples all use the palm tree image from Balmy Breezes but in completely different ways and color schemes:
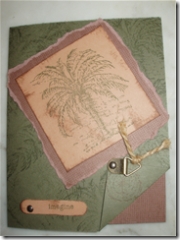
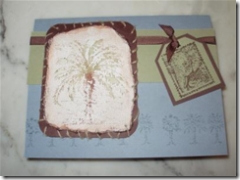
The quality of that last photo is not-so-good – I must have zoomed in on it or changed the image for something else. I think I sent those in at the same time as the others that were in the spring issue (which was back in JULY!), so who knows if they’ll ever appear in the magazine.
I also sent this series in at the same time for the “Shifting Shades” feature (same basic layout and stamps but different colors and embellishments):
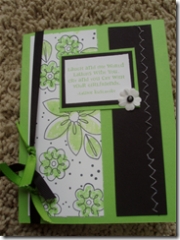
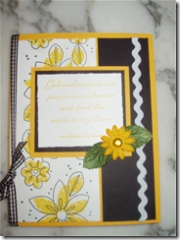

I thought they were pretty good, but who knows how they decide what to publish. But again, if they do – you saw it first right here on my blog!
Posted by Kathy Torrence on Feb 23, 2007 in
Cards Here are the cards I will be offering at my Stamp-A-Stack on Monday, February 26th. Remember, these are purposefully simple, quick and easy cards so that all of my attendees can move around from station to station quickly. I also have to use few embellishments since I make so many cards (I made 100 this morning) – it’s almost impossible to have that many of any one embellishment. Another criteria – no two cards can use the same colors of ink or markers so that I can keep the stations separate. It can be quite a challenge when making these cards!
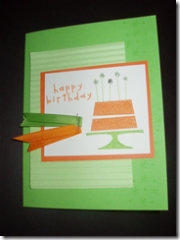
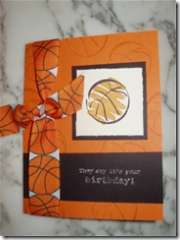
I like this bright and cheery card using the Eat Cake stamp set. It works for a young boy or girl and will even work for an adult birthday too. This card uses Green Galore, Gable Green and Only Orange.
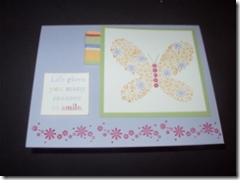
This card has such beautiful colors. I colored in the butterfly and sentiment using markers. Here’s a hint for this card – stamp OFF the images before stamping them onto the paper. The markers tend to be a little juicier than the ink pads. This card uses Almost Amethyst, Apricot Appeal, Rose Red and Certainly Celery.
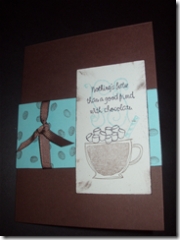
I just love this Like It a Latte stamp set – I’ll miss it when it’s gone! This card uses Chocolate Chip, Cool Caribbean and White Naturals.
I love the Doodle This stamp set – I can’t wait to start demo-ing the Spring Mini! I also had a bunch of the Vintage Violet paper (I ordered an extra pack by mistake) so I wanted to try to use it up. This card combines Vintage Violet, Sahara Sand and Mellow Moss.
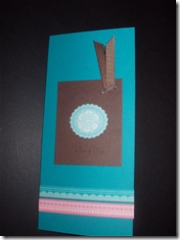
This was my favorite card from the Stamp-A-stack. I love the colors together(More Mustard, Not Quite Navy and Ruby Red). The card is a 3X6 size which will fit in the small open-end envelope.
I have 10 ladies coming and everyone will make 2 of each of these cards. I have the pieces cut and ready to go – I hope they like the cards!
Posted by Kathy Torrence on Feb 23, 2007 in
Crafts I’m going to be holding a Pearl Ex Technique Class on Sunday, and I thought I’d share some of the info here.
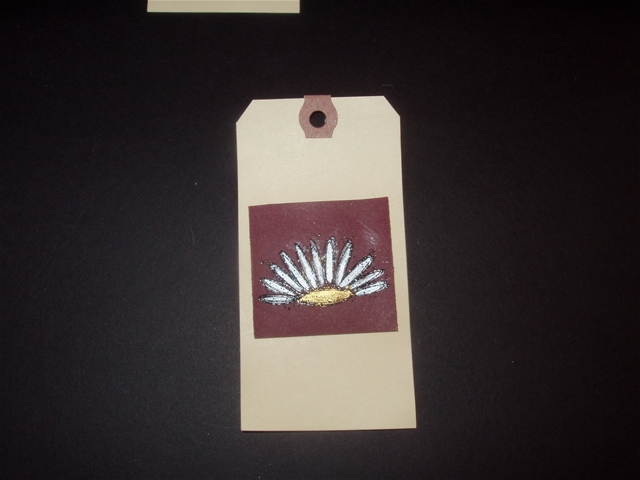
My technique classes are quick and simple – we don’t make any projects; we just go over 4-5 different ways to use the product or technique. Then each person makes a small sample using technique and puts them onto the front of large tags. On the back of the tags, I give each person a set of written instructions for how to achieve the effect on the other side. Then they are putting all the tags onto key rings (given out by me) so that they’ll have all the info available when they’re looking for a technique to use on a project. This is the 5th class in the series.
I have so many customers who have no idea how to use Pearl Ex – and it lends such a beautiful effect to projects! So here are a few simple how-tos.
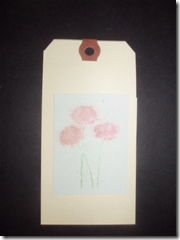
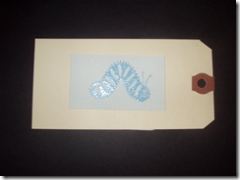
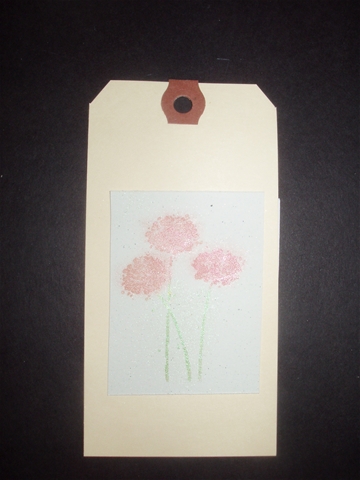
First, a simple way to use it is a technique I call “Poppin’ Pearl Ex” – similar to the “Poppin’ Pastels” technique. To do this, you stamp an image onto cardstock using Versamark ink, then rub the Pearl Ex powder over the image with either a sponge dauber, paint brush or Q-tip. The Pearl Ex powder will stick to the inked image and you’ll get a result like this on white paper (I used an amber Pearl Ex on the flowers and a green Pearl Ex on the stems in this example):
Or a result like this on dark paper:
The image shows up like magic – it’s a really fun technique.
The Versamark ink acts as a fixative – you don’t need to seal the image when using this technique.
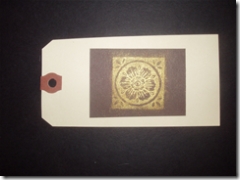
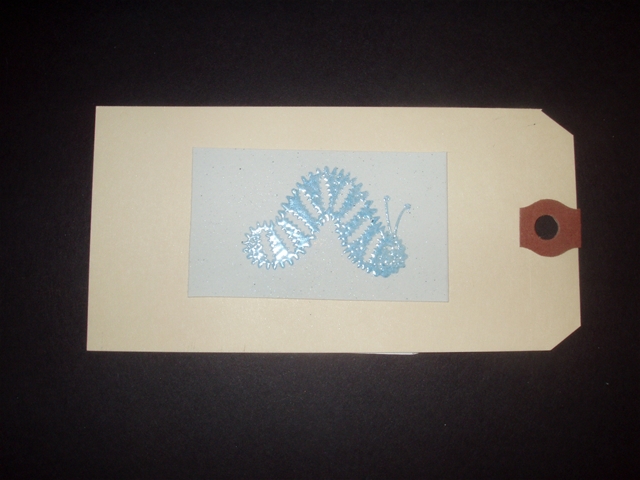
Another way to use Pearl Ex is to mix it with embossing powder. For this sample, I’ve mixed blue Pearl Ex with clear embossing powder and applied it to an image stamped with Versamark and heat embossed it:
It gives a really pretty pearly effect to the embossed image. Again, the Pearl Ex does not need to be sealed for this technique.
You can also ‘paint’ with Pearl Ex by either mixing it with plain water as I’ve done here:

I embossed the image with black embossing powder, then just dipped my damp Aquapainter directly in the Pearl Ex powder and applied it to the image. It looks messy in the photo (I must have some stray powder that caught the camera’s flash), but it looks really pretty in person. In this case, you do need to apply something to adhere the powder to the paper (cheap hairspray works well).
Finally, you can also mix Pearl Ex powder with a paint such as Lumiere and water and apply it with a watercolor brush:
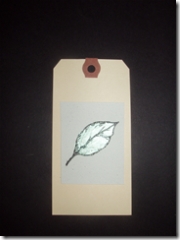
It’s kind of hard to tell in this photo, but the leaf is embossed with black embossing powder and is colored in with a beautiful pearlescent glow (I used green Pearl Ex for the leaf). In a small bowl, I mixed a little bit of Lumiere with enough Pearl Ex until I got the color I wanted. Then I added just a few drops of water to make it easy to paint with. I applied it to the leaf with a small paint brush in small strokes, then set it aside to dry. No fixative required here either – the paint will hold the powder.
I hope my technique class goes well!
Posted by Kathy Torrence on Feb 23, 2007 in
Cards,
Crafts,
Other items,
Scrapbooks This has been some crazy week for me! After I finished putting the floor in, there was this one little piece that was not quite perfect and it was really bugging me. Of course, I can’t leave well enough alone, so I had to try to fix it – and that was when I cut my finger! I should have gotten stitches, I guess (it’s been bleeding now for almost 3 days), but I really don’t have time – here’s why…
First, my daughter Emily and I both have the flu and feel crummy.
And I think I’ve slightly overextended myself as far as stamping events go – in fact, I’ve done so much, I’m going to have to post my samples in at least 3 different posts today.
I have a workshop tonight (someone called last minute and in my sick delirium, I said I’d do it) and another tomorrow afternoon. Then I have a Pearl Ex Technique class on Sunday afternoon and a Stamp-A-Stack on Monday night. Am I crazy!?!?!
But…after focusing on everything today while my poor sick daughter was vegging out by the TV, I am now prepared for all the events.
Oh, and I got an email from one of my friends that several of my cards are in the Spring issue of Take Ten Stamper’s Sampler – but I didn’t get a comp copy and I can’t find it in any of the stores. I called them this morning and they said they had a mistake with my zip code, so they’ll be mailing it out shortly. I’ll post which pages I’m on as soon as I get it.
Meanwhile…I thought I’d first post the projects I’m going to be using at my workshops this weekend. I’m going to do the same projects at both workshops, and my focus is going to be ‘quick and easy’ cards and scrapbooking.
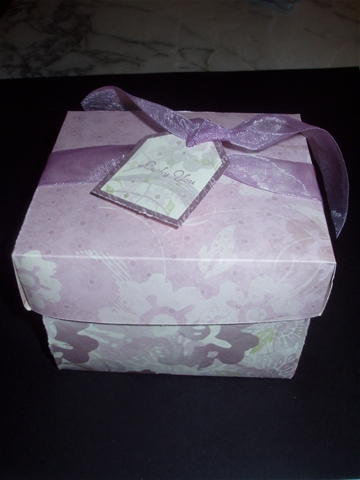
First, here’s a little box I made that I’m going to use as a door prize with an incentive stamp inside:

No adhesive required on this one -just score and fold. I used the GORGEOUS Enchante paper from the SU! Winter Mini – I’m really going to miss it when it’s gone next month!
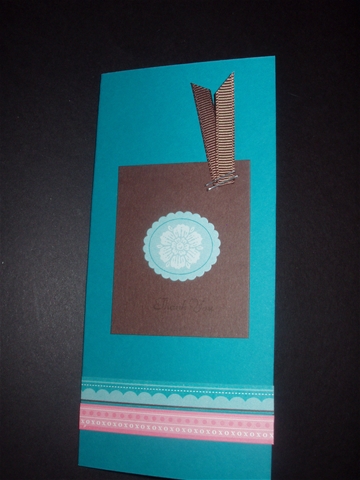
Next, I’m going to show off our Simply Sent kits and show how easy it is to make the completed card for this kit:

I haven’t been selling many of these, and I think they’re a good deal for those who just want to make some quick and easy cards. Plus, this particular one gives me a chance to demo how to use the watercolor crayons.
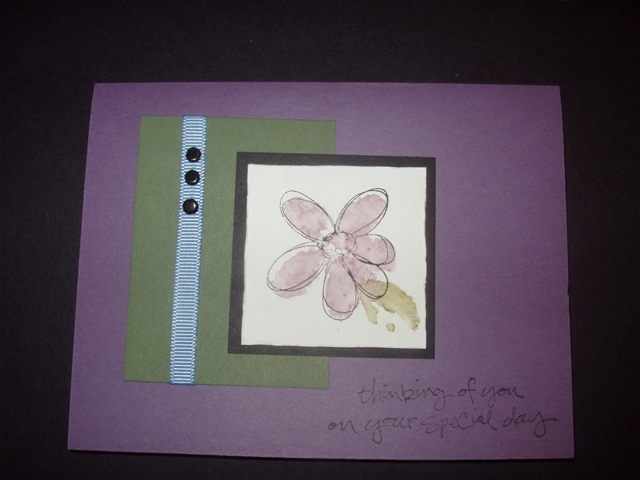
Then, talk about easy, I’m going to make a simple card using the stuff from Accents and Elements:
This card goes together in about 2 minutes and is simple, but pretty. The size of this card is different – 3X6 – perfect for the small open-ended envelope.
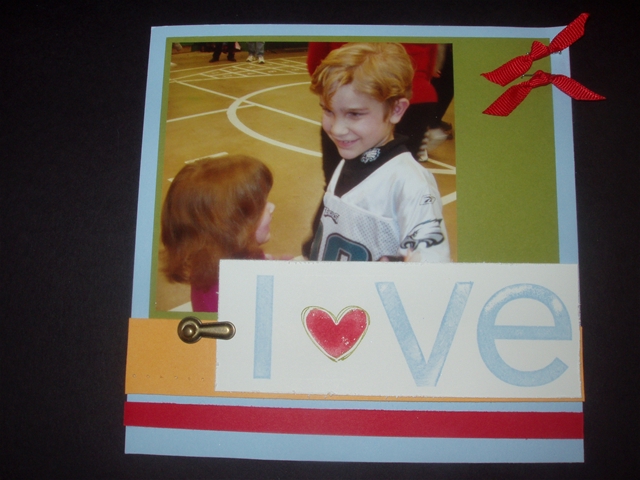
Then for the make-and-takes, we’re going to make a small 6X6 scrapbook page:
Then I’m going to show how to easily convert it to an 8X8 page:
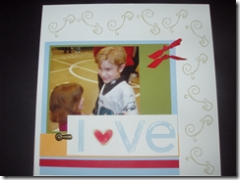
(Those doodles are the steam swirls from Like It a Latte) And then to a 12X12:
Then we’re also going to do beaded pens for a make-and-take:
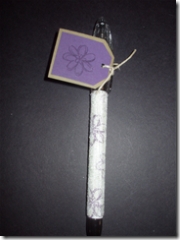
These are so simple and so much fun! You stamp an address label and wrap it around the base of the pen then cover it with double sided tape and roll it into clear microbeads. These ladies have a demo every year and I thought I’d try to do something besides the normal card make-and-takes.
Hopefully, the workshops go well. Now I’m going to post some samples/tutorials for my Pearl Ex Technique class…
Posted by Kathy Torrence on Feb 21, 2007 in
Uncategorized I haven’t posted in a few days because I’ve been up to my neck in my latest home improvement project – putting in a new kitchen floor. Yes, that’s right – I’m handy around the house! 🙂
The ball began rolling when our oven stopped working a few months ago. We made do with the stovetop, microwave and crock pot, but eventually, it had to go.
So Mike pulled it out and we spent the weekend shopping for a new one. Sounds easy enough, right? But it was anything but easy. There are so many different options out there – it was overwhelming!
But back to the floor – our kitchen floor was in pretty bad shape and I have wanted a replacement since we moved into our house 9 years ago. But it just wasn’t in the budget (and still isn’t).
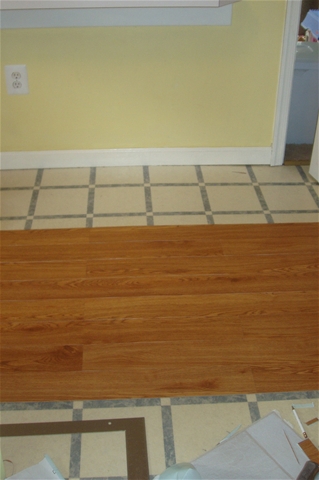
Since the stove was gone, I took the opportunity to convince my husband to try one of those peel-and-stick vinyl floors (a new floor Trading Spaces style). We found one that came in planks and looked a lot like the laminate floors that are so popular right now. And it was only $120 to do the whole floor!
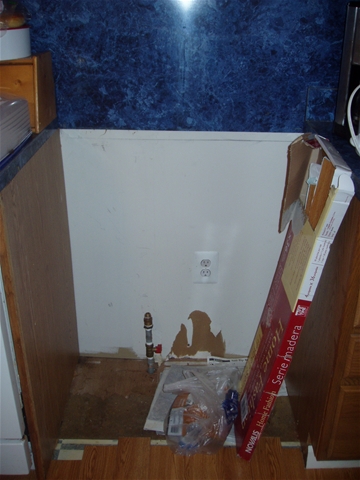
I began to install it yesterday afternoon…here’s an in-progress photo:
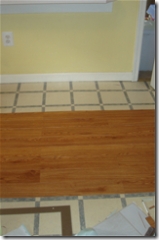
Here’s where my paper crafting skills came in handy – the pieces all have to be cut to fit around the cabinets, walls and such. My experience as a crafter has taught me how to cut things in awkward places to get paper or other coverings to fit, and it basically worked the same way on the floor. I marked the pieces with a pencil and cut away the excess with a utility knife. I was working on the floor until 11:30 last night and just finished it up this morning.
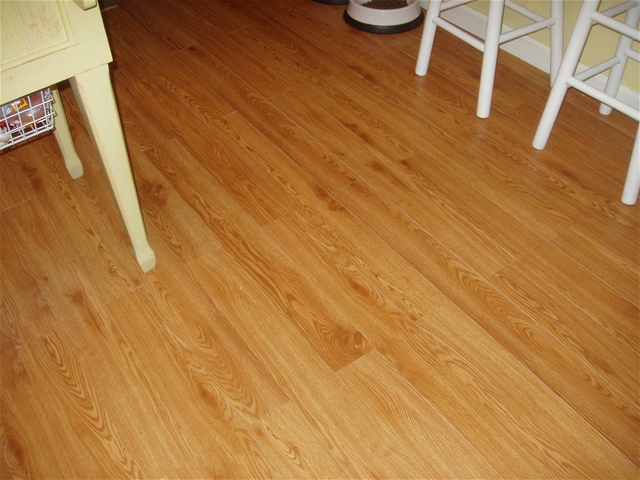
Here’s the finished floor:
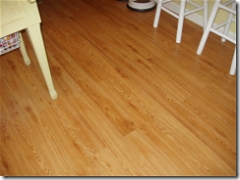
I think I did a pretty good job if I do say so myself!
Of course, there is still this mess:
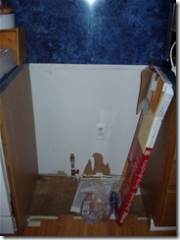
Sometime next week, I hope there will be a new stove in that very spot…
Posted by Kathy Torrence on Feb 19, 2007 in
Crafts,
Scrapbooks Yesterday we had another crop with our Scrapbooking Ministry and it went very well! Everyone loved the keychain class that I taught (see my previous post for instructions). I realized yesterday morning that I was a little short on laminate chips, so I made quick trip to my local hardware store and stocked up…I just pretended that I REALLY couldn’t decide on a countertop color…
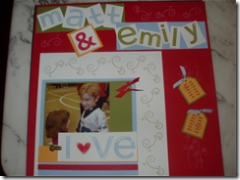
While I was at the crop, I worked on a project for my daughter’s preschool teachers. Last weekend they held a spaghetti dinner fundraiser that was so much fun! They had a DJ playing songs the kids could dance to. I was one of the few people there with a camera, so I snapped a few photos and thought I’d make up a little book as a ‘thank you’ gift for the school.
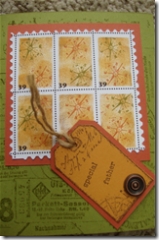
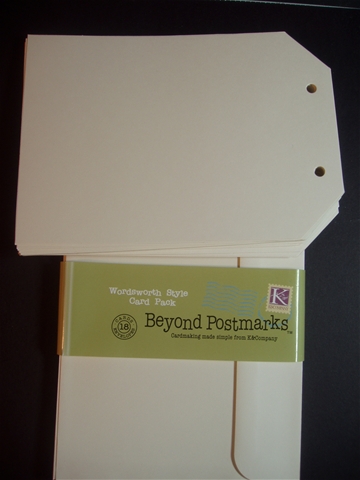
I started with some cards by K & Company that I found at Michaels:
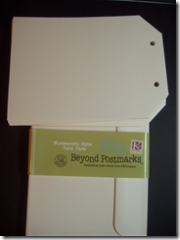
I thought these cards would make a perfect little tag scrapbook. I also bought some adorable DaisyDs paper while I was at the scrapbook retreat in Cape May – the paper has a vintage school-days theme. So I covered the some pages with the patterned paper and some with some cardstock – then I added the photos and just a few embellishments (I kept this project VERY simple):
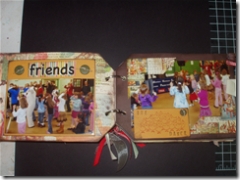
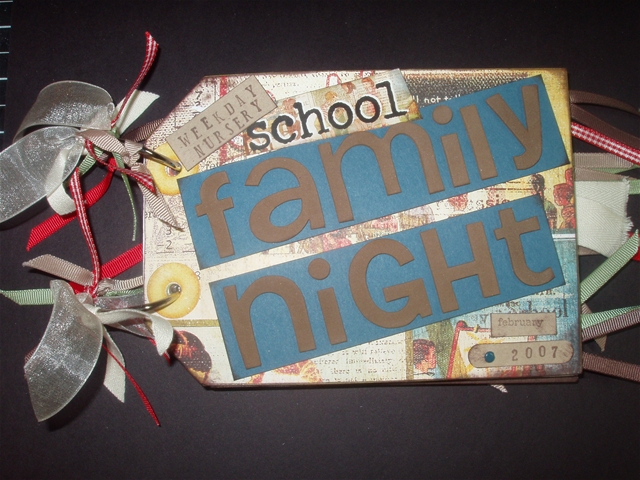
I bound the book together with some split rings that I picked up at an office supply store. Here’s the front cover:
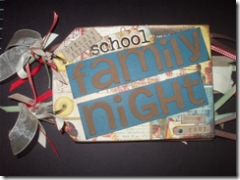
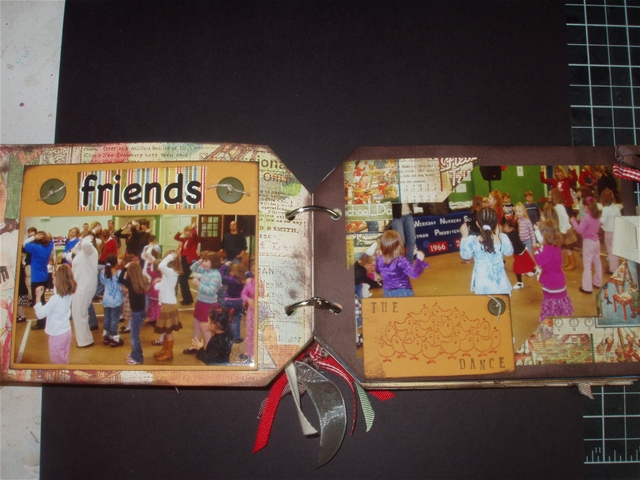
The title letters are some really cute foam sticker letters that I bought during my QVC shopping binge last week. Here’s another photo from an inside page (the book is actually made of just 3 of the tag cards – 6 pages w/2 sides for a total of 12 individual pages all together).
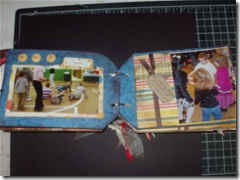
That is actually the middle of the book – you can both sides of this card. These are the only two pages with the same paper facing each other.
What I liked about this project is that I could stop anytime I wanted to – I just added pages (and could even go back and add more) until I felt like I was finished.
I hope the teachers like it! 🙂
Today, Mike and I went shopping for a replacement stove – ours stopped working right before Christmas. We went to SO many stores and looked at SO many ovens – after a while, we were so overwhelmed that we just went home and decided to look online so that we could compare the different models and features side-by-side. We did finally order one – hopefully it will be here soon.
We also picked up a new floor for our kitchen – ours is in such bad shape and we really can’t afford a nice replacement right now, so we decided to go the ‘Trading Spaces’ route and try one of those peel-and-stick floors. We found one that actually comes in planks and looks a lot like a laminate floor, so we bought that up today too. Me and my ‘Type-A’ personality wants to start installing it tonight, but Mike is trying to convince me not to put it down right now…it’s killing me to see the boxes just sitting there…they’re calling out to me….we’ll see if I can hold out until later this week…
Posted by Kathy Torrence on Feb 17, 2007 in
Uncategorized This has been such an eventful week…I’m looking forward to a (hopefully) quiet week next week!
My husband Mike was in a car accident on Thursday on his way home from work. He wasn’t hurt…but I can’t say the same for the car – it had to be towed away from the scene. And his accident was 40 minutes from here in the middle of nowhere, so picking him up and getting the car back has been a real hassle. But I’m just glad he’s okay.
And last week, my good friend Fran’s son was hurt while away on a church retreat. He fractured his skull and suffered a concussion, and at the time, the doctors though he might need surgery. He’s home now, but we were all so worried for him.
And…Mike and I finally pulled out our stove to see why it wasn’t working…turns out some mice had made it their home underneath and had ruined the wiring. So we’ll be shopping for a new stove today – at last!
With all the bad weather last week, many events were canceled including my new Bible study, my daughter’s dance class, choir, preschool and even Mike’s bowling! So Emily’s Valentine party won’t be held until next week (so our family had to eat all the cupcakes – darn!) and I still have party stuff everywhere!
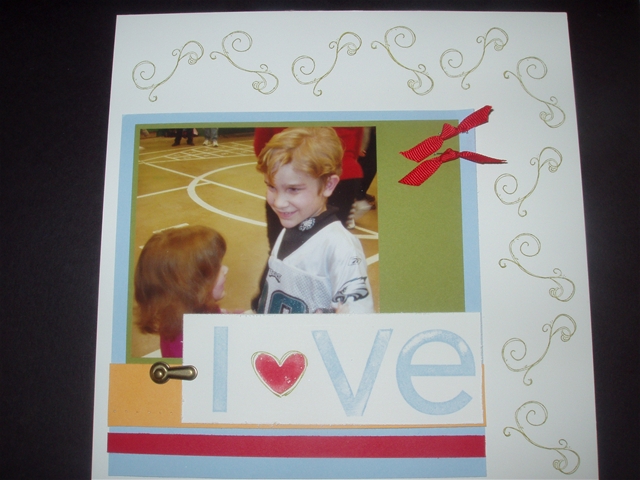
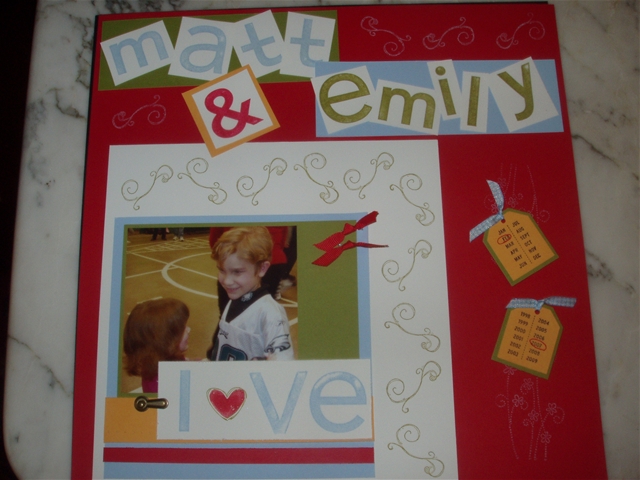
On a positive note, I held my son Matt’s second grade Valentine party on Thursday and they LOVED the crafts (see my previous post) – especially the little ‘gum guys’ – that was a real hit with the kids! But of course, I had to think on my crafty-feet – I walked in and the kids had already made their Valentine bags with the teacher, so I had to scrap that idea and go with plan B.
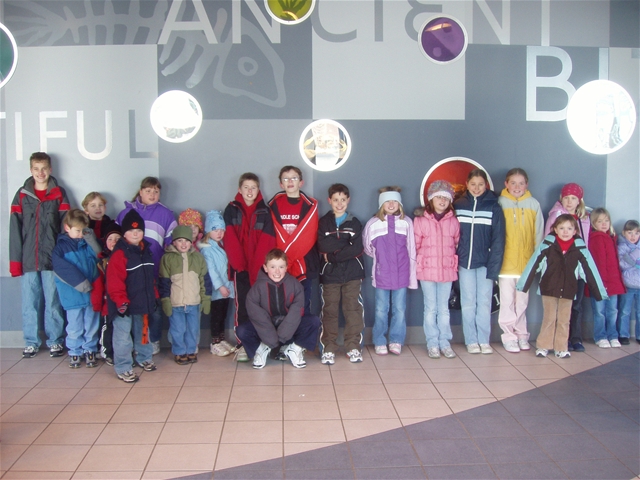
Yesterday was a fun day as well – my friends and I took our kids to the Adventure Aquarium in Camden – we had a ball! Did I mention there were over 30 of us?!?! Here’s a photo of all the kids:
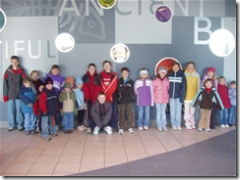
Actually, now that I look at that photo, there were even a few kids missing from that picture! It was quite a challenge to keep track of everyone, but we managed not to lose any kids, so it was a successful trip!
After the aquarium, we took the new RiverLine train that departs from Camden and goes all the way to Trenton. The kids just wanted to ride a train – we didn’t plan on getting off anywhere.
There were SO many of us on the train, we were a bit…let’s say ‘intimidating’. There were a few unsavory characters that got on the train along the way (including one man who smelled like a liquor store and was riding a bike with a garbage bag as a seat) and the funny thing was – THEY were afraid of US! I’ve never felt so safe on a train ride – there really is safety in numbers (especially when you’re talking about more than 20 kids in a small space!).
Today is our Scrapbooking Ministry Crop at my church. I think I’m going to work on a little scrapbook for my daughter’s preschool teachers. They held a fundraiser last weekend that was LOTS of fun and I took a bunch of photos. I’ll post some pictures after I finish putting it together today…
Posted by Kathy Torrence on Feb 15, 2007 in
Cards My husband was so sweet for Valentine’s Day – he sent me a dozen roses and made me a card.
Here’s the card he made himself:
Okay – well…I helped him design it. 🙂
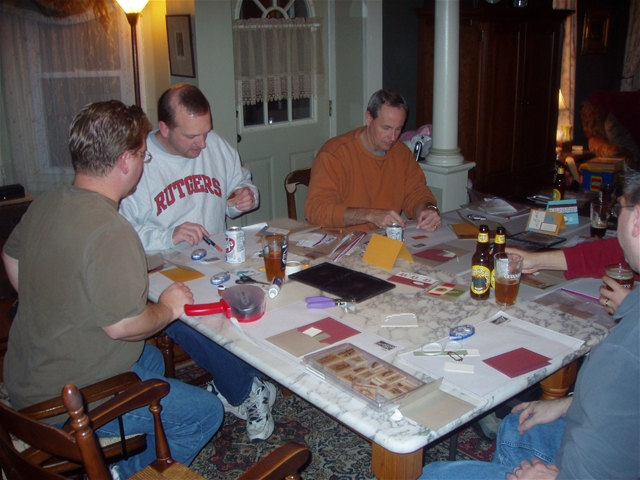
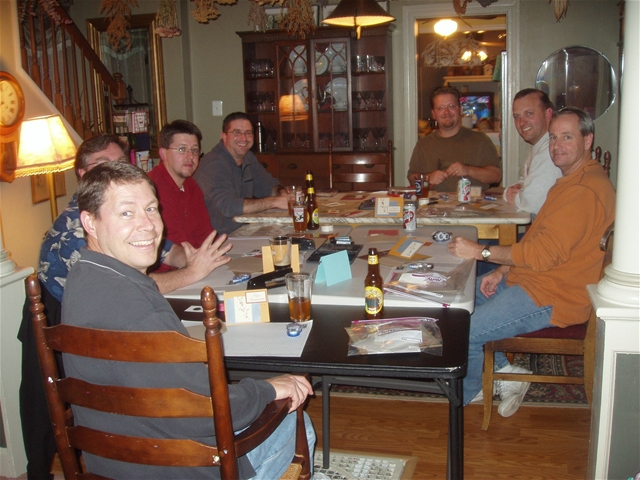
Back in December, I held a Men’s Night Out class where the guys came and made cards for their wives/girlfriends for the whole year. We made a card for Valentine’s Day, birthday, Mother’s Day, anniversary and an ‘I Love You’ type card that can also work to get the men out of the doghouse.
I had 9 guys show up and they really seemed to enjoy it. We had the football game on in the background and my husband served manly food like pork and sauerkraut, beer and cigars.
I kept the card designs really simple and used lots of tools like punches, staples and the heat gun.
Here are some photos I took during the class:
And I’m sure the men are enjoying it even more now since they don’t have to go to the Hallmark store and they’re also earning lots of brownie points for making the cards themselves.
This was the first card I received from that batch – didn’t he do well?
Posted by Kathy Torrence on Feb 15, 2007 in
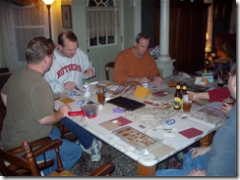
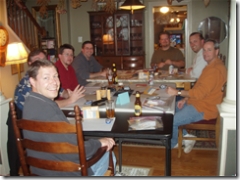
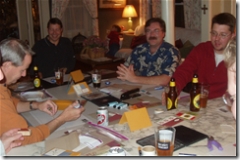
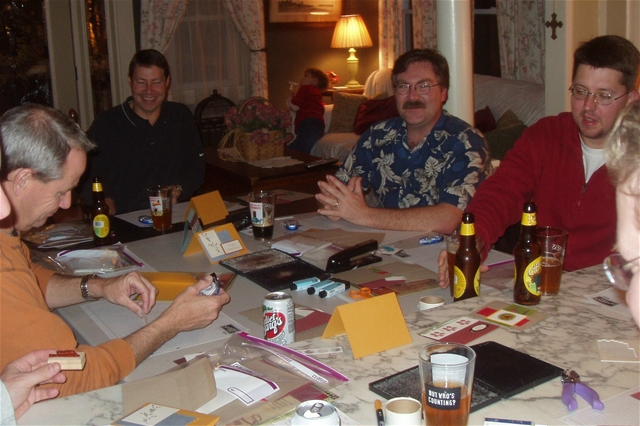
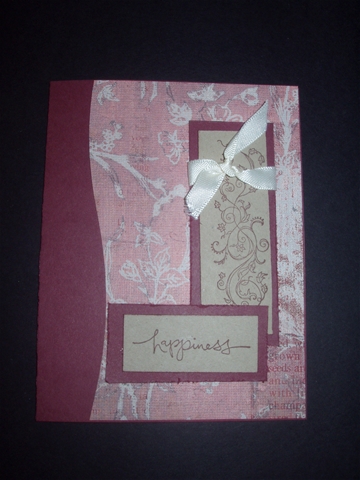
Cards Even though the weather was frightful yesterday, my committed stamp club members trudged their way to my house last night for a shoebox card swap. It was so much fun and I’m so proud of the cards everyone did!
I thought I’d show off their work today:
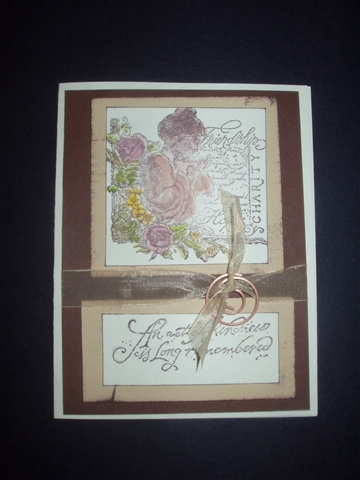
This card is by Cheryl Lacke:

I love the vintage effect of Cheryl’s card and the great idea of tying the ribbon through the circle clip – great job, Cheryl!
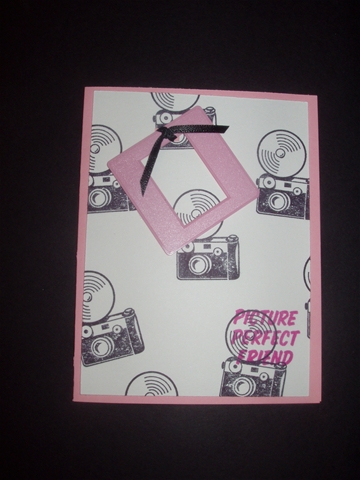
This one is by Fran Brennan:
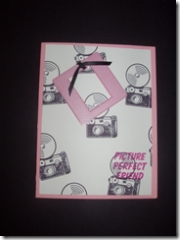
I really like that Fran’s card was simple but clever. I also adore the way that she used the slide mount together with the camera stamps – fun card, Fran!
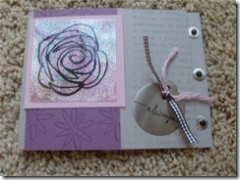
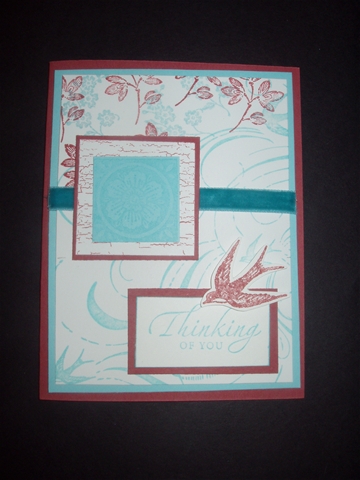
This card is by Marie Skinner:
Marie’s was by far the most complicated of all the cards, but the effect is beautiful! I must admit, I made a few mistakes that varied my card from her original design. She used white craft ink for the flower square and I accidentally used Cool Caribbean instead. And I also reversed the color of the two flower stamps in the background – hers looked much better than my attempt! Beautiful card, Marie!
This one is by Christen Iannucci:
Everyone just fell in love with Chris’s choice of patterned paper! And I love the curved, cut edge of the piece as well as the lovely swirl stamp she used as the main image. Great job, Chris!
This card is by Denise Mennella:
Denise’s card is simple and classic – I love it! She used origami paper behind vellum for a nice effect. I also made a mistake assembling this card (I’m the WORST at copying cards from other people!). Her floral and vellum piece was actually in the upper left corner and her sentiment was in the lower right. But since I smeared my sentiment after stamping it…I had to do a little variation. But since it was such a wonderful design, I think it worked out okay. Great card, Denise! (By the way – there’s a link to the right of my blog for Denise’s blog if you’d like to see more of her work)
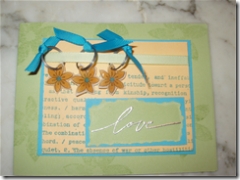
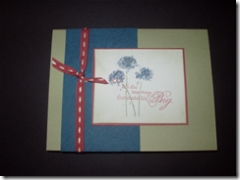
This card is by Jennifer Coles:
Jennifer is one of my downline demonstrators and I think she did a fabulous job with this card! She managed to use all of the In Color colors together in a beautiful, harmonious way. And I love the way she layered the flowers on top of each other for a nice 3D effect! Great job, Jennifer!
And here’s the card designed by Angie Chadwell:
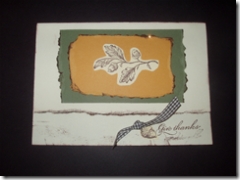
Angie stepped outside of the box a little bit and created a card that was a different size from all the rest. I love the torn and inked edges and the little acorn at the bottom. Again, I messed up her original design when I tried to get just “Give Thanks” from the stamp with the ink pad. So I improvised and added a lot more inking to the bottom to help the other words blend in. Wonderful card, Angie!
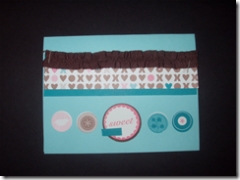
And this was the card that I used for the swap:
I can’t take too much credit for this design – I pretty much CASEd it from a swap I received at Stampin’ Up! Leadership. The original design was from Kathy Hilden from Shelby Twp, Michigan and was absolutely beautiful! I modified the design to make it a bit simpler for the time constraints of a shoebox swap. So I should really say “Great job!” to Kathy Hilden – thanks for the pretty card idea!
We all had such a great time and loved the opportunity to work with stamp sets we don’t normally use, to create card styles different from our own and to go home with a bag of beautiful cards designed by our very best friends!
And…now for the most embarrassing moment of the evening…
I love to pick up furniture at yard sales (as my friends well know) – and I like to use mis-matched chairs in my dining room. I purchased a set of two wooden chairs with needlepoint cushions a few years ago for just $1 each and I used them regularly.
One of the chairs fell apart and a few weeks ago, my husband and I ‘repaired’ it with some wood glue and small nails.
Wouldn’t you know I was sitting on that very chair last night, working on my very ast swap when the chair completely collapsed underneath me and I fell to the floor in a heap! I was so embarrassed! But, in true stampaholic form, I managed to save my card from ruin and calmly put the cap back on the blender pen I was using before I picked myself up from the floor. Sigh…at least everyone had a good laugh, even if it was at my expense… 🙂
Posted by Kathy Torrence on Feb 14, 2007 in
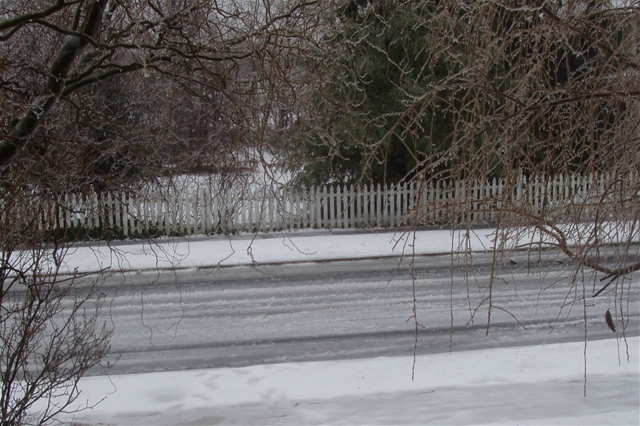
Uncategorized I woke up this morning to this scene in my front yard:
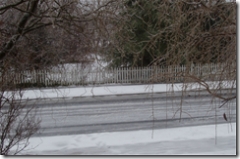
It looks lovely enough, until you realize that the white stuff is a thin layer of snow covered by a VERY thick layer of ice! If you look carefully, you’ll see that the branches of the trees are all covered with ice – pretty to look at, but dangerous to drive in.
So the kids all have the day off from school today (and I went back to bed under my nice, warm electric blanket!). Which means that both Valentine parties are re-scheduled for tomorrow.
It looks like a day off for me too – and I think I might actually get a chance to play in my craft room later today… 🙂


