Photo Keychain
Good morning! Just thought I’d post a quick and simple gift idea that came to me last night as I was in a panic over which project to offer at our Scrapbooking Ministry this month.
I took a few laminate chips (free from home improvement stores – they are samples of countertop finishes):

Then covered them with patterned paper:

In this case, I didn’t use ModPodge – I was in a real hurry (this project took a total of about 10 minutes start-to-finish), so I just used my ATG gun to adhere the chips directly to the paper, then trimmed around them with scissors (as you can see from this photo, I still had a little more trimming to do on these).
Next, I took my kids’ photos from school and used a square punch to just punch out their faces. I adhere the photos and a little strip of paper to the bottom of the chips, then inked the edges.
I used my Xyron with the double-laminating cartridge to laminate them for durability, then punch holes and put them on a split ring. I added a little ribbon and voila! A cute little gift item in 10 minutes or less:
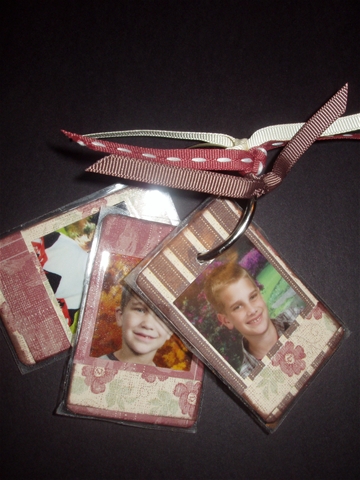
I kept this project VERY simple, but you could embellish them as much as you’d like. These are photos of my three children – I also stamped their monogram initials on the back of each chip.
I’m calling this project “People We Love Keychain” – our Scrapbooking Ministry’s theme for February is ‘love’ and I think this will fit in nicely as a quick, inexpensive project!
[…] and it went very well! Everyone loved the keychain class that I taught (see my previous post for instructions). I realized yesterday morning that I was a little short on laminate chips, […]