Posted by Kathy Torrence on Nov 5, 2007 in
Cards,
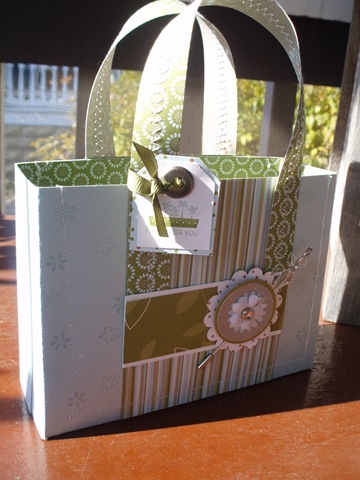
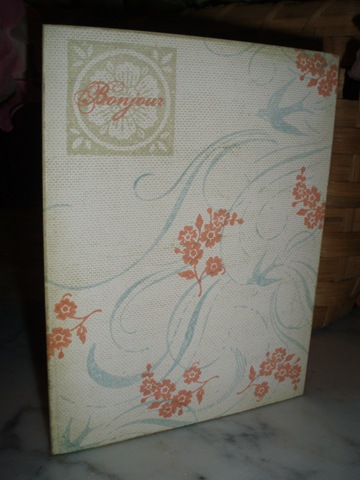
Crafts Let’s just say that I was having more than a few blonde moments this morning. I went to check the challenge board on SplitCoastStampers this morning and saw the Shopping Tote challenge at the top of the board.
I assumed that was the challenge for today, and worked for quite a while to complete my Shopping Tote project:
I lined the inside of the tote, stamped the outside and even used my sewing machine to stitch around the edges and on the handles. I added a stick pin and flower from the Pretties Kit and included a little tag on the handle, too.
When I went to post to the message board, I saw that the tote was NOT the challenge for today – someone had just posted to the tote challenge which moved it up to the top of the list!
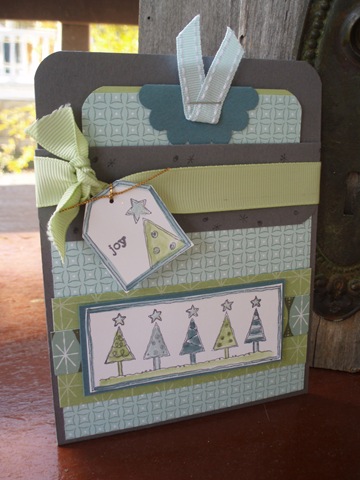
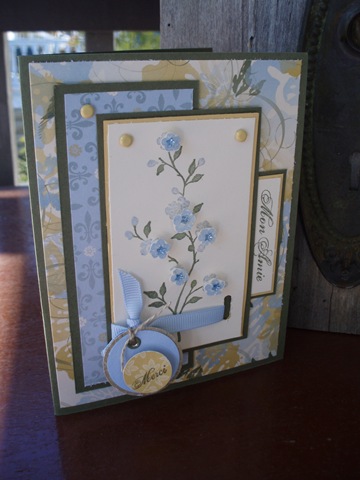
So…I decided to do the actual challenge for today – a pocket card. So I made this:
I used the Wintergreen designer paper for color inspiration and watercolored the images using ink and a blender pen. I also used a scallop punch for the pull-tab on the card inside and thought I was happy with this design…until I went to post it and saw that the challenge was for a HORIZONTAL pocket card, not a vertical one.
Sigh…after that, I decided to give up on this challenge for today…
Posted by Kathy Torrence on Nov 5, 2007 in
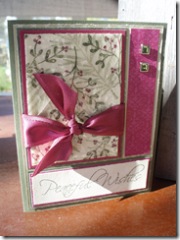
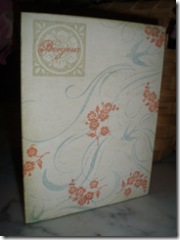
Cards For Sunday’s Featured Stamper challenge, we were to take a card from the gallery of SplitCoastersStampers member “jpmayo” and CASE it into a card of our own.
I chose this beautiful card of hers:

And used it as inspiration to make this card of my own:
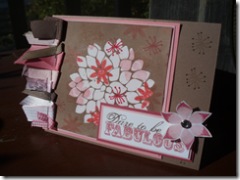
I just loved how she used the large flower in the Fabulous Flowers stamp set to reveal the colors beneath! I changed the color palette to pinks and browns and found all this great ribbon that I thought really fit the phrase “dare to be fabulous”. I added a little bling on the letters and in the center of the cut flower as well.
This technique is called “emerging colors” – it’s very simple to do.
-
First, take a sheet of white or vanilla cardstock and stamp your design – in this case, several flowers in different shades of pink.
-
Then stamp your large image right on top of your design using VersaMark ink.
-
Heat emboss the large flower using clear embossing powder.
-
Next, sponge or brayer the darker ink (Close to Cocoa in my sample) over the entire white/vanilla stamped sheet.
-
Wipe the ink from the embossed flower -the clear embossing powder will resist the dark ink revealing the stamped images beneath.
Posted by Kathy Torrence on Nov 5, 2007 in
Cards After going away for the weekend, I got behind on my SplitCoastStampers challenges – I really missed doing them. So I tried to catch up today…
These cards are for Saturday’s Inspiration Challenge. For the challenge, we were to take a person who inspires us and make a card to reflect that person’s style.
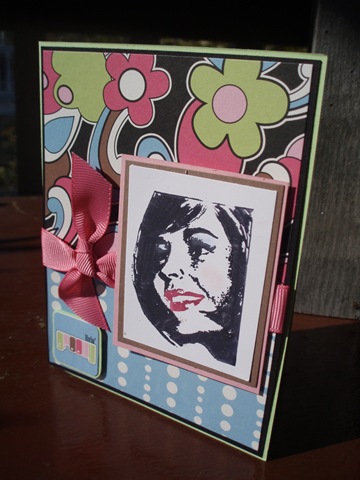
First, I made a card inspired by my friend Denise. When she scrapbooks, she tends to use very retro patterned paper and embellishments – very reminiscent of the sixties. I saw the SEI line of paper called, “Hippie Chick” and I couldn’t help but think of her! I also had this great stamp with an image of a woman with a very retro hair cut. I thought I’d put the two together and here is the result:
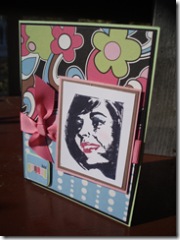
Pretty groovy, don’t ya’ think? I also gave the woman some pink lips with a marker and blue eyeshadow with some pastels. The sticker in the lower left corner says, “Feelin’ Groovy”- I layered it on some cardstock and popped it up with a Stampin’ Dimensional. Fun, fun!
Next, I made a card inspired by my friend Marie (I’d link you to her blog, but she doesn’t have one!). Marie was trying to use a particular non-Stampin’ Up! stamp the other night at a crop and was getting very frustrated – I can see why! It took me 12 attempts to get it to stamp a decent image (see – this is why I love Stampin’ Up! stamps so much!).
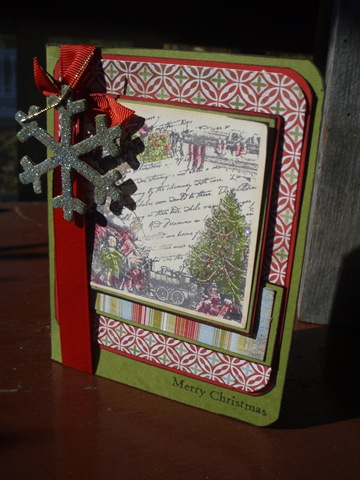
Anyway, Marie loves to use layers and sparkles – and also inks the edges of all the pieces she uses on a card. So, Marie, here’s my card inspired by you:

I chalked the stamped images and used some of Basic Grey’s Blitzen paper line for the background. I also took a chipboard snowflake and covered it with heat-and-stick powder then added lots of Dazzling Diamonds for some major bling! I also inked lots of the edges and stamped a simple sentiment on the lower right corner.
Thanks to you ladies for the inspiration – hope you like the cards!
Posted by Kathy Torrence on Nov 1, 2007 in
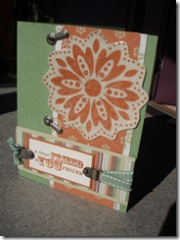
Cards Today’s challenge on SplitCoastStampers was to use chalk inks on a project. Now, I have to admit – I wasn’t sure if I even had chalk inks in my stash!. So I searched through my supplies and found a brand new set of chalk inks still in the wrapper! I bought them in the Earth Elements palette back when Stampin’ Up! used to carry chalk inks and never even used them – how sad is that?
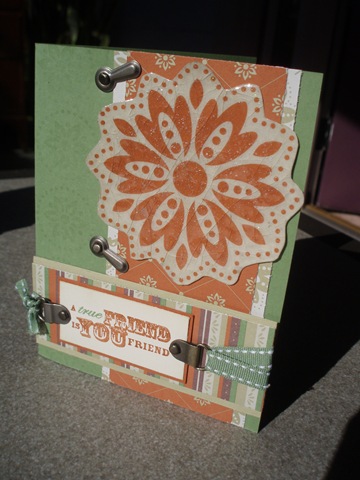
So after blowing off the dust and breaking the seal, I made this card:
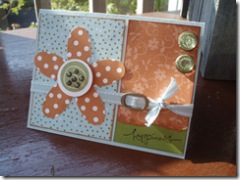
I used the Pick-A-Petal stamp set and stamped the petals on white cardstock with the rust chalk ink and punched them out with a large oval punch. Chalk ink is like a hybrid between dye ink and pigment ink with a nice, soft chalky effect after it dries. So pretty! I also used the olive green chalk ink for the flower center and punched it out with a circle punch.
I used a piece of Soft Sky for the card base and added pieces of SU!’s Fall Flowers Designer Series paper. I inked the edges of the patterned paper for an even softer look. The brads in the upper right corner are Build-A-Brads – I punched little circles from the patterned paper to make these. I also added some random brads in the flower center to mimic the flower centers on the patterned paper.
I’m really happy with how this card turned out – glad I broke out the chalk inks!
Posted by Kathy Torrence on Oct 31, 2007 in
Cards I did two SplitCoastStampers challenges today – it’s been a busy morning!
The first was a card sketch challenge – here’s the sketch we were to follow:

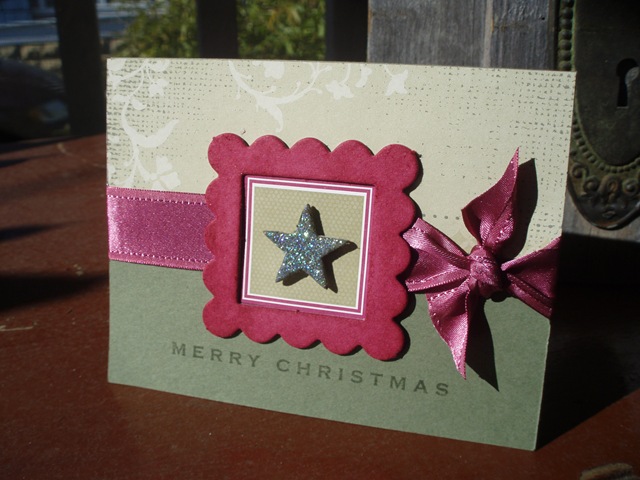
And here’s my card based on the sketch:
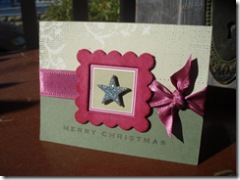
I used an Always Artichoke cardstock base and added a strip of Holiday Harmony paper at the top. I wrapped the center seam with a piece of satin ribbon (LOVE, LOVE, LOVE that satin ribbon!!!!) and then put a self-adhesive die-cut from the Hand Selected Accents and Elements tin in the center.
I took a chipboard scallop-edged frame piece from one of the On Board sets and sponged it with Purely Pomegranate ink, then placed it over the die-cut.
I took a star from another On Board chipboard set and inked it with Versamark then applied Heat and Stick Powder. I heated it and applied Dazzling Diamonds glitter, then set it in the center of the scallop frame with a pop-up glue dot.
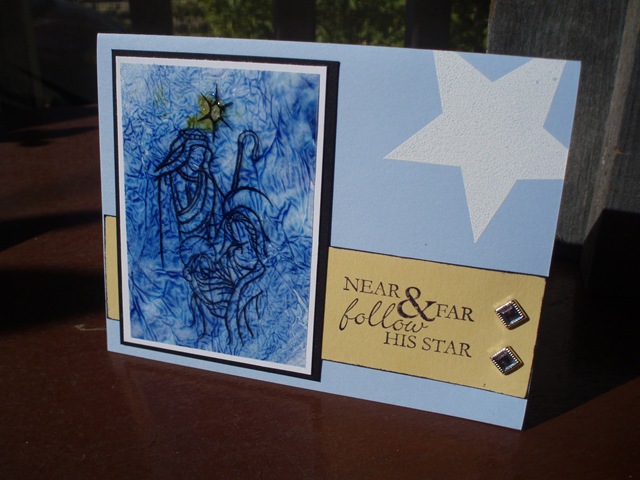
The other challenge was a demonstrator challenge to use the acetate-and-tissue technique on a card. There’s a great tutorial for this technique on SplitCoastStampers. Here’s my card using the acetate and tissue technique:

I did another one as well, but the ink turned out a shade or two too dark under the acetate:
I love this technique and have many other samples that I’ve shared in previous blog posts.
I know I’ve been showing lots of Christmas cards lately, but let me remind you that today is actually only Halloween. Have a great one!
Posted by Kathy Torrence on Oct 30, 2007 in
Cards Today’s SplitCoastStamper challenge was to use Real Red, So Saffron and Tempting Turquoise on a card. Sounds like an odd color combination, but it’s one I really like and have used before.
Here’s my card for the challenge:
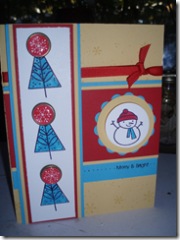
I used the Merry and Bright Stampin’ Up! stamp set – the snowflakes are stamped on the background, the trees are on the left side and the snowman is in the circle. The trees and snowman are colored with markers (I wanted this card to have a very bright look).
I received the new Build-A-Brad kit from Stampin’ Up! yesterday and wanted to try it out. I stamped the snowflakes from Snow Flurries on white cardstock and punched them out with a 1/2 inch circle punch. Then I adhered them to the tops of the brads and inserted the clear pebbles on top – really cool! I used three of them as the tree toppers on this card.
I punched out the snowman with a 1 1/4 inch circle punch then went to layer it with my 1 3/8 circle punch…but I realized that I had lent it out. So…I improvised and used my Coluzzle to cut a larger circle then layered it onto a scallop punch.
Fun challenge!
Posted by Kathy Torrence on Oct 29, 2007 in
Cards Today’s SplitCoastStampers technique challenge was to make a cracked glass effect using clear embossing powder. This is a fun one to play with!
To do this technique, take your image and ink the entire piece with Versamark ink. Then coat it and heat emboss with three or more layers of clear embossing powder (the thicker powder works better), re-inking it between layers with Versamark if necessary for the powder to stick.
After the piece cools, bend it slightly to achieve the cracked effect. You can rub a light ink into the cracks to intensify the effect if you’d like.
Here are two cards that I just made using this technique:
This technique is addictive – make sure you have LOTS of clear embossing powder and lots of time on your hands before you try! 🙂
Posted by Kathy Torrence on Oct 29, 2007 in
Cards Sounds like an impossible challenge, but I gave it a try! This week’s demonstrator challenge on SplitCoastStampers was to create a card using only stamps, paper and ink – no layers and NO embellishments! That’s a REAL challenge!
Here’s my attempt:
My card base is Very Vanilla cardstock. I used Stampin’ Up!’s French Flair background stamp in Soft Sky, then added some flowers and a sentiment all from the Carte Postale stamp set stamped in Groovy Guava. I then overstamped the whole card with the Linen background stamp in River Rock and sponged around the edges for a vintage look.
It didn’t turn out too bad – and this is a quick, super-easy card to stamp, too!
Posted by Kathy Torrence on Oct 28, 2007 in
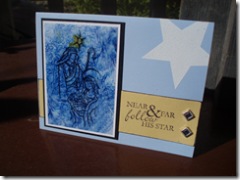
Cards Today’s SplitCoastStampers challenge offers us a beautiful gallery from a talented stamper and challenges us to take one of her creations and CASE it to make one of our own.
The featured stamper this week is Nitestamper and here’s her gallery on SCS. Isn’t her work gorgeous?!?! It was so hard to decide which lovely work to choose…but after much debate, I decided to start with this card for inspiration.
And here’s my CASEd version:
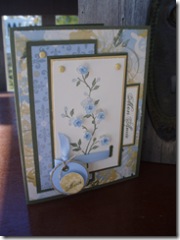
When CASEing her card, I kept the same basic layout and placed my embellishments the same way – it’s so easy to create a pretty card when you start with such a wonderful one!
I then changed the colors from pink and brown to blue, saffron and artichoke and used the Le Jardin series as my patterned paper. I also changed the stamp set to the Garden Silhouettes Stampin’ Up! hostess set and used my markers to color in the flowers and stems. I also stamped the flowers again and cut some out, popping them up with dimensionals and adding a few little sparkle stickers for a little bling.
Thanks, Nitestamper, for the inspiration!
Posted by Kathy Torrence on Oct 26, 2007 in
Cards I had another idea for today’s number-only card challenge. Here’s my card:
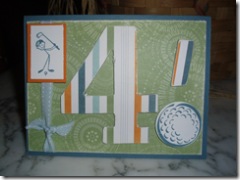
I thought this might be cute for a masculine birthday. I covered a chipboard number with patterned paper and popped up the golf ball with some dimensionals.
And today, I got the supplies for a new extension of my hobby – soldering! I want to try my hand at making some small pieces of jewelry using some of the ephemera I’ve collected from yard sales. Wish me luck!