Posted by Kathy Torrence on Nov 23, 2007 in
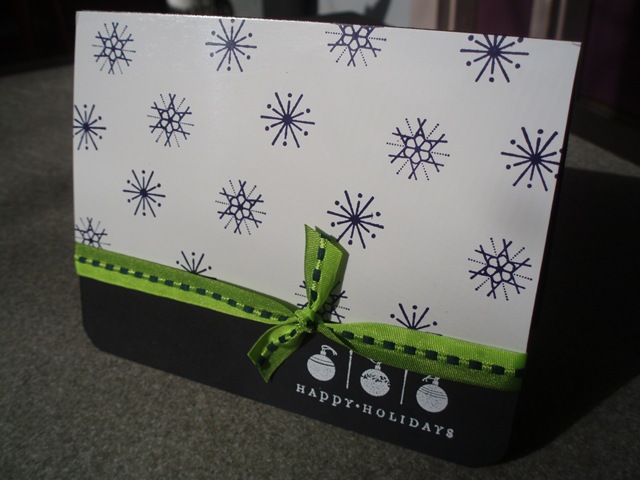
Cards Today’s SCS Limited Supply challenge asked us to create cards using snowflake images and mainly neutral colors (black, white, sand, etc) with just a little pop of color.
I did two cards:

The snowflakes are stamped onto glossy white cardstock and the sentiment is embossed on this card.
And:
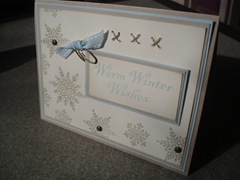
I think I bent the rules with this card by using Hodgepodge Hardware, ribbon AND linen thread, but I tried…really! 🙂
Other than the cards, I’ve also been trolling eBay looking for some unique beads for my jewelry – bidding on auctions is addictive! But I spent only about $20 and got over 20 different kinds of beads – none were over $1! Unless you include shipping…but the prices were still really good.
I’m off to try to find all of my Christmas decorations in my mess of an attic – send out a search party if I don’t post in the next few days!
Posted by Kathy Torrence on Nov 22, 2007 in
Cards The wonderful gals at SplitCoastStampers still managed to post a “Ways to Use It” challenge today even though it’s a holiday – so of course, I HAD to take a few moments out of my holiday preparations to do a little stamping!
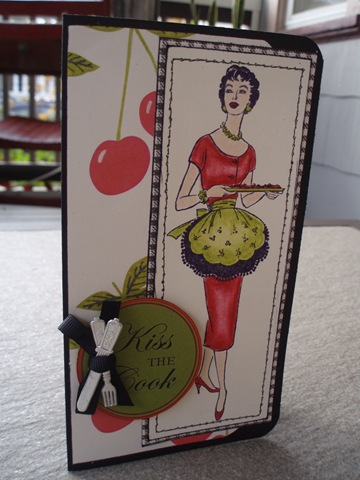
The challenge was to use stitching on a card – real, or in my case, faux. I just received the newest kit from Paula’s Kit Club and absolutely love the kitschy 1950’s feel of the kit – especially the large woman stamp!
I used the stamp and colored in the image with Prisma colored pencils. I also used the cherry patterned paper, the black gingham paper and added some faux black stitching around the stamped image (I poked the holes with the paper piercer and then drew in the stitches).
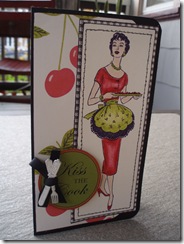
I added a “Kiss the Cook” rub-on, adhering it to Old Olive cardstock. I tied on a little silver fork and knife with a black ribbon and adhered the whole thing to the card with pop-dots.
All of these elements came from the kit (except for the cardstock) – I just love Paula’s kits!
I think this is a great card for Thanksgiving – be sure to kiss your cook today!
Posted by Kathy Torrence on Nov 21, 2007 in
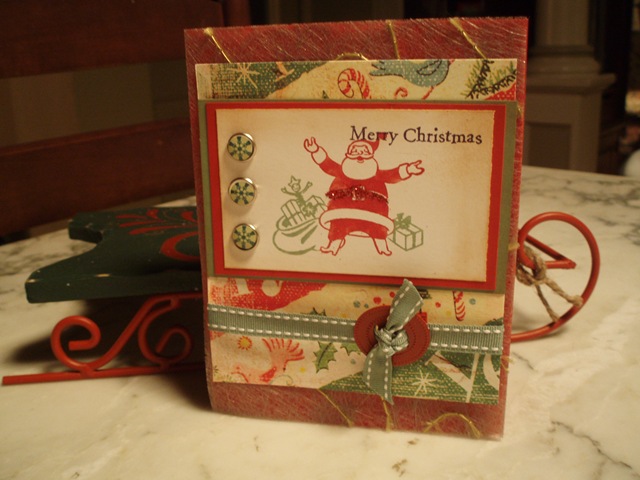
Cards Here was the card sketch from today’s challenge:

And here was my take on it:
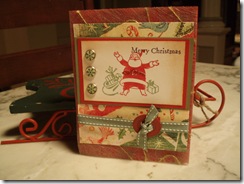
I used some stamps and embellishments from Paula’s Kit Club’s Christmas kit – I love the 1950’s vintage feel of the paper and stamps. I sponged some Creamy Caramel around the stamped image to age it a bit and used Real Red and Wild Wasabi for my colors as the nearly perfect match to the colors in the Daisy D’s Christmas paper.
Thanks for looking!
Posted by Kathy Torrence on Nov 20, 2007 in
Cards,
Crafts I’m a little short on time this week, so I missed this weekend’s SplitCoastStampers challenges.
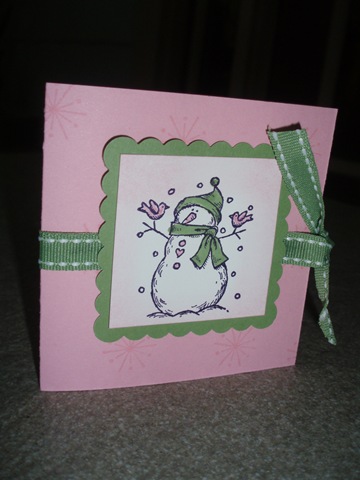
But I did two challenges in one this morning – I combined the technique challenge (tea bag holder) with the color challenge (Pretty in Pink and Wild Wasabi).
I dusted off an older stamp set – Holiday Tag Time and combined it with Snow Flurries for this simple little card:

A single tea bag fits into the slot on the right side of the card.
Cute and easy, right?
Posted by Kathy Torrence on Nov 19, 2007 in
Cards,
Crafts,
Other items I haven’t posted for a while, but I’ve certainly been busy! I’ll do a few posts to catch you up on my latest projects…
I’ve been trying to keep up with all of the SplitCoastStampers challenges this week – I just haven’t had time to post the cards. So here they are…
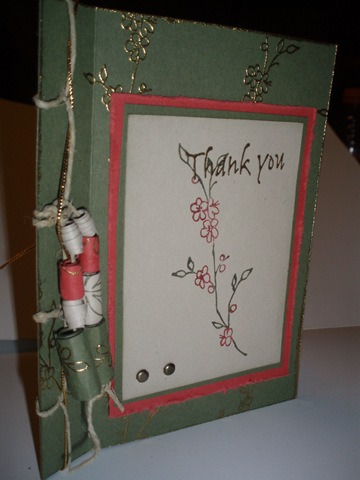
First, last week’s technique challenge was to use “Japanese stab binding” on a card. Here is my sample:
Once you get the hang of it, this is an easy technique, but I have to admit – it took me quite a few tries to finish the binding! I used hemp twine for the binding and then decided to dangle a few beads from the twine to keep with the Asian feel of the card.
Of course, these are no ordinary beads – they are made of rolled paper! I took some small strips of cardstock (1X5 inches for the largest bead) and stamped them or inked them, depending on the look I was going for. Some papers were also stamped and embossed with gold embossing powder. Then I conditioned them between my thumb and forefinger to make them easy to roll. I applied glue to the backs of the paper strips (bookbinding glue from www.ClubScrap.com) and then rolled the strips around a thin wooden dowel to form the bead. It’s amazing – after they dry, they harden so much that it’s impossible to tell that they are even made from paper!
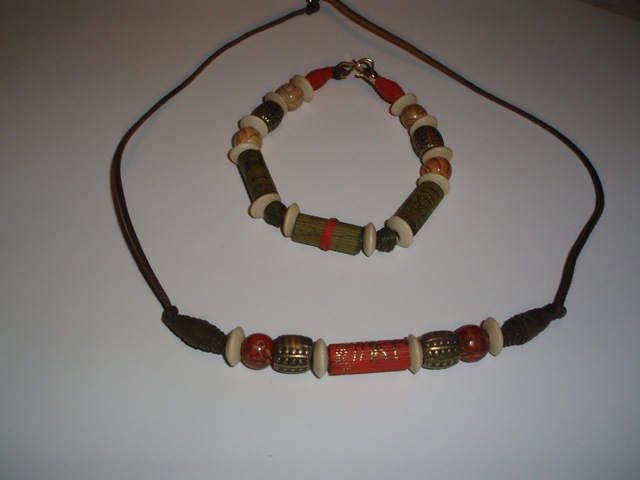
I got this idea from ClubScrap and actually used their project kit and templates to make the following necklace, bracelet and earrings:
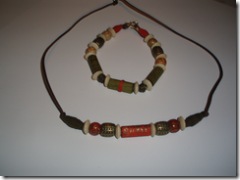

The paper beads are mixed with regular beads from the kit – it’s hard to tell them apart! I made some more paper beads this weekend using some of Stampin’ Up!’s designer patterned paper – hopefully, I’ll have a project and tutorial incorporating those to show you soon.
I have more jewelry to show you later – let’s get back to more challenge cards…
Our Featured Stamper for last week’s challenge was SplitCoastStampers member StampOwl. Such an extremely talented stamper! Here is her card that I chose to CASE and here is my CASEd card:
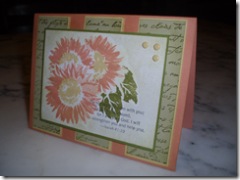
Her original used the Wild Rose stamp set and a weathered background – I substituted the Serene Sunflower stamp set and the Linen background. I like this combination of Groovy Guava, Old Olive, So Saffron and River Rock – I may use it again.
The Inspiration Challenge used an E-card as the inspiration piece: Here is my take on the piece:
Another cool color combo of Soft Sky, Chocolate Chip, Summer Sun and Pumpkin Pie – this was a fun card to make.
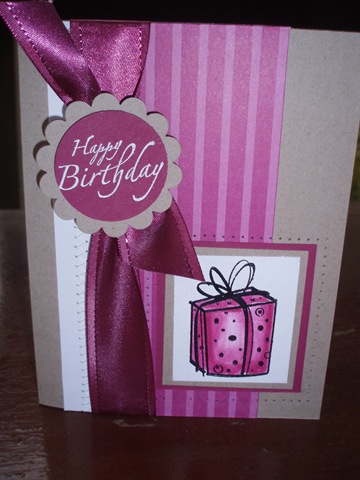
For the Color Combination challenge, we were to use Kraft, white and Purely Pomegranate on a card. Here is my sample:
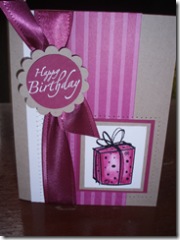
The gift image is watercolored and the white strip of cardstock is sewn with a zigzag stitch and white thread.
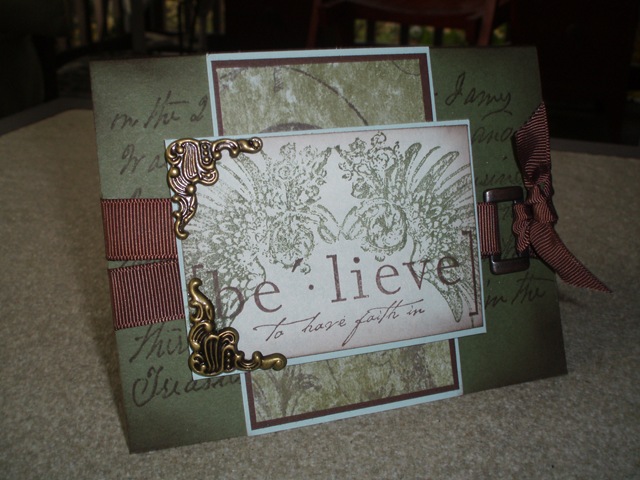
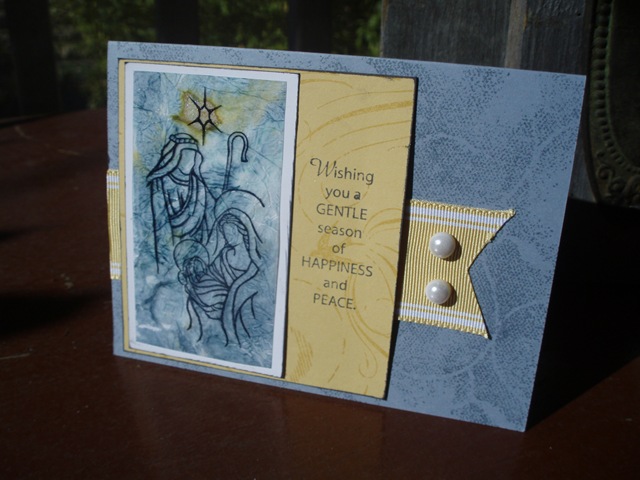
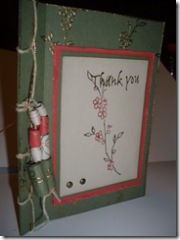
I was so inspired by the Sketch Challenge this week, I did two cards with two very different feels:

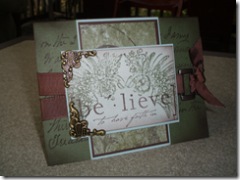
This card uses unmounted stamps from Stampers Anonymous (my first time using them) and paper from Basic Grey. I really like the way the wings combine with the sentiment and I also was happy with the way the ribbon wrapped around the buckle.
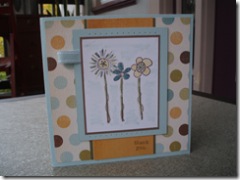
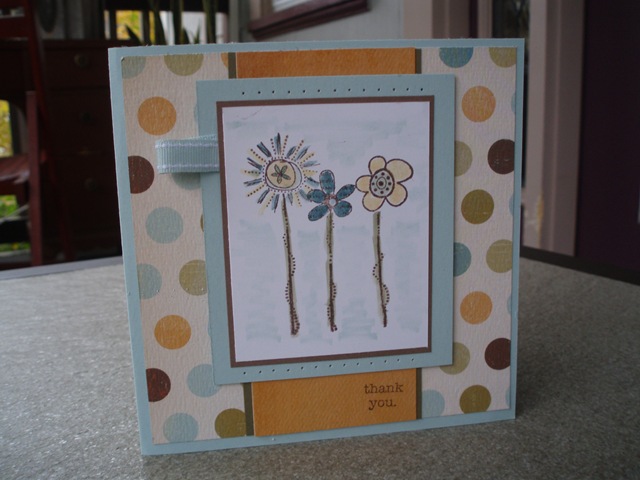
This card was made using some acrylic stamps from Autumn Leaves that I picked up from a Target clearance bin the other day for $1.63! It did take me quite a few tries to get the image to stamp nicely (I’m going to have a hard time converting from rubber stamps to acrylic), but I thought the flowers are fresh and cute. The main image is watercolored and the background paper is from My Mind’s Eye.
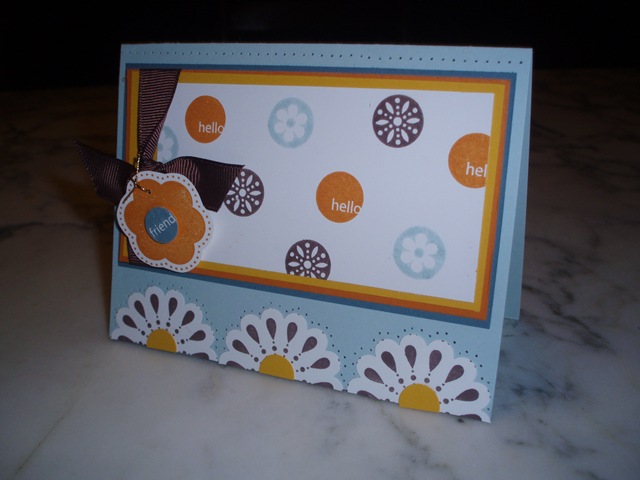
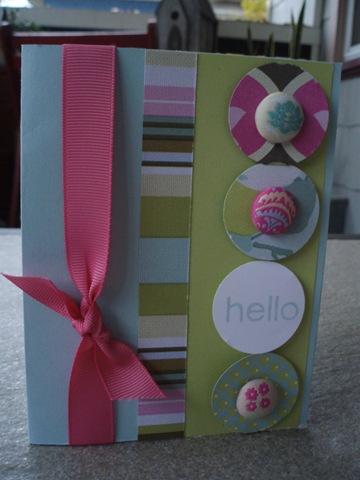
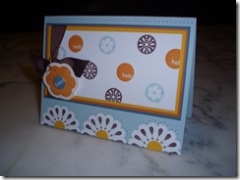
For our Ways To Use It Challenge, we were asked to use unique brads. I made this simple card:
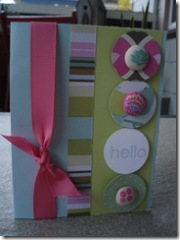
I had some brads and paper from K & Company/ Amy Butler that I purchased at the Creating Keepsakes convention this summer – I’ve wanted to use them and this was a great challenge for these supplies! I just punched out three circles from various patterned papers and inserted the brads through the middle and added a white circle with a stamped sentiment – very easy!
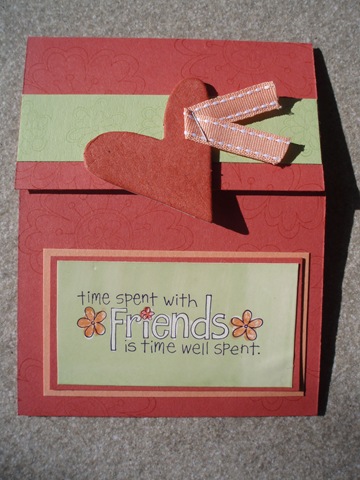
Finally, we the Limited Supply Challenge was to make a ‘Pick Me Up’ card using a heart image, no more than three stamps and limited layers with one embellishment. Here’s my card:
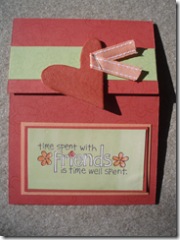
I decided to use the new Time Well Spent stamp set that all Stampin’ Up! demonstrators received for free last week – thanks, SU! I used the wax resist technique for my main image. For this technique, I stamped the sentiment on glossy cardstock with regular classic black ink and then highlighted the words and flowers with a white crayon. I brayered Certainly Celery ink on top of the whole thing and then wiped the ink from the parts colored with the crayon. I also went back and added some color to the flowers and adhered the matted piece onto the bottom fold of the card.
I also stamped a large flower on the entire card (hard to see in the picture) as well as a small flower on the celery strip of cardstock. I then added a chipboard heart inked with Ruby Red ink as a closure for the card.
Whew! Now that we’re caught up on last week’s challenges, I’ll show you what else I’ve been up to…
Posted by Kathy Torrence on Nov 9, 2007 in
Cards,
Crafts Just a few cards for this week’s challenges…
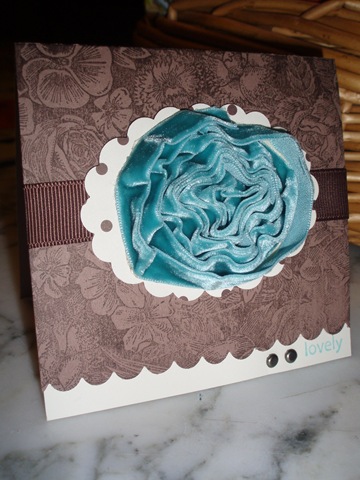
Yesterday’s “Ways to Use It” challenge asked us to use velvet on a card in some way – I chose to use velvet ribbon and made this card:
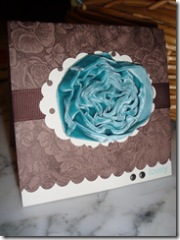
I started with a piece of double sided tape and wound the velvet ribbon around and around until it formed this flower. I used scalloped scissors on the bottom edge and stamped a tiny sentiment on the lower right corner. The paper behind the flower is ivory with brown polka dots – it looks a little odd in the photo, but is cute in real life…
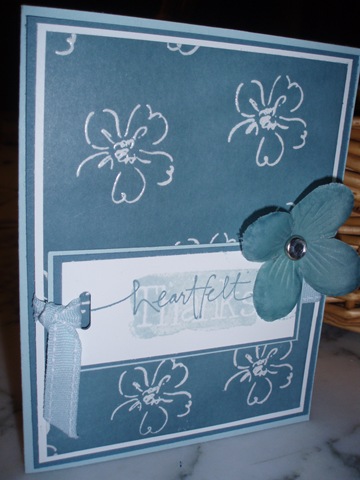
I also made a card for this week’s demonstrator challenge for the ’emboss resist’ technique:
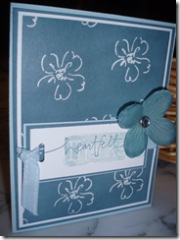
To do this technique, start with a piece of neutral colored cardstock and randomly stamp an image with VersaMark ink (the flower images on this card). Then heat emboss the images with clear embossing powder.
Next, brayer a darker ink on top of the embossed images. The embossing powder will resist the ink, revealing the color of the cardstock underneath (white on this card). It helps sometimes to wipe the ink from the embossed images with a paper towel after brayering.
I had fun with today’s Limited Supply challenge! We were to make a card using only animal, background and sentiment stamps and punches – no other embellishments.
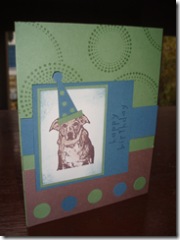
I picked up the dog stamp at a stamp show some time ago – the dog already had a party hat on in the stamped image, but I decided he needed an even larger hat. The dog’s face is priceless – it’s the same look my dogs had on their faces when I dressed them up for Halloween!
Posted by Kathy Torrence on Nov 7, 2007 in
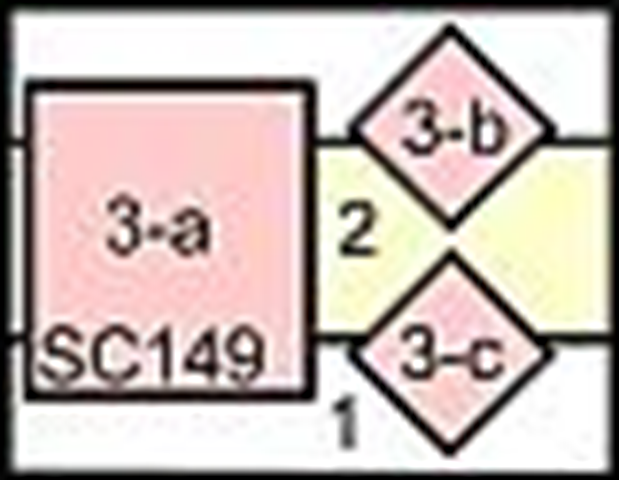
Cards Here’s the SplitCoastStampers sketch for today’s challenge:

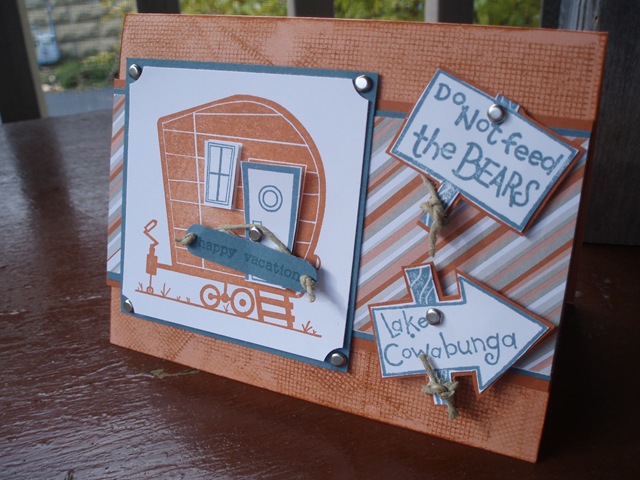
And here’s my card:
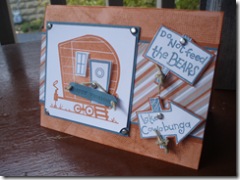
I had so much fun with this card. I popped up the door and window on the stamped camper (does that make it a ‘pop-up’?) then used a silver brad as a doorknob. I used some hemp twine and hung a punched-out sign on which I stamped ‘happy vacation’. I also cut out a few signs from the coordinating wheel for the Happy Camper stamp set and added a brad to each for a ‘nail’. I also tied some hemp twine around the bases and popped them up for a little added dimension (plus, with all that twine, they’d never lay flat!).
On the background, I used the Canvas background stamp and tried something different – instead of stamping it straight on, I moved it around on the cardstock and tried to get a more rustic effect. Hopefully, it worked! 🙂
Posted by Kathy Torrence on Nov 6, 2007 in
Cards,
Crafts,
Other items At our last stamp club meeting, I demonstrated the ‘reflection’ technique using a piece of acetate (AKA – an overhead transparency). My friend Denise mentioned that she has a whole stock of acetate sheets at home – I promised her that this month’s stamp club would give her some new ideas on how to use them. I’m calling it “All About Acetate”!
Note: If you are attending my stamp club meeting tomorrow night and want to be surprised with the projects, read no further! 🙂
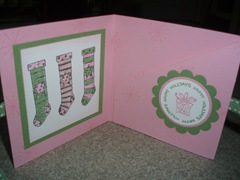
First, I’m going to show a simple make-and-take acetate card. Here’s the project they will be making:
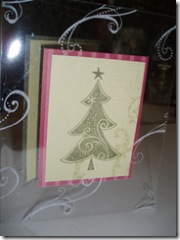
To make this card, we’ll take a sheet of acetate and fold it in half, stamping the swirls with white StazOn ink. Then we’ll stamp the tree image onto the smallest piece of paper. We will adhere the paper to the front of the card, then adhere a slightly larger piece of paper behind it to the OTHER side of the acetate – this way, no adhesive will show. Next, we’ll add a slightly larger piece of paper to the right side of the open card as a place to write a greeting. Finally, we’ll add an even slightly larger piece of paper to the very back of the card – again, to the other side to hide the adhesive.
I am also going to demonstrate the ‘acetate and tissue’ technique with this card that I’ve posted before:
For this technique, stamp your image onto a piece of acetate with StazOn ink. Then on the reverse side, add some color with a few drops of re-inkers, then coat the back with Crystal Effects. Rub it around with your fingers, then add a little glitter, if you’d like. Apply a piece of crinkled tissue paper on top of the glue/ink mixture and allow it to dry. Then trim the tissue paper and adhere to your card.
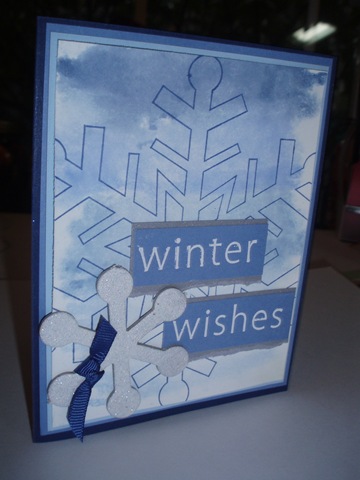
Another way to use acetate is with the “smackin’ acetate” technique. Here’s the card I’m going to demonstrate:
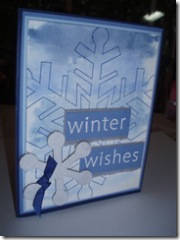
For this technique, take your acetate and scribble on the back with several colors of markers. Then spritz the acetate with water and press onto a piece of neutral colored cardstock. You’ll get a nice watercolor background. You can keep the acetate on top, or just stamp right on top of your background as I’ve done here.
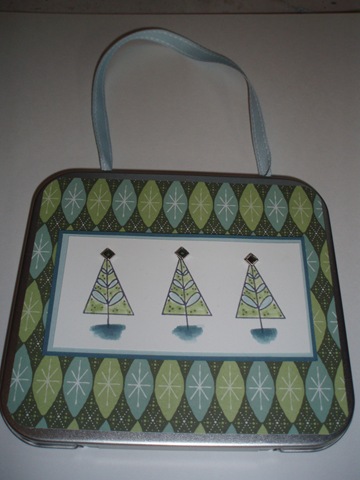
You’ll notice that I’m using a lot of blue for Christmas this year – I’m just trying to branch out from the usual green and red. In fact, I’m also going to show this little purse I made out of a Stampin’ Up! tin:
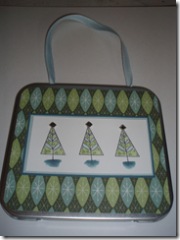
The Crop-A-Dile is great – it just punches right through so I can add a ribbon handle!
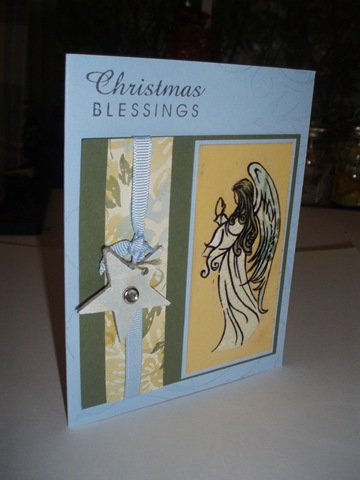
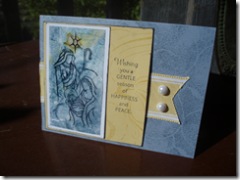
Anyway, back to acetate. I am also going to demo this card:

If you look closely, you’ll see that the angel is stamped on acetate and her hair, robe and wings are each made up of different patterns. To achieve this effect, I stamped the angel on several different types of patterned paper in addition to the acetate. Then I carefully cut out the different pieces from the patterned paper and adhered them behind the acetate, lining up the pieces. Here’s a hint – stamp the patterned paper on the REVERSE side so that you won’t see the stamped lines under the acetate. To get the pieces to stick to the acetate, I ran the acetate angel through my Xyron machine. It’s kind of a interesting, stained glass look, but with patterns instead of solids.
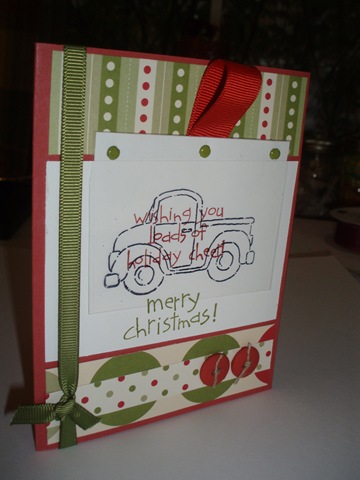
Here’s another way to use acetate – “magic cards”. On these cards, the image stamped on the acetate is black and white, but when you pull it up, it appears to be colored in.
Here’s my sample with no color:
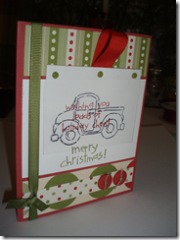
The sentiments are stamped behind the clear acetate panel with the truck. When you pull it up…
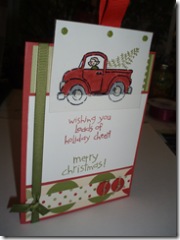
The truck is colored in. To achieve this look, you stamp the truck twice – once on the acetate panel and again on a neutral cardstock. Color in the image on the neutral cardstock and place another piece of cardstock between them to hide the colored image, attaching the acetate and colored image at the top. When you pull the piece, the acetate will lay on top of the colored piece (make sure they line up), coloring it in like magic!
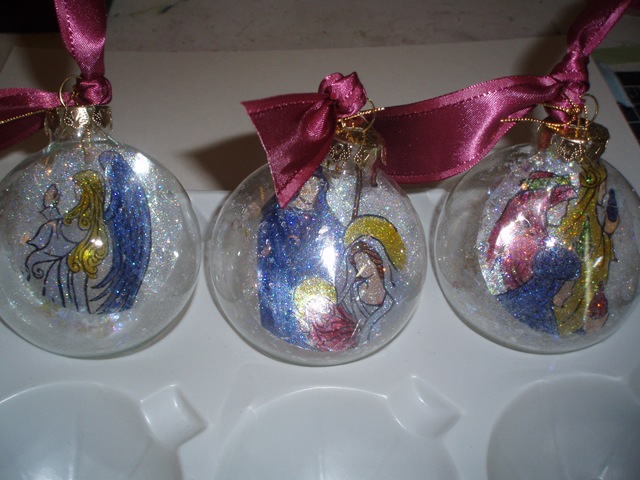
For a second make-and-take, we will make a Christmas ornament using acetate. The make-and-take will be a simplified version of these:
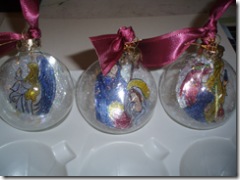
The first step is to stamp your image onto a piece of acetate using StazOn ink. Cut the image into a circle slightly smaller than the ornament (I used a Coluzzle for this step). Next, color in the reverse side of the image with permanent markers (I recommend Sharpies). You can stop here, or for a little extra bling, coat the back of the image with a thin layer of Crystal Effects and sprinkle on a little Dazzling Diamonds glitter.
After the glue has dried, roll the image into a tube shape and insert it into the ornament. If your acetate circle is small, punch a hole in the top of the circle and tie it to the top of the ornament with some ribbon or cord to keep it from falling over.
You can also add a little glitter, snow or whatever other embellishment you’d like inside the ornament.
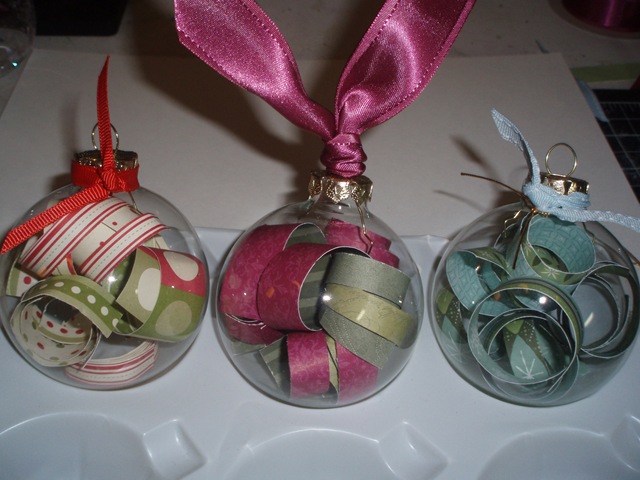
Here’s another idea for these glass ornaments…fill them with rolled patterned paper! Just roll the paper around a pencil and insert the rolls into the ornament:
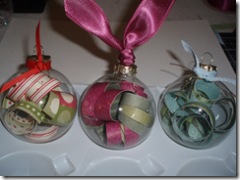
How fun and easy is that?!?! I think I’m going to make a centerpiece with these for the holidays this year.
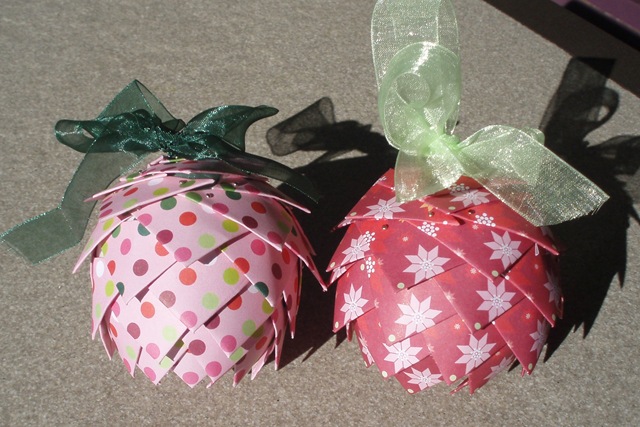
Slightly off topic, but another easy ornament idea – take a foam ball and some pins and tack in small pieces (1″ X 2″) of paper folded into points:
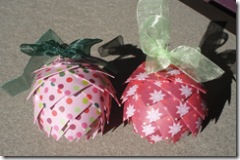
The result is an ornament that kind of resembles a pinecone – a great project for older kids, too!
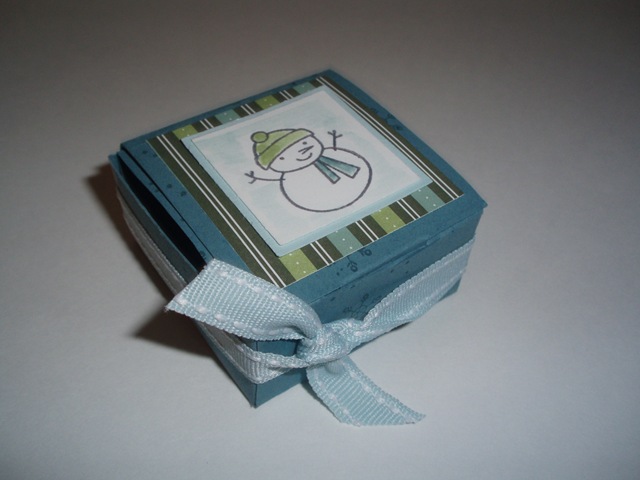
Okay – one more acetate project…here’s the last make-and-take:
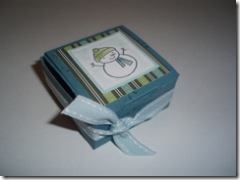
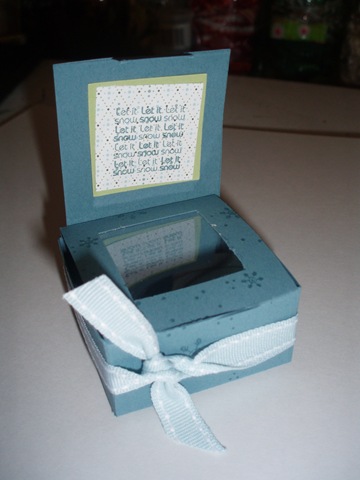
It’s this adorable little box – perfect for party favors! This box is really tiny – only about 2″ X 2″ – and on the inside:
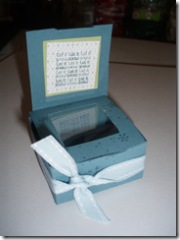
Is a little acetate peek-a-boo window to show off the treasures! I got this template from SplitCoastStampers’ user Qbee – here’s a link to the thread with the box template.
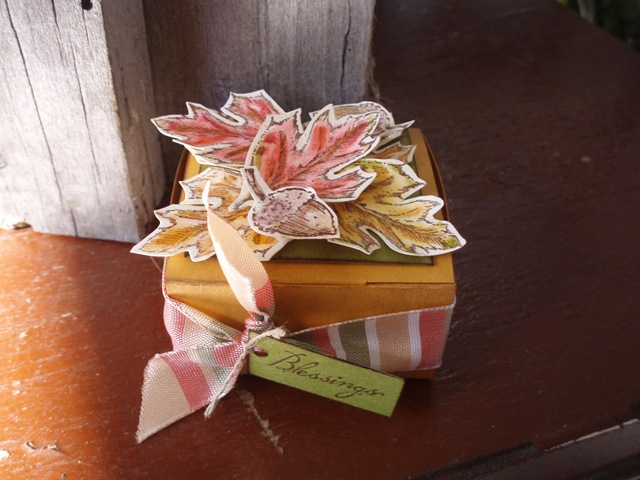
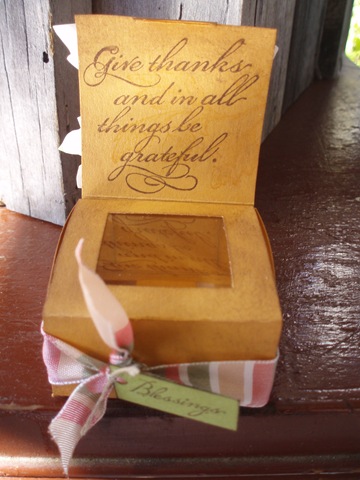
And here’s another version that I made:
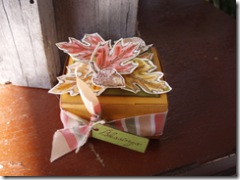
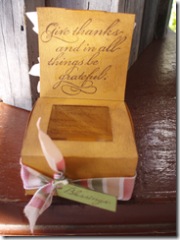
How cute would this be as a place card for Thanksgiving?
Whew! That’s a lot of projects to show – I hope we’ll end at a reasonable time this month – and I hope everyone enjoys the projects, too!
Posted by Kathy Torrence on Nov 6, 2007 in
Cards Today’s color challenge on SplitCoastStampers was to use Soft Sky, Ruby Red and Wild Wasabi colors. I had a card idea in mind that I wanted to try, and used this challenge as an excuse to play:
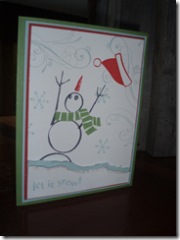
I saw a similar card at Regionals and thought it was just adorable! I love the idea of the swirls as the wind and the snowman reaching up for his hat – too cute!
I kept my card flat so that I could also use it for last week’s Limited Supplies challenge. For that challenge, we had to make a holiday card that was totally flat with no embellishments (so that it doesn’t require any extra postage). This one qualifies!
I did add some Dazzling Diamonds along the snow line at the bottom of the card – it doesn’t show too well in this photo. I also used the masking technique so that the scarf and hat appear in the front on the card.
Posted by Kathy Torrence on Nov 5, 2007 in
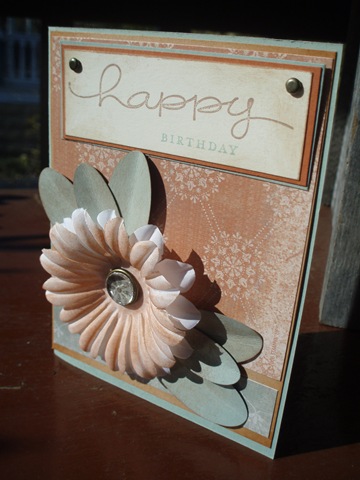
Cards One more challenge…the demonstrator “punch art” challenge. The challenge was to use only Stampin’ Up! products and include punched shapes on the card as well. I looked at all the punched shape objects I’ve done before, and I just felt like they were too ‘cartoony’ for me today – I wanted the card to seem more elegant, but still use punched shapes.
So I came up with this:
I used the oval punches for leaves with a “Pretties” flower. This card looks much nicer in real life – the flowers kept flopping over as I was trying to photograph them.
I also used my Build-A-Brad again as the center of the flower – I love playing with them!