A “Green” Crafty Gift Idea
I finally finished the felted purse that I’ve been knitting since SEPTEMBER! I had this great (but totally unrealistic) idea that I would whip up all these knitted/felted purses and give them as Christmas presents this year. Well…four months later and only one purse is finished – not exactly productive. Maybe I don’t have the patience for completing knitted projects – I seem to lose interest – especially when knitting something like the handle that takes FOREVER and is the same stitch and the same color yarn over and over again…
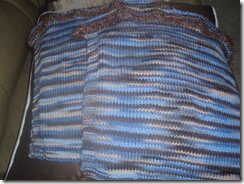
Anyway, here are the side panels after they were knitted (I added some brown fuzzy yarn at the top that will not felt for a little texture):
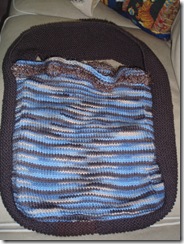
And here is the purse assembled, but before felting:
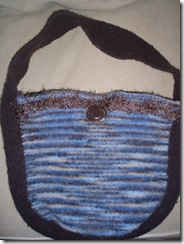
And after felting (I added a vintage brown button to help keep the top of the purse closed):
The thing is, I LOVE the felting process…but have little patience for the knitting part…
Then I came across a great idea in the January issue of Country Living magazine called “Sweater Recycling 101”.
The article described how to take old, wool sweaters and felt them (no knitting required!!!!), then cut and sew them into cute little tote bags – perfect!
I visited my local Goodwill store yesterday and picked up a variety of inexpensive 100% wool sweaters, all of which were $4.99 or less (yardsales would be great for this too, but there aren’t too many yardsales in Pitman in December – way too cold).
I took the sweaters home and ran them through my washer on hot with the greatest agitation level, then threw them in the dryer until dry. Just a hint – don’t wash more than one sweater together or with other clothing. The sweaters will lose an enormous amount of fibers that stick to everything when wet. And make sure they are 100% wool – I think chunky wool works better for this project.
After washing in hot and drying in the dryer, the sweater will be felted – the fibers shrink and blend together forming a nice, thick piece of fabric that is easily cut and won’t unravel. The thing is – felting is a very unpredictable process. There’s no telling how a sweater will shrink. Some of those I tried shrank evenly all around – others ended up with a very short body and very long arms. And in general, the larger the sweater size, the larger the bag.
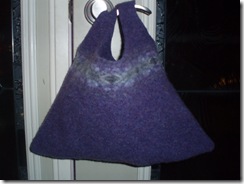
Cutting the sweater is a matter of experimentation depending on the size of the sweater and the amount of shrinkage. Country Living gives a pattern that is almost like cutting the sweater into a tank-top – the shoulder straps of the ‘tank-top’ become the handles. This makes for a very simple project – just stitch a seam across the bottom and you have a sweet little tote:
The bag above started out as a purple ladies V-neck sweater from the Gap with a fair-isle pattern across the chest.
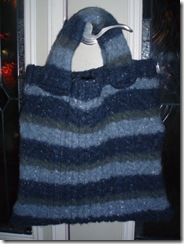
My favorite bag was a men’s extra-large striped sweater in blues and greens with a nice cable pattern and a rolled-neck. This sweater had some holes in it, so I wasn’t able to use the ‘tank-top’ pattern. Instead, I had to cut out the front and back panels of the sweater and stitch down the sides. I then used the arms as the handles, cutting them apart and folding them over in half. I stitched them in place and this is the result:
I wish I would have taken a photo of the sweater before I felted it – I was just so curious as to how this would work, I forgot to stop and take a picture of the ‘before’! This is a very large, sturdy bag – but my little basic sewing machine did have some trouble stitching through the thick, felted wool – I just kept pushing and pulling it until it made it though.
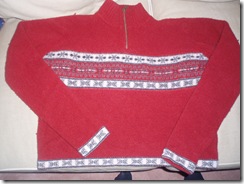
I also experimented with adding some pockets. Here is a women’s wool sweater from Eddie Bauer after I felted it:
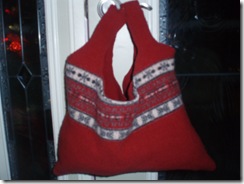
Not sure if you can tell, but the body shrunk up really short but very wide. I cut it into the ‘tank top’ pattern and stitched up the sides as well as the bottom:
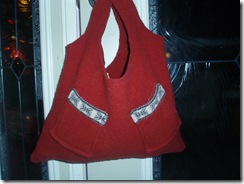
The back of the bag was just plain red so I decided to cut the bottoms of the sleeves and add them to the back side as little pockets:
I’m telling you…this became addictive after a while! You never know how the bag is going to turn out…
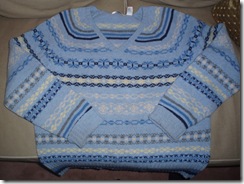
Here’s another one – this is an Old Navy sweater before felting:
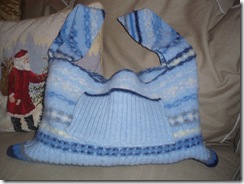
I used the ‘tank-top’ pattern, but cut it into more a square, then added the unfolded end of one of the sleeves as a long pocket on the front:
I love this project because…1) there’s instant gratification – you throw the sweater into the washer and in no time, you have a brand new piece of felt that’s a surprise every time, 2) one entire project (once the sweater is felted) takes less than 30 minutes, 3) it’s inexpensive, 4) it’s a practical but still a really cute gift and 5) it’s good for the environment to re-use something in a whole new way – it can be fun being green!
And now even though I didn’t actually knit them as I intended, I have all these cute felted purses to give as gifts – plus I may make a few more after a visit to another local thrift store this weekend…
Hi, Thanks for great tips, Did you put a lining in your bags? Thanks Betty
Betty –
Thanks for reading my blog!
I have not tried to put a liner in my bags, but it should be pretty easy to do. Good luck with your project!
Kathy