Posted by Kathy Torrence on Sep 3, 2008 in
Family Stuff,
Today's Photo Andrew started high school as a freshman at Gloucester Catholic today. I took these photos while he was waiting for the bus to pick him up at WaWa this morning (I made sure that there were no other kids around so he wouldn’t be embarrassed – although I think he was embarrassed anyway):
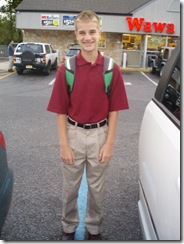
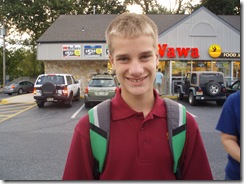
Hey, Andrew – just be glad that I didn’t drive you to school and take your picture as you walked inside…
Posted by Kathy Torrence on Sep 3, 2008 in
Crafts,
Knitting Way back in January, I started to work on a felted tote bag – and tonight (in SEPTEMBER), I finally finished it!
Not that I’ve been working on it non-stop since then. In fact, I stopped work on it altogether for a few months after I lost one of my size 8 knitting needles on my first trip to Alaska back in April. A few weeks ago, I replaced the missing needle and then it was back in progress. Unfortunately, I can’t find the book with the instructions…so I had to improvise a bit.
What I like most about this bag is the simplicity of the design – basically two side panels and one VERY long handle. I should have probably made the handle longer, but I got really bored when it got to be around 6 feet long (it was supposed to be 7 feet, I think – part of the problem of losing the instructions!) and stopped. The handle was just a plain garter stitch with the first stitch of each row slipped to make a nice, sturdy edge.
So after knitting the handle and side panels, I hand-sewed them together using the green yarn. The handle acts as the sides and bottom of the bag – the seam is sewn together along the bottom.
Before felting, the bag was so big and floppy, I had my doubts.
But then I threw it in the washer through a entire cycle on the hot/cold setting…and it was like magic! I couldn’t believe how fantastic it was after it was felted – you can barely see any of the individual stitches and the bag became structured and sturdy – now I can’t wait to felt some more projects!
To complete this one, I knitted some pockets (again, no instructions so I had to wing it) then felted them individually. The result would have been okay…but I wanted to add some felted flowers and leaves.
I found this pattern for a simple ruffled rose from Y2knit online and decided to give it a try…here’s one of my roses before felting:
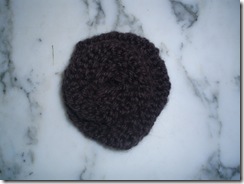
Just a simple strip that curls around itself as a result of increasing the stitch count.
Next, I wanted to add some leaves made with the green yarn. But I couldn’t find a leaf pattern that I liked online – I tried several that I found, but they all seemed to end up looking lumpy. So I made up my own pattern and made these (the photo is before felting):
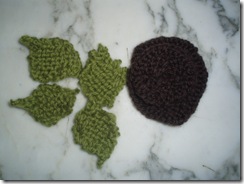
To make these leaves:
Cast on 3 stitches and knit the first row.
Knit the next 3 rows, casting on an extra stitch at the end of each.
Knit the next few rows – I think I did three or four.
Then knit the following rows, decreasing the number of stitches by knitting two together once on each row.
Bind off when you reach a row that only has two remaining stitches – that’s it! They felt up so cute – it’s just the final shape that’s really important after they are felted.
Here’s the finished tote completely felted (one side is blue, the other is brown):
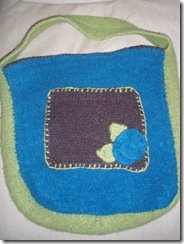
I also added some blanket stitching around the pocket and top edge to keep the colors blending together. I think it’s so cute – and I can’t believe that I made the whole thing myself.
Hmm…I think I may be making some of these for Christmas presents…and if I do, I’d better start now (or make smaller bags)!


