Posted by Kathy Torrence on Mar 26, 2009 in
Crafts,
Other items,
Today's Photo I needed a cute cupcake idea for my daughter’s bake sale at school and saw these “slider” cupcakes online – I decided to try my own.
Mine aren’t quite as professional-looking, mind you – but I think they turned out pretty cute:
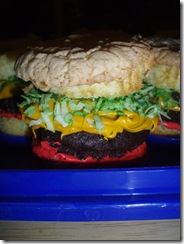
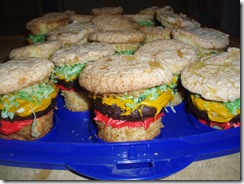
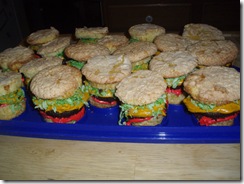
The buns are vanilla cupcakes, the burgers are chocolate cupcakes, the ketchup and mustard are icing and the lettuce is colored coconut.
Will we win for originality?
Posted by Kathy Torrence on Dec 31, 2008 in
Crafts,
Other items,
Today's Photo Even though I had to work today, I managed to get a little crafting time in while I was there. That’s right – there was some crafting going on at the Tech Center today!
My co-worker Sybil saw a gift item online that she had tried to order, but was receiving no response from the store owner. She showed it to me and I said, “Sybil, we could make that!”. A crafting challenge!!!!
The item was a personalized frame containing a poem and a high heel shoe silhouette on a fabric (at least I think it was fabric) background – selling for $59.95. Sybil thought it would be perfect for a friend who was turning 40.
I’d like to show you the link to the original item, but the link no longer seems to be working. Maybe Sybil didn’t receive a response because they went out of business…
Anyway, our project was similar to the original, but instead of fabric, we used patterned paper. And I just happened to have a shoe stencil from November’s Paula’s Kit Club kit – how convenient! I trimmed the shoe image from the paper with a craft knife then placed ivory cardstock behind the opening.
We used an original poem written by Sybil for her friend and put all of the items into a frame she picked up at Michaels:
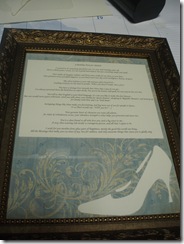
This is SO close to the original (and was MUCH less expensive) – Sybil was very happy:
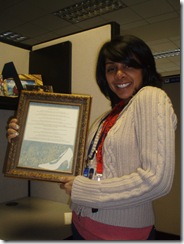 I am using this photo with her permission, but she did want me to emphasize that she was feeling quite under the weather at the time…I think she looks just fine.
And by the way, I think I have her hooked on crafting – I caught her surfing the Internet looking for more projects for us to try…
Happy New Year to everyone! Here’s hoping for a happy and healthy 2009…
Posted by Kathy Torrence on Dec 30, 2008 in
Crafts,
Other items,
Today's Photo I just completed a baby gift for one of my co-workers – I haven’t made one of these for a while but I have posted the instructions previously on my blog. I used to make a lot of these to sell at craft shows back in the day when I had more time for crafting…and spent less time working (before job).
The gift starts out as an empty paint can that is covered with scrapbooking paper using ModPodge. Here’s the finished can:
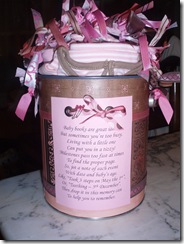
She knows she is having a girl (obviously!) and the colors in the nursery are pink and brown. Inside the can, I included some receiving blankets and a tiny outfit in the same colors (a girl has to be color-coordinated, you know – even a newborn girl!).
I used paper from Basic Grey’s “Blush” collection to cover the can then added a little poem on Stampin’ Up! cardstock to the front:
Baby books are great ideas,
But sometimes you’re too busy.
Living with a little one
Can put you in a tizzy!
Milestones pass too fast at times
To find the proper page.
So, jot a note of each event
With date and baby’s age.
Like, “Took 3 steps on May the 1st”,
Or, “Teething – 5th December”.
Then drop it in this memory can
To help you to remember.
I also included a little stack of stamped tags on a split ring to which I added ribbon:
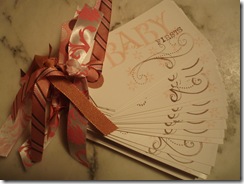
The cards can be used to jot down little notes about things the baby did and when she did them.
I tied some coordinating ribbon all around the paint can handle and also attached a paint can opener (also tied with ribbon). The lid is also included – I put it beneath the can and tied the whole package with cellophane:
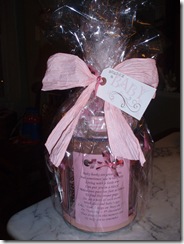
Hope she likes it!
Posted by Kathy Torrence on Dec 24, 2008 in
Crafts,
Other items I have another gift that I made for my friend Linda’s daughter Kylee:
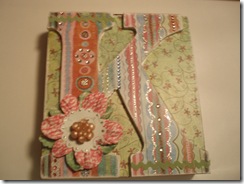 It started out as a plain white letter “K” plaque that I picked up this summer at the Creating Keepsakes Convention (yes, I’ve had it that long and just finally got a chance to make it and mail it). I added some patterned paper to the raised letter and background – to cut it to shape, I just put the paper on top of the plaque and pressed it down around the edges, creating a crease to show the shape to cut. After adding the paper with ModPodge, I used my stickles glitter and some rhinestone bling to outline the patterns in the paper. The flower is made from some Prima flowers and in the center, I used a cluster of beads from a vintage earring. Hopefully, this will look nice in her room.
Posted by Kathy Torrence on Dec 21, 2008 in
Crafts,
Other items After paying another visit to the Goodwill (this time in Atlantic City after our company holiday party), I made a few more felted sweater bags:
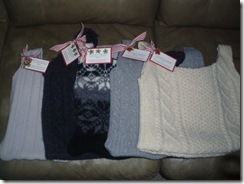
I added some pretty tags to let the recipients know that these are recycled sweaters:
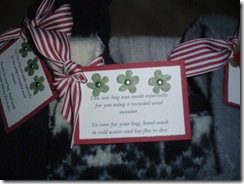
After doing some research online, I saw a bunch of other recycled sweater projects that I’d like to try. Everything from blankets, mittens, wreaths, Christmas trees – even the most adorable Easter basket! There are also some amazing purses ideas out there – there’s really no end to the types of things you can create. I have a new item to search for at yard sales…or if you have any wool sweaters you’d like to donate, just let me know. 🙂
By the way, when Andrew came home and saw a large Goodwill bag in the dining room, he turned and asked me, “Are we poor?”. I told him that there’s nothing wrong with shopping at the Goodwill – not only did I find these sweaters, but I also picked up an adorable Talbot’s cardigan for Emily (for wearing, not crafting) and one of those Pedi-Paws that they show on the infomercials for trimming your dog’s nails (it was brand new and still in the box!).
Both Goodwill stores were actually full of people shopping for bargains – while I was there, I saw some of the same toys that Santa is bringing for Emily for a steal (still brand new and in the box) and a whole table of brand new girls’ tap shoes. There were tons of college kids looking for some unique clothing and some other crafters checking out the vintage jewelry for projects. Yardsales and Goodwill – not much of a difference, really. Just be sure to wash your items in hot water, and they’re good as new!
Posted by Kathy Torrence on Dec 16, 2008 in
Crafts,
Knitting,
Other items,
Today's Photo,
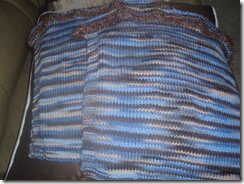
Yardsale Finds I finally finished the felted purse that I’ve been knitting since SEPTEMBER! I had this great (but totally unrealistic) idea that I would whip up all these knitted/felted purses and give them as Christmas presents this year. Well…four months later and only one purse is finished – not exactly productive. Maybe I don’t have the patience for completing knitted projects – I seem to lose interest – especially when knitting something like the handle that takes FOREVER and is the same stitch and the same color yarn over and over again…
Anyway, here are the side panels after they were knitted (I added some brown fuzzy yarn at the top that will not felt for a little texture):
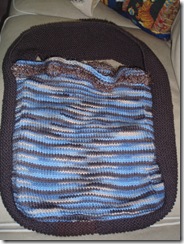
And here is the purse assembled, but before felting:
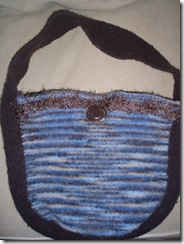
And after felting (I added a vintage brown button to help keep the top of the purse closed):
The thing is, I LOVE the felting process…but have little patience for the knitting part…
Then I came across a great idea in the January issue of Country Living magazine called “Sweater Recycling 101”.
The article described how to take old, wool sweaters and felt them (no knitting required!!!!), then cut and sew them into cute little tote bags – perfect!
I visited my local Goodwill store yesterday and picked up a variety of inexpensive 100% wool sweaters, all of which were $4.99 or less (yardsales would be great for this too, but there aren’t too many yardsales in Pitman in December – way too cold).
I took the sweaters home and ran them through my washer on hot with the greatest agitation level, then threw them in the dryer until dry. Just a hint – don’t wash more than one sweater together or with other clothing. The sweaters will lose an enormous amount of fibers that stick to everything when wet. And make sure they are 100% wool – I think chunky wool works better for this project.
After washing in hot and drying in the dryer, the sweater will be felted – the fibers shrink and blend together forming a nice, thick piece of fabric that is easily cut and won’t unravel. The thing is – felting is a very unpredictable process. There’s no telling how a sweater will shrink. Some of those I tried shrank evenly all around – others ended up with a very short body and very long arms. And in general, the larger the sweater size, the larger the bag.
Cutting the sweater is a matter of experimentation depending on the size of the sweater and the amount of shrinkage. Country Living gives a pattern that is almost like cutting the sweater into a tank-top – the shoulder straps of the ‘tank-top’ become the handles. This makes for a very simple project – just stitch a seam across the bottom and you have a sweet little tote:
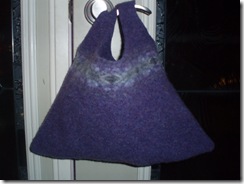
The bag above started out as a purple ladies V-neck sweater from the Gap with a fair-isle pattern across the chest.
My favorite bag was a men’s extra-large striped sweater in blues and greens with a nice cable pattern and a rolled-neck. This sweater had some holes in it, so I wasn’t able to use the ‘tank-top’ pattern. Instead, I had to cut out the front and back panels of the sweater and stitch down the sides. I then used the arms as the handles, cutting them apart and folding them over in half. I stitched them in place and this is the result:
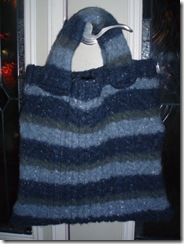
I wish I would have taken a photo of the sweater before I felted it – I was just so curious as to how this would work, I forgot to stop and take a picture of the ‘before’! This is a very large, sturdy bag – but my little basic sewing machine did have some trouble stitching through the thick, felted wool – I just kept pushing and pulling it until it made it though.
I also experimented with adding some pockets. Here is a women’s wool sweater from Eddie Bauer after I felted it:
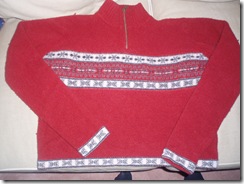
Not sure if you can tell, but the body shrunk up really short but very wide. I cut it into the ‘tank top’ pattern and stitched up the sides as well as the bottom:
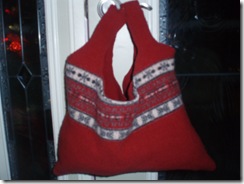
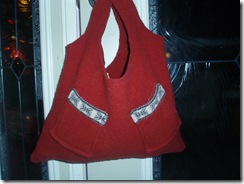
The back of the bag was just plain red so I decided to cut the bottoms of the sleeves and add them to the back side as little pockets:
I’m telling you…this became addictive after a while! You never know how the bag is going to turn out…
Here’s another one – this is an Old Navy sweater before felting:
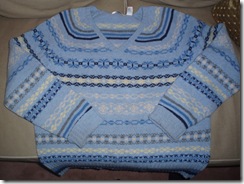
I used the ‘tank-top’ pattern, but cut it into more a square, then added the unfolded end of one of the sleeves as a long pocket on the front:
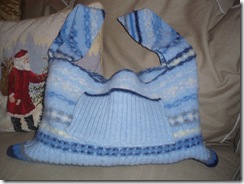
I love this project because…1) there’s instant gratification – you throw the sweater into the washer and in no time, you have a brand new piece of felt that’s a surprise every time, 2) one entire project (once the sweater is felted) takes less than 30 minutes, 3) it’s inexpensive, 4) it’s a practical but still a really cute gift and 5) it’s good for the environment to re-use something in a whole new way – it can be fun being green!
And now even though I didn’t actually knit them as I intended, I have all these cute felted purses to give as gifts – plus I may make a few more after a visit to another local thrift store this weekend…
Posted by Kathy Torrence on Nov 17, 2008 in
Crafts,
Other items,
Today's Photo One more Christmas craft that I created during my ‘craft frenzy’ – a “JOY” Christmas banner.
To create this project, I started with plain cardstock cut into triangles. For the size pennants I used, I cut a piece of 8 1/2 X 11 cardstock into an 8 X 8 square then cut that into four equal triangles (it’s the easiest way I could think of).
I used chipboard letters to spell out the word “JOY” and added snowflakes at the beginning and end of the banner. Because it was so long, I had a difficult time photographing this project – so here are several photos to show different levels of detail:
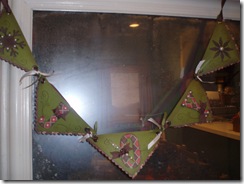
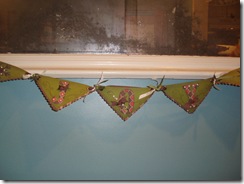
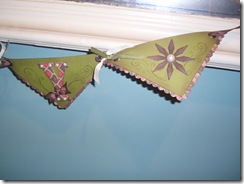
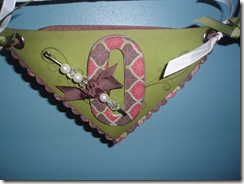
As you can see, I added scalloped patterned paper along the edges and various ribbons and pearls from the Stampin’ Up! Pretties Kit. For an aged look, I covered the letters with patterned paper and sanded and inked the edges. I also used large eyelets to reinforce the holes where the ribbon feeds through.
I think this is SO pretty…I can see hanging it either from a mirror, in a doorway or even on a mantle.
This week I’ll share some of my new card designs with you…
Posted by Kathy Torrence on Nov 16, 2008 in
Crafts,
Other items,
Today's Photo During my ‘craft frenzy’, I created a ‘Christmas Countdown’ that can hang on a wall or mirror. I used one of the new Decor Elements from Stampin’ Up! for this project.
I started with a plain white canvas (literally), and added some Old Olive ink for an aged effect.
After struggling to apply the Decor Elements to the canvas, I finally read the directions and noticed that they are not recommended for textured surfaces such as this. You can achieve the same idea by applying the elements to a piece of smooth, painted wood or even cardboard – but I wouldn’t recommend using a textured canvas for this project.
I am, however, happy with the results – but it took a lot of blood, sweat and tears to get here (well…maybe not blood – but there sure were a lot of sweat and tears as well as a frantic phone call to SU! Demonstrator Support)…
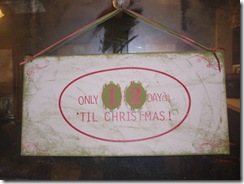
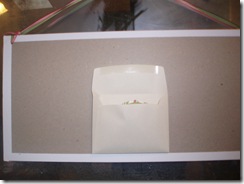
I applied the numbers for the countdown to Old Olive cardstock (which was MUCH easier than the textured canvas!!!!) cut into ovals and backed with scalloped patterned paper. The numbers are attached to the canvas with velcro – and I even adhered an envelope to the back of the canvas to hold the unused numbers:
I used my Crop-A-Dile to punch holes in the canvas to string ribbon for hanging. That Crop-A-Dile will punch through ANYTHING!
One more Christmas craft tomorrow…
Posted by Kathy Torrence on Nov 15, 2008 in
Crafts,
Other items,
Today's Photo Today I’d like to show you an idea for a place setting/napkin ring for Thanksgiving using items you already have in your craft room.
For this sample, I’ve actually used a Halloween napkin (again, 90 percent off at Target – it cost me 25 cents) – it’s the right color to show you the idea if you just ignore the bats and Halloween ghouls in the brocade pattern.
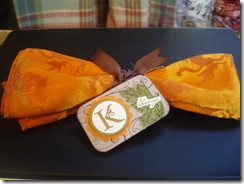
I took a wide brown grosgrain ribbon and tied it around the napkin, then added a Kraft piece of cardstock to use as a tag. I stamped the swirl pattern from the Season of Joy Stampin’ Up! stamp set and inked the edges of the tag.
Next, I used a monogram initial from the Lovely Letters stamp set and embossed it with gold embossing powder. I used a circle punch then layered it onto scallop punch, using dimensional adhesive for some added interest.
I stamped a few leaves onto Old Olive cardstock, attached them to the tag and added the word "Blessings" on top – simple and easy. I think it would also have been cute to add a bunch of twigs under the ribbon (but the weather was not cooperating with me the day I made this – they would have been some very wet branches!).
Here’s another cute place setting idea – using a chipboard ‘frame’, cover the piece of chipboard with patterned paper, add a photo behind and tie a ribbon through the top:
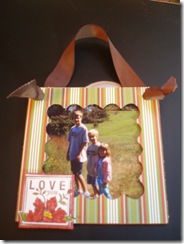
This could act as a place setting if you use a photo of the guest and add his or her initial instead of the stamped image I have here. Or as I’ve made it, this could be a Christmas ornament or other small gift.
How about some more Christmas ideas tomorrow?
Posted by Kathy Torrence on Nov 14, 2008 in
Crafts,
Other items,
Today's Photo Here are a few more simple ideas for Christmas crafts…
I had a bunch of these tiny little silver tins that were actually sitting in my craft trash can (they were originally used for some bracelet kits that I purchased, but can also be found in the wedding favor aisle of most craft stores). I picked them out of the trash (yes…I was trash-picking my own trash) and thought they would make cute little gifts for candy or mints:
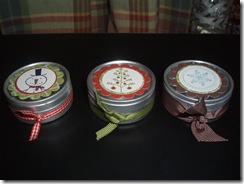
Just a few samples – these are SUPER easy! Stamp any image (color, if desired – I used the Mr. Twigster and Season of Joy stamp sets from Stampin’ Up! here), punch out with a circle punch and layer onto a piece of patterned paper punched with a scallop punch. Tie a ribbon around the tin and you have a sweet little gift tin!
If these aren’t big enough to hold your gift items, you can try the same idea with a larger glass jar:
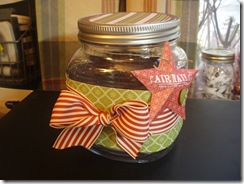
I took a piece of patterned paper and used it as a ‘belly-band’ around the jar. It wouldn’t fit all the way around, so I actually cut two pieces and overlapped them on the sides of the jar. I added a pretty red-striped ribbon and one of the new Stampin’ Up! Star Bright Designer Series Paper Ornaments from the Holiday Mini Catalog. I added a rub-on to the ornament and a piece of linen thread to tie it to the top. To top it off, I also added a circle of patterned paper cut with my Coluzzle to fit the jar lid. How cute would this be filled with homemade candy or cookies as a gift for your neighbor or teacher?
And speaking of those Star Bright ornaments, for my display at the Shop ’til You Drop night tomorrow, I assembled several of the ornaments from the kit and have them hanging from a little Christmas Tree for my table:
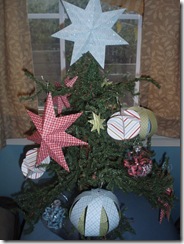
These ornaments are SO easy to make – I’m going to offer them as make-and-takes at tomorrow’s event. And not only do they work as ornaments, they also make great additions to gift packaging (as I’ve shown on the jar above).
How about another Thanksgiving idea tomorrow?


