Posted by Kathy Torrence on Oct 1, 2007 in
Scrapbooks So…now that I’m a ‘scrapbook diva’, I decided to try to play with a sketch challenge on SplitCoastStampers just for fun. The sketch to be used was this one:

and the entire challenge post can be seen here.
So here are my pages…
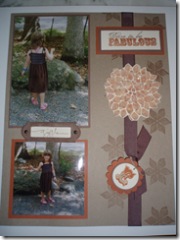
First, I decided to use a cheerleading photo of Emily in an 8X10 size. I rarely use this size in frames, so I figured it was the perfect one to use for this challenge.
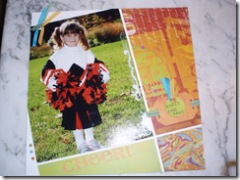
I used paper from the Basic Grey line, “Color Me Silly” for this page.
I had so much fun with this sketch, I decided to try another page using the same sketch.
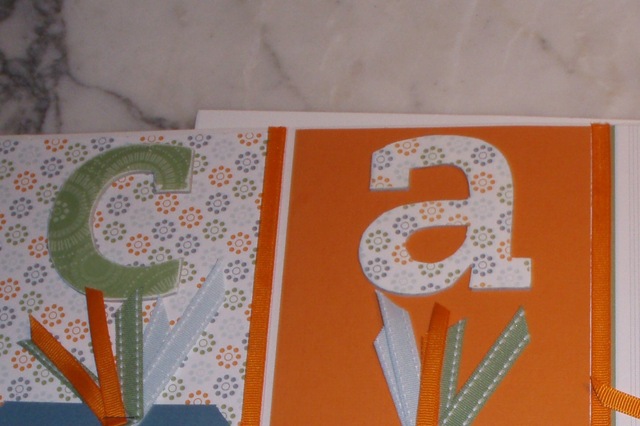
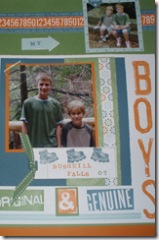
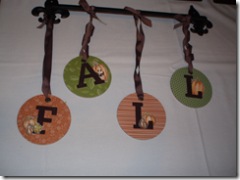
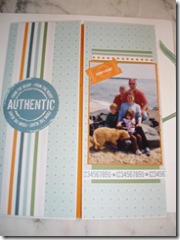
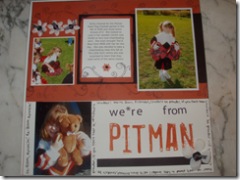
I started with a black-and-white photo of Matt from last year’s school pictures. I tried sanding the edges, which resulted in a sort of reddish-orange color (not sure why) and I used this color as the inspiration for the page. I used paper from My Mind’s Eye for this page:
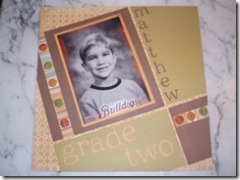
I used my Cricut to cut out the letters and my Xyron to adhere them. I like how this turned out!
That was WAY too much fun – much more fun than doing the laundry that is calling my name… 🙂
Posted by Kathy Torrence on Oct 1, 2007 in
Crafts,
Scrapbooks How exciting – I was just chosen as the ‘Scrapbooking Diva of the Week’ on SplitCoastStampers.com! Here’s a link to the post.
Thanks, ladies – I’m flattered!
Posted by Kathy Torrence on Sep 23, 2007 in
Scrapbooks I have just a few new scrapbook pages to share…
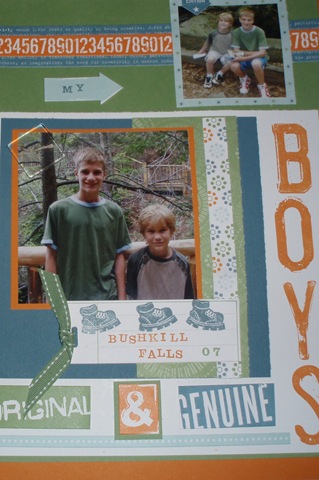
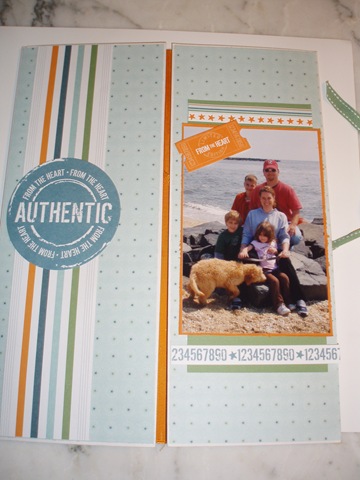
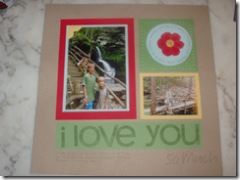
For the scrapbooking workshop I did the other night, I showed this page as an example of using our Simply Scrappin’ Kits – this one uses Creative License (perfect for boy pages!):
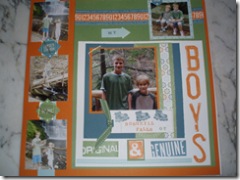
You’ll also notice that although this page is a 12X12 size, it also contains an 8 1/2 X 11 page:
And a 6X6 page:
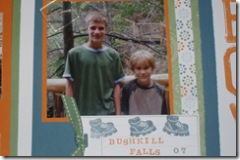
I like to show how you can take other size pages and sketches (even cards) and incorporate them into your own size pages.
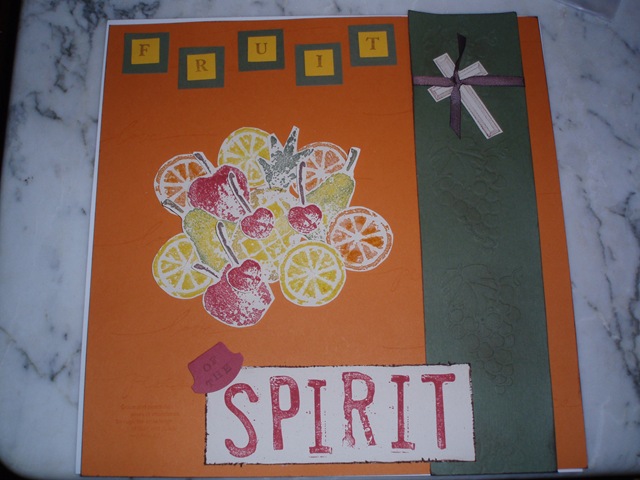
I also made up this page for my Scrapbooking Ministry:
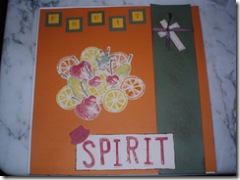
We’re going to do a nine-part Bible study on the Fruits of the Spirit and this will be the cover page for our book.
Posted by Kathy Torrence on Sep 23, 2007 in
Cards,
Crafts,
Scrapbooks I did a scrapbooking-based workshop the other night, and during the demonstration, I focused on ways to use chipboard – one of the current hottest scrapbooking items.
Chipboard is basically a really thick, sturdy cardboard that comes die-cut into shapes and letters. It can come raw, which is just the brown cardboard color or it can come already altered – it’s available in different colors and patterns.
The great thing about the raw chipboard is that you can take it and alter it to exactly match your project. There are a few ways to do just that…
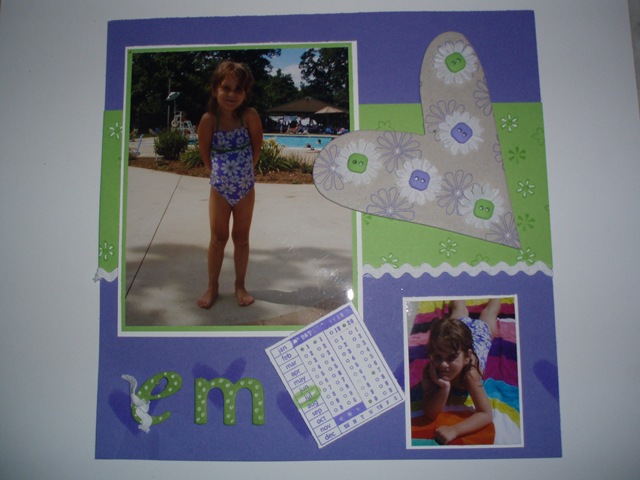
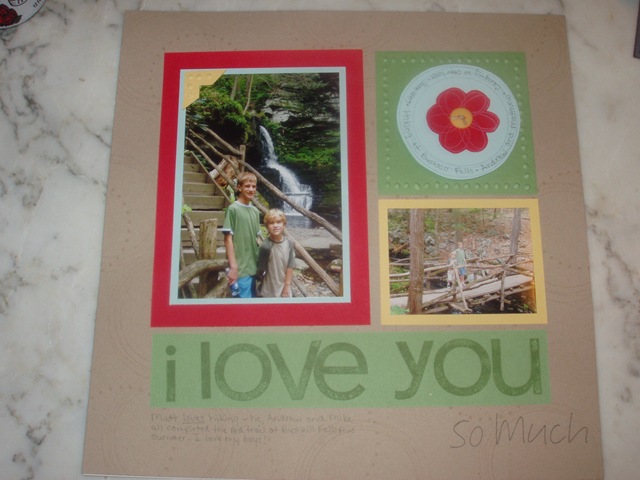
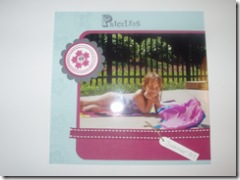
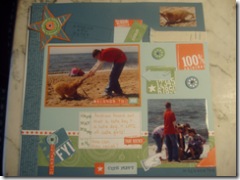
The easiest way to alter chipboard is probably just to stamp directly on it. You can use regular ink and your favorite stamp to make your own matching embellishment as I did on this little scrapbook page:
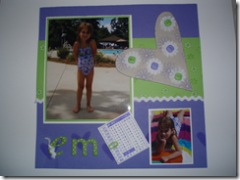
I took the heart shape and stamped on some flowers then added some paper flowers and buttons in colors to match my page (and my daughter’s bathing suit!).
There are also some smaller chipboard letters at the bottom of the page. These are done with another altering technique – inking the chipboard. To do this technique, you just take the letters and either rub them directly onto the ink pad or take a sponge and apply the ink onto the letters.
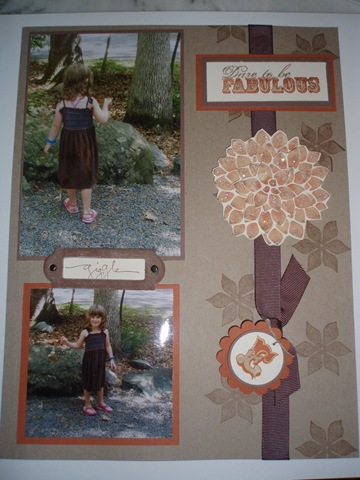
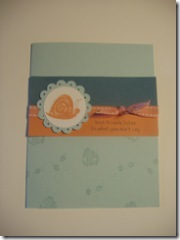
Here’s another example of a page with inked chipboard:
I’ve inked the little chipboard bookplate around the work ‘giggle’ on this page.
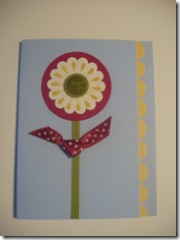
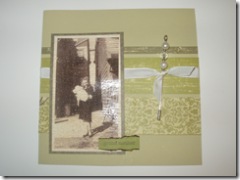
I’ve also shown how to take chipboard shapes and emboss them with embossing powder. You take the shape and cover it with either craft ink or Versamark, depending on the color you’d like on your shape. On this page shown in a previous post, I used Versamark on the flower petals, then embossed with white embossing powder and I used Pretty in Pink craft ink on the flower centers, then embossed with clear embossing powder:
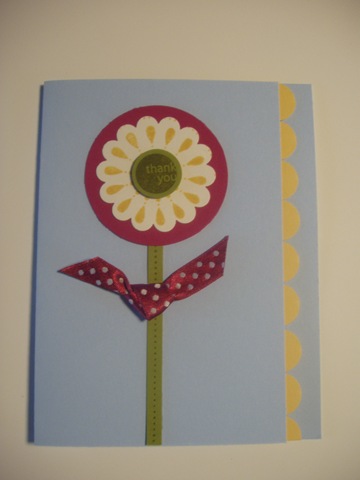
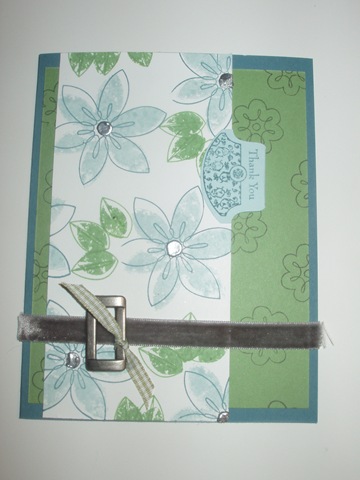
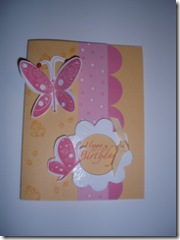
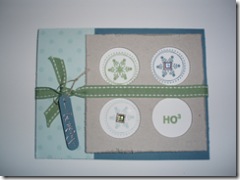
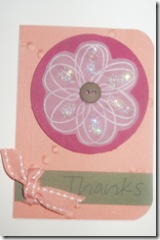
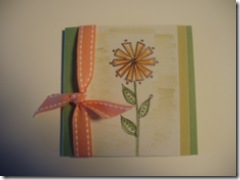
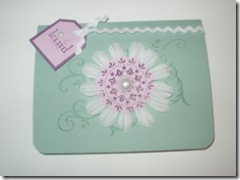
And on this card, I used Versamark and white embossing powder on the flower:
And look at how beautiful these letters turned out shown at the Philadelphia Regional Seminar! These are covered with craft ink followed by clear embossing powder:
Love that project – I may make it a class next month…
I also showed an example where I kicked it up a little bit more and used craft ink with some Iridescent Ice embossing powder followed by clear embossing powder on this Daisy page shown in a previous post:

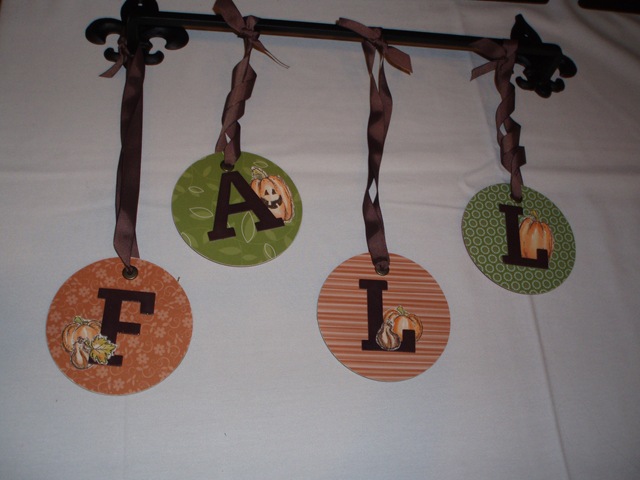
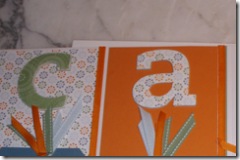
And in a previous post, I showed how to take chipboard letters and cover them with patterned paper. Just apply adhesive to the shape, place it face-down on paper and trim around the shape. It helps to sand the edges after you’re finished for a smooth, clean look. Here are some shapes that I covered with paper:
And one more thing – don’t throw away the leftover pieces! If you look closely, you’ll notice that on the bottom of my “Em” page above, I used the piece of chipboard after I removed the hearts as a stencil at the bottom of the page. I just sponged ink directly over the stencil piece.
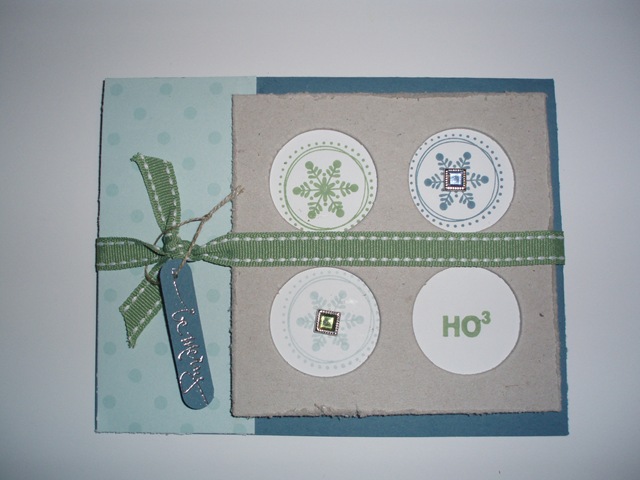
And here’s another example where I used the leftover pieces – on this card, I used the remaining piece of chipboard after punching out the circles:
Hope you this gives you some new ideas on how to use those chipboard pieces you have! 🙂
Posted by Kathy Torrence on Sep 17, 2007 in
Crafts,
Scrapbooks Just a few little ideas I was playing around with the other day…
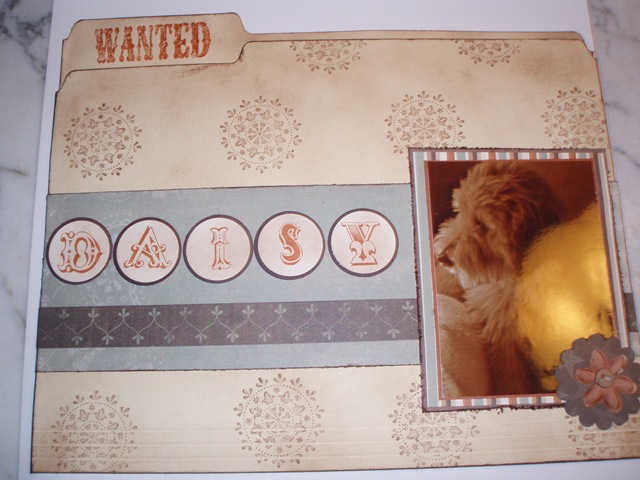
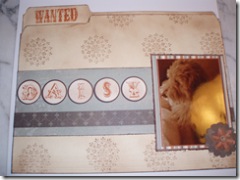
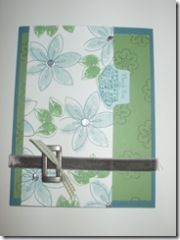
Here’s a little ‘scrapbook’ (I guess it’s not really a scrapbook – more of a scrapfolder) made from a manila folder:

I think this turned out much cuter in person – you’ll have to trust me on that. 🙂
I used a sponge to rub Close to Cocoa ink on the folder, then stamped images from the Wanted stamp set. I added a photo of my dog, Daisy, and stamped her name using the Wild West alphabet stamp set. Inside, I put a few photos too – this would make a nice little gift.
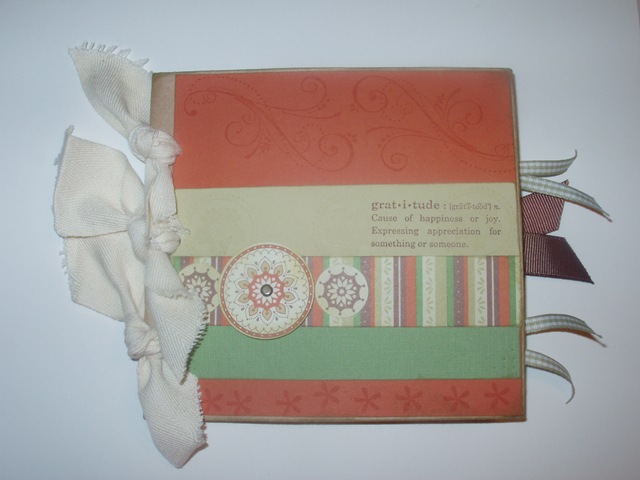
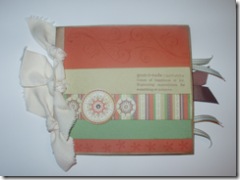
I also was playing around with two pocket file folders (can you tell it’s back-to-school time? It’s all about the school supplies…) and came up with this project:
This is a white two pocket folder folded in half and tied closed with double-stitched ribbon. I used the Creative License scrapping kit for this project…
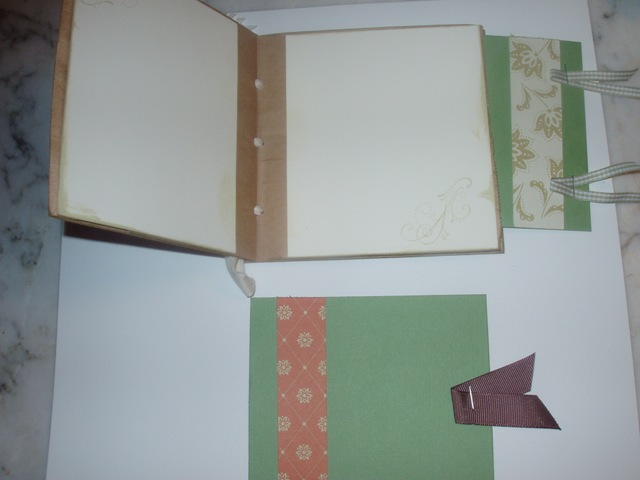
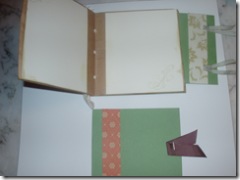
Here is what it looks like after you open the ribbon…the folder edges are both folded in toward the center…
It then opens like a gate-fold…
Again, I think this turned out so cute (if I do say so myself)! I must have been on a roll that day…
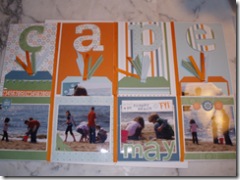
I used photos taken from a day at the beach in Cape May and put them all along the bottom of the folder. I visually separated the four sections with different patterned paper and ribbon and also added chipboard letters covered with paper at the top. Inside each pocket is a tag with more photos from the day at the beach.
Again, this would make a really cute gift…
Posted by Kathy Torrence on Sep 4, 2007 in
Cards,
Crafts,
Other items,
Scrapbooks As I mentioned before, I will be attending the Stampin’ Up! Regional Seminar in Philadelphia later this month. It’s tradition to bring some cards and other projects to swap with other demonstrators at our events, so I’ve been working on a few.
I signed up for one swap where we are exchanging fall holiday ideas. I chose Thanksgiving and decided to make gratitude journals for my swaps.
I made these using paper lunch bags and the new Apple Cider designer paper from the Holiday Mini Catalog. I bound the book using the Crop-A-Dile and twill tape, and added a few Wild Wasabi page inserts to fit in the book openings as well.
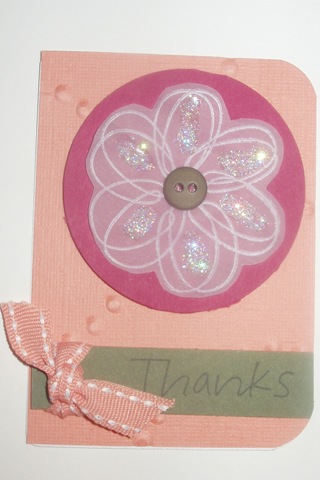
I also signed up for an ATC swap and I decided to make a card front-type ATC using the free stamp set, “So Much”, that we will be receiving at the seminar.
I stamped the flower image on vellum using white StazOn and then added some Dazzling Diamonds on the petals. I also used the Crop-A-Dile to emboss small circles on the textured Groovy Guava paper as done on one of the seminar projects.
How did I get the free stamp set and see the Regional Seminar projects, you ask? I am going to be a Make-And-Take helper at the seminar and received my goody package the other day!
Here are two of the scrapbook pages we will be making, modified slightly to include my photos and use other stamp sets I currently have (unfortunately, SU! didn’t provide us with ALL of the sets that will be available at the seminar).
I had SO much fun making these – I can’t wait to get there!
Posted by Kathy Torrence on Sep 2, 2007 in
Cards,
Crafts,
Scrapbooks I made a few cards for my workshop last night – thought I’d share them really quick. Most are based on projects from the Stampin’ Up! demo website – altered slightly to accommodate my supplies and tastes. 🙂
This card uses the stamp set In the Spotlight and uses So Saffon, Purely Pomegranate, Old Olive and Bashful Blue.
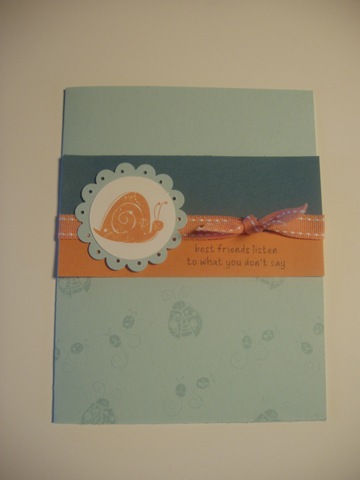
This card uses the stamp set Garden Whimsy and Soft Sky, Groovy Guava and Blue Bayou.
This card uses Double Line Doodles is watercolored and is 3″ X 3″.
I think I actually used all of the new In Colors in these three samples.
I also put together a few scrapbook pages, playing around with the new hostess Simply Scrappin’ Kit and a few other supplies.
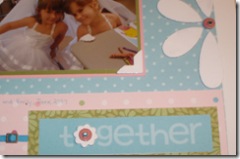
I LOVE those photos of Andrew and Daisy!
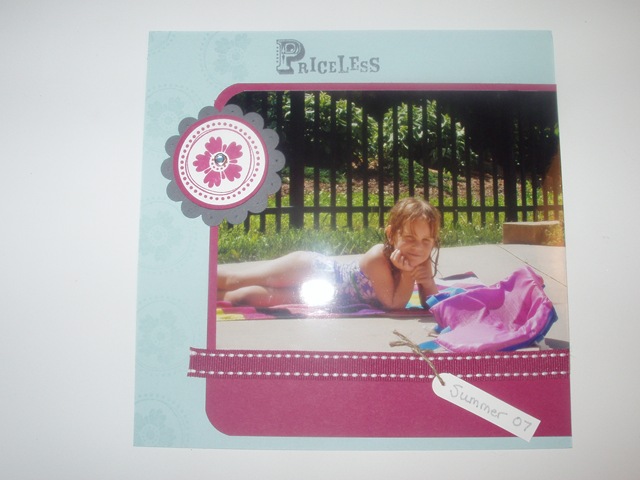
For this page, I was playing around with stamping on acetate as a photo overlay. I used the Priceless stamp set, Groovy Guava, Soft Sky and River Rock. It didn’t come out quite as I planned it, but it’s an okay page.
Now go create something of your own…
Posted by Kathy Torrence on Aug 6, 2007 in
Cards,
Crafts,
Scrapbooks I was just browsing through some more photos from the Stampin’ Up! Convention in Denver, and noticed two more of my projects on display – how exciting!
One is this card that I made as a contest entry:
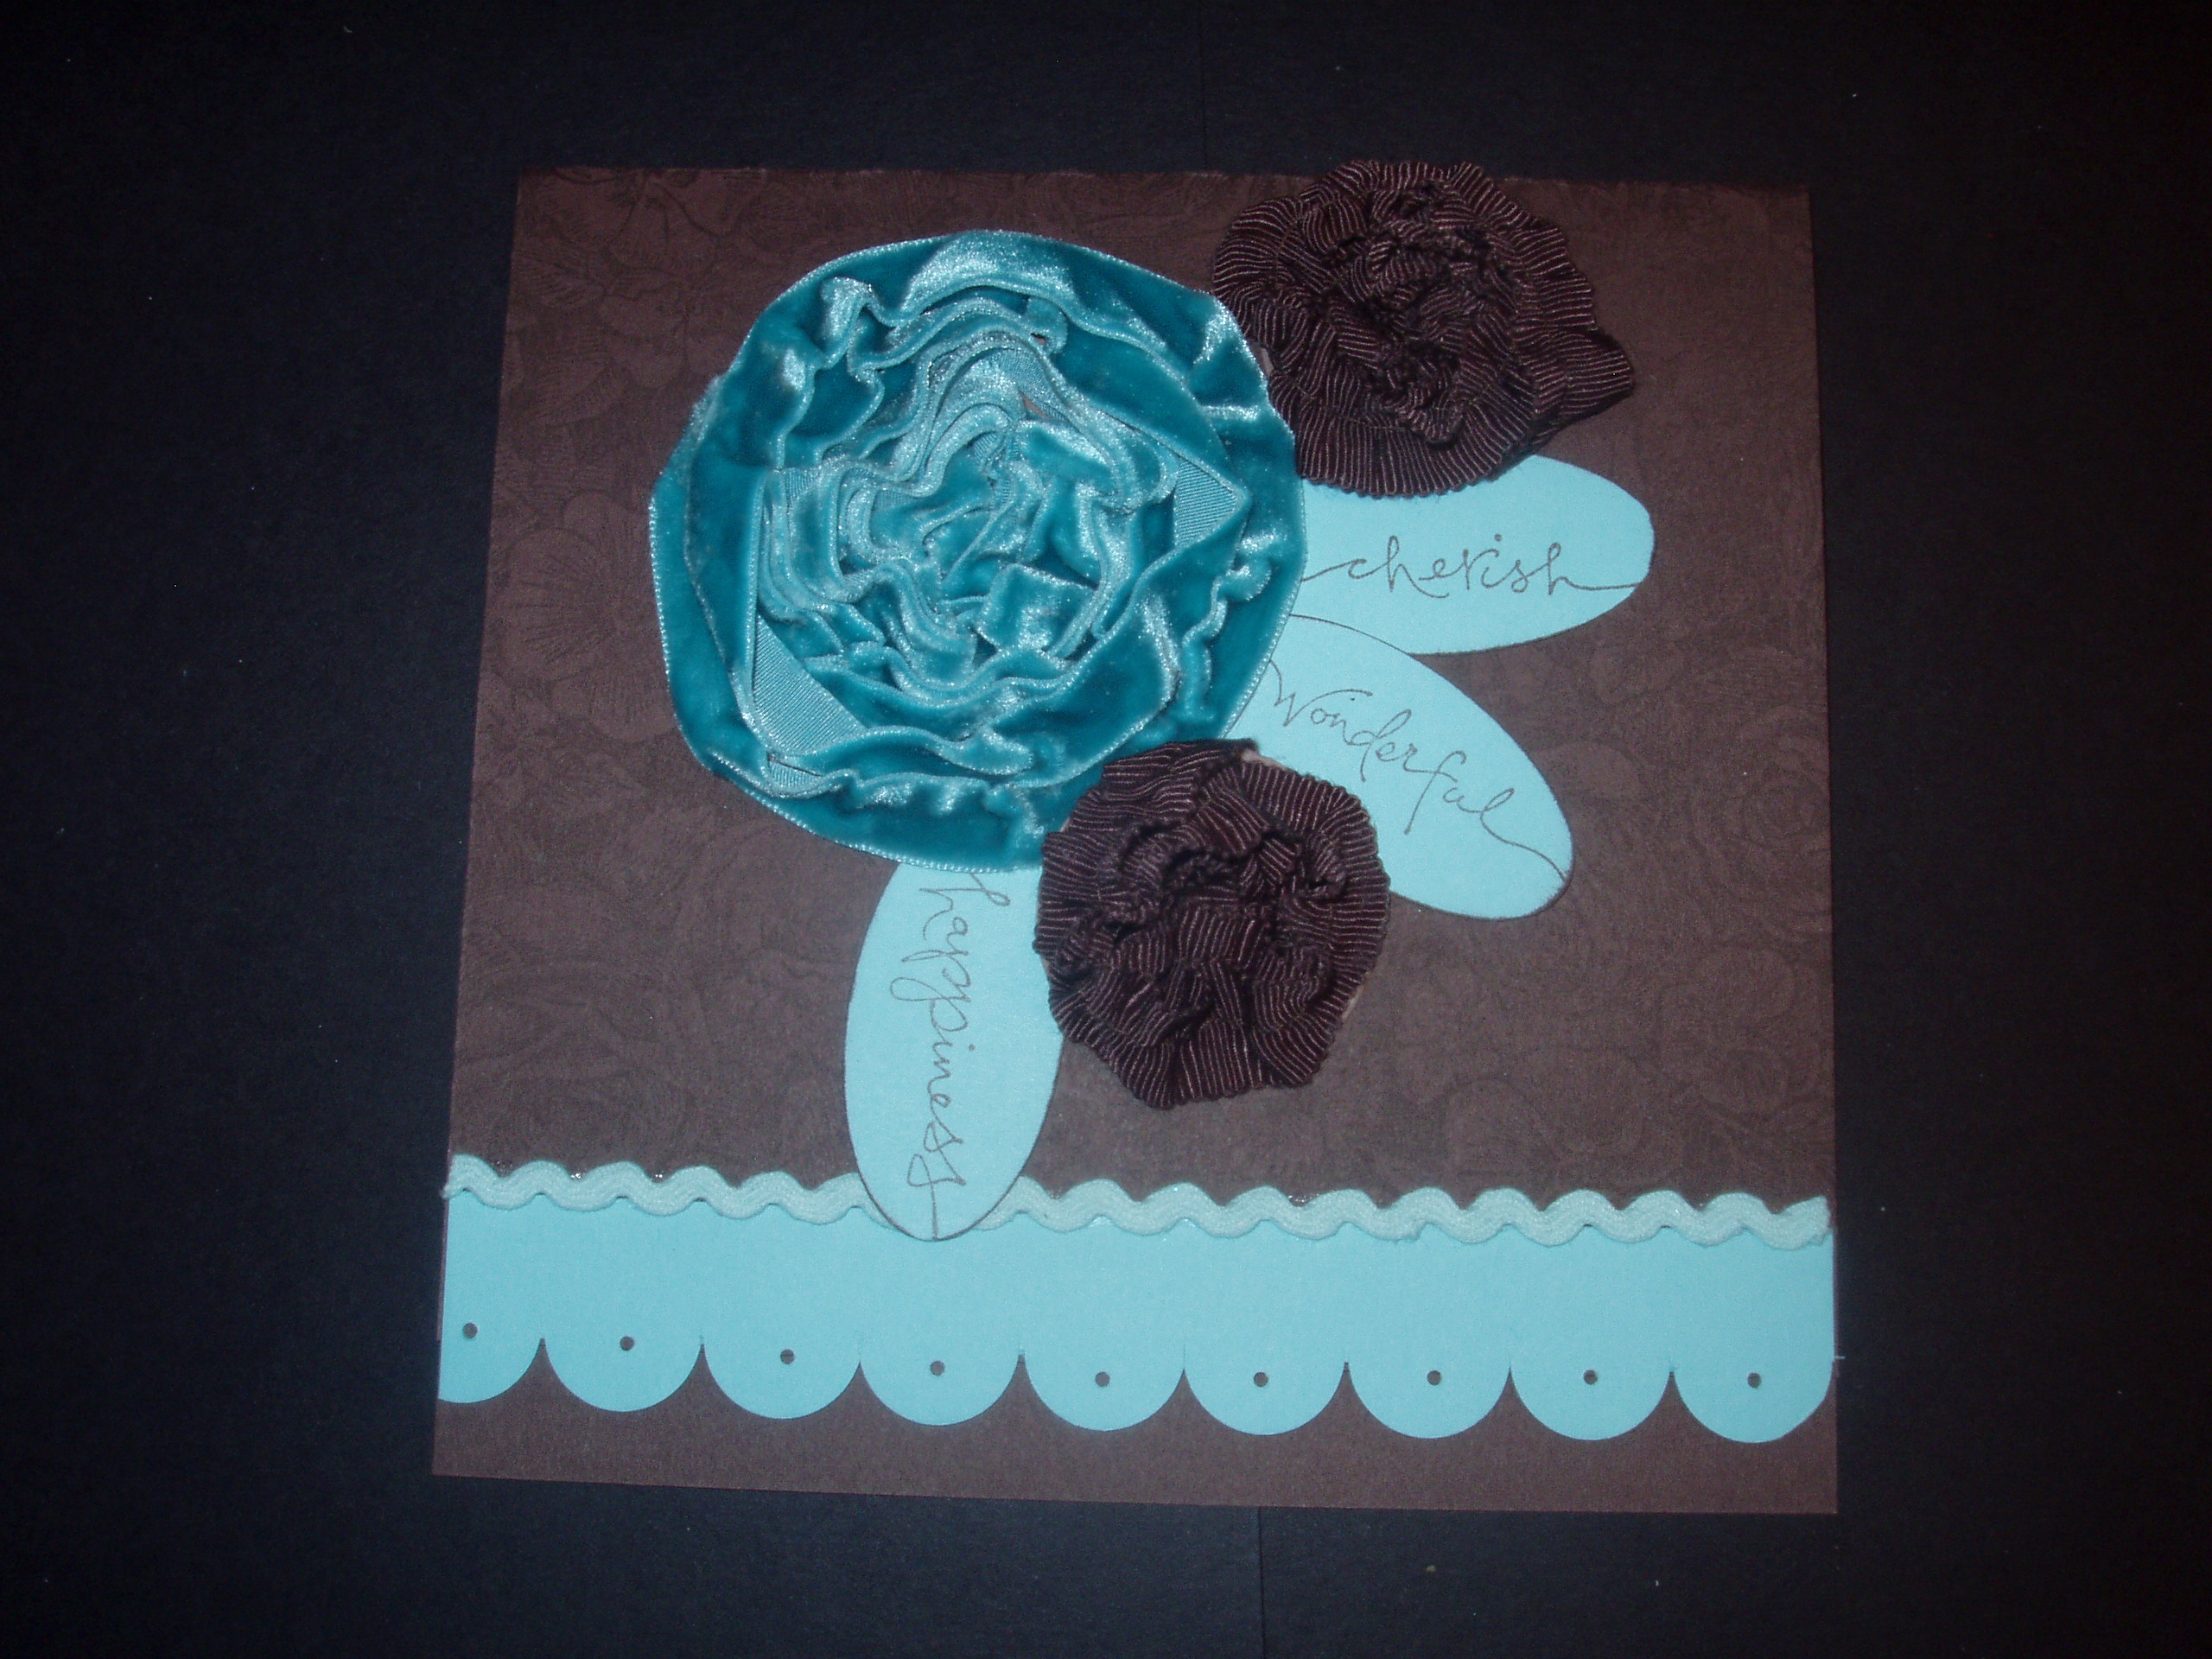
I used ribbons curled around each other to form flowers. The blue flower is velvet ribbon and the brown flowers are a puckered ribbon – both were from the Winter Mini last year. I also used the scallop punch at the bottom and used the oval punch for the leaves. The background is the Floral stamp. I really liked this one – I’m glad they chose to display it (even if it didn’t win).
The other entry I saw was this little scrapbook page:

The photo is from the Philadelphia Flower show in March, 2006. A bunch of ladies went together and I thought this would make a cute page (again, not good enough to win, but good enough to put on display). I embossed the butterfly, “F” and flower with black embossing powder and used sticky tape with microbeads as a ‘frame’ around the photo. So…if you’re in this photo - you’re on display in Denver, ladies! 🙂
Posted by Kathy Torrence on Jul 31, 2007 in
Crafts,
Scrapbooks I have a really full day ahead of me today, but I was just browsing through the photos of the display boards at the Stampin’ Up! Convention going on right now in Denver. I noticed a page on the display board that looked familiar – and lo and behold – it’s one that I entered!
Here’s a link to the photo taken by SCS user ‘sluman’ – thanks for taking and posting the photo!
You’ll notice that it looks sort of like the layout I used on the cover of one of my record album projects. I liked the way it turned out on the record album so much that I ‘scraplifted’ it (from MYSELF), modified it just a bit and turned it in as a contest entry. I didn’t win, but at least it’s on the display boards.
I’ll have to scan the rest of the photos when I have time and see if any of my other entries on on the boards…
Posted by Kathy Torrence on Jul 30, 2007 in
Cards,
Crafts,
Other items,
Scrapbooks Whew! I’ve been working like crazy to get ready for my Stampin’ Up! New Catalog Open House tomorrow night. I thought I’d post some of the projects here for those who won’t be able to make it…and if you ARE coming and think you don’t need to now that you’ve seen it all…I’m not going to post photos of the two REALLY cute FREE make-and-takes to my blog until after the Open House! 🙂
When I set out to do these new projects to show some of the new stamps, colors and accessories, I decided to use some new embossing techniques given to demos at the Stampin’ Up! Convention going on right now in Denver. Even though I’m not there 🙁 , other demos were kind enough to post some of the things they learned – and I was just dying to try them! I won’t demo all of these at the Open House – just a few – and not the entire projects – just the embossing parts.
To start, I made a card that uses a mixture of embossing powder and Dazzling Diamonds. I stamped the image with Perfect Plum craft ink, then used the mixture to emboss the image in the center of the flower…
I also used the new Pretties Kit and left the flower white. The cardstock is Sage Shadow and I used the Baroque Motifs swirl (LOVE that stamp!) behind the flower.
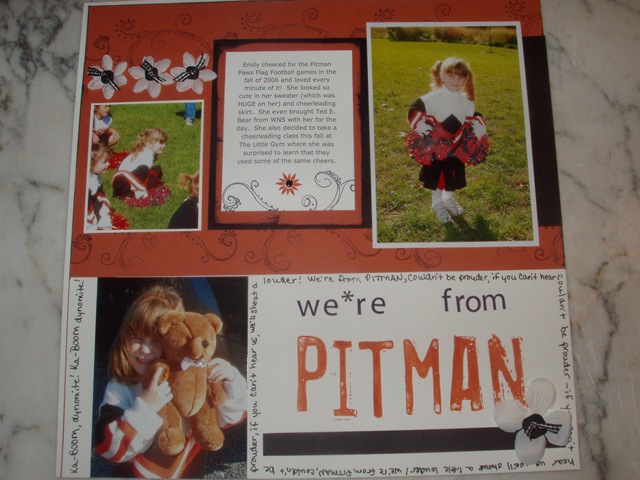
Next, I tried a technique where you take a photograph and add Dazzling Diamonds to areas you would like to highlight. I used a VersaMarker to highlight my daughter’s pom-poms and the teddy bear’s bow tie and then heat embossed with Heat & Stick powder. I added the DD on top – I think it looks really cute in person. but you may not be able to see it as well in the photo (see? that’s why you need to come to my Open House 😉 .
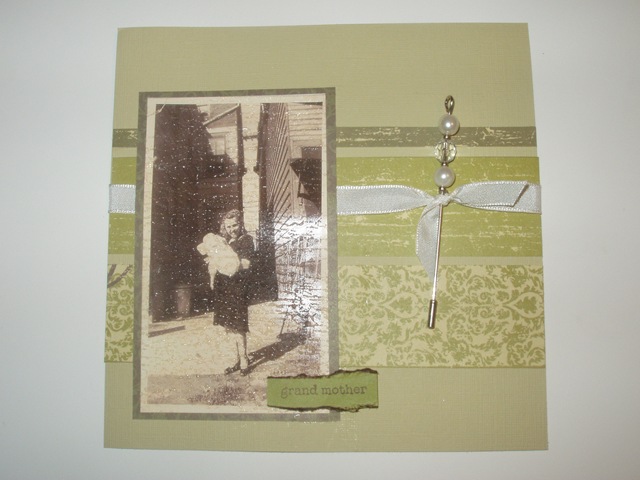
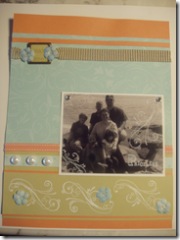
I also used a technique where you take the Weathered background stamp and use it with VersaMark on top of a photograph. Then you heat emboss with Glossy Glaze embossing powder for a cracked-glass look…
This is a copy of a photo of my grandmother. I also used one of the Pretties pins on this layout. The cardstock is the River Rock textured cardstock and the patterned paper is Brocade Backgrounds.
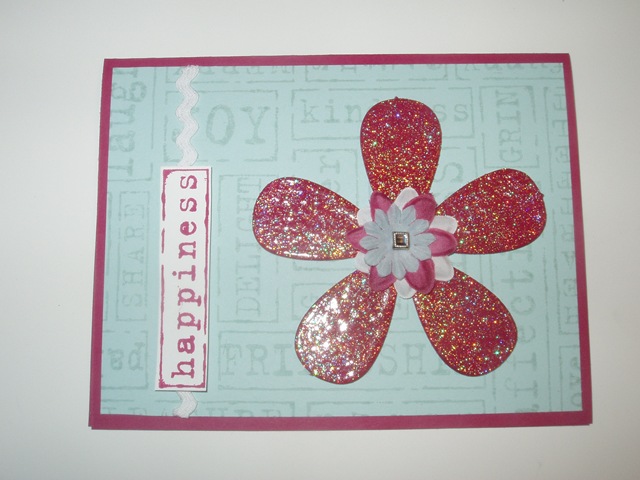
Next, I made a card using a chipboard accent. I used Rose Red craft ink to ink the chipboard flower, then embossed using iridescent embossing powder. Next, I inked the entire flower with VersaMark and heat embossed again with Glossy Glaze embossing powder – what a GREAT effect!
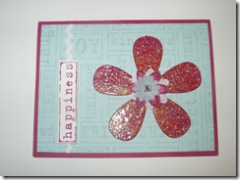
On the rest of the card, I used soft sky and Purely Pomegranate. It’s funny – once I was done with the chipboard, the color darkened quite a bit and didn’t look like Rose Red anymore. I also used three flowers from the pretties. I dyed them using ink refills and an aquapainter.
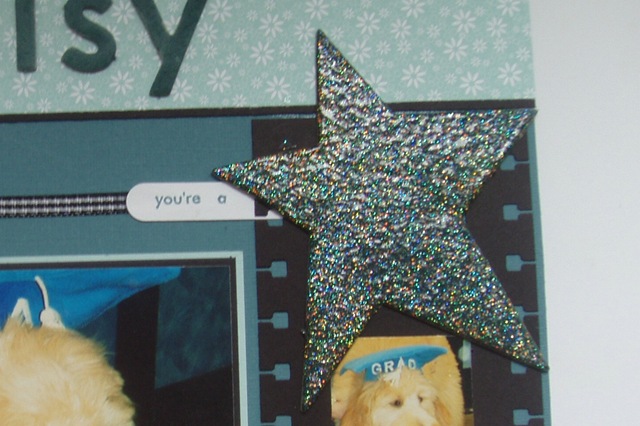
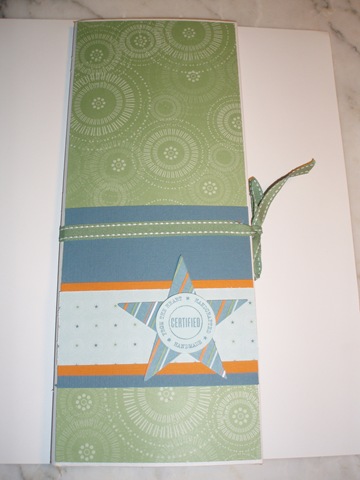
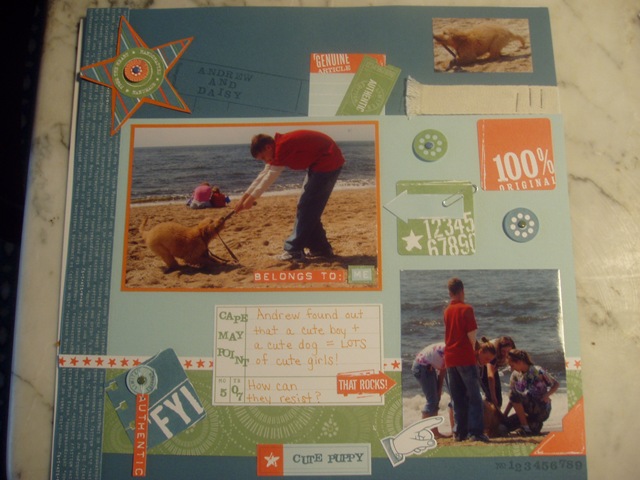
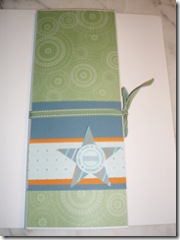
I used the same technique for the star on this scrapbook page of my dog, Daisy. For this, I used Blue Bayou ink then just coated it with Versamark the first and second time I embossed it since I don’t have the corresponding craft ink.
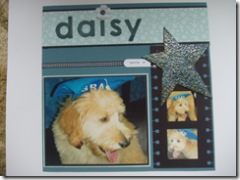
The filmstrip effect is done with a piece of black cardstock, the spiral punch and the square punch. I like how this turned out!
Finally, I used some glue dots in the centers of some stamped flowers, then embossed them with silver embossing powder:
I used a combo of Wild Wasabi, Blue Bayou and Soft Sky on this card – makes a nice combination.
Tune in later to see the Open House make-and-takes…