Finally! A Completed Knitting Project!
Way back in January, I started to work on a felted tote bag – and tonight (in SEPTEMBER), I finally finished it!
Not that I’ve been working on it non-stop since then. In fact, I stopped work on it altogether for a few months after I lost one of my size 8 knitting needles on my first trip to Alaska back in April. A few weeks ago, I replaced the missing needle and then it was back in progress. Unfortunately, I can’t find the book with the instructions…so I had to improvise a bit.
What I like most about this bag is the simplicity of the design – basically two side panels and one VERY long handle. I should have probably made the handle longer, but I got really bored when it got to be around 6 feet long (it was supposed to be 7 feet, I think – part of the problem of losing the instructions!) and stopped. The handle was just a plain garter stitch with the first stitch of each row slipped to make a nice, sturdy edge.
So after knitting the handle and side panels, I hand-sewed them together using the green yarn. The handle acts as the sides and bottom of the bag – the seam is sewn together along the bottom.
Before felting, the bag was so big and floppy, I had my doubts.
But then I threw it in the washer through a entire cycle on the hot/cold setting…and it was like magic! I couldn’t believe how fantastic it was after it was felted – you can barely see any of the individual stitches and the bag became structured and sturdy – now I can’t wait to felt some more projects!
To complete this one, I knitted some pockets (again, no instructions so I had to wing it) then felted them individually. The result would have been okay…but I wanted to add some felted flowers and leaves.
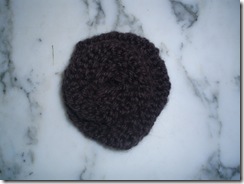
I found this pattern for a simple ruffled rose from Y2knit online and decided to give it a try…here’s one of my roses before felting:
Just a simple strip that curls around itself as a result of increasing the stitch count.
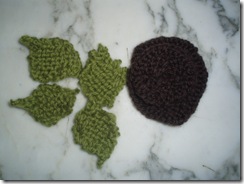
Next, I wanted to add some leaves made with the green yarn. But I couldn’t find a leaf pattern that I liked online – I tried several that I found, but they all seemed to end up looking lumpy. So I made up my own pattern and made these (the photo is before felting):
To make these leaves:
Cast on 3 stitches and knit the first row.
Knit the next 3 rows, casting on an extra stitch at the end of each.
Knit the next few rows – I think I did three or four.
Then knit the following rows, decreasing the number of stitches by knitting two together once on each row.
Bind off when you reach a row that only has two remaining stitches – that’s it! They felt up so cute – it’s just the final shape that’s really important after they are felted.
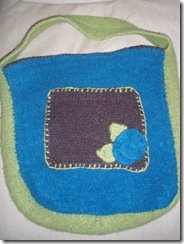
Here’s the finished tote completely felted (one side is blue, the other is brown):
I also added some blanket stitching around the pocket and top edge to keep the colors blending together. I think it’s so cute – and I can’t believe that I made the whole thing myself.
Hmm…I think I may be making some of these for Christmas presents…and if I do, I’d better start now (or make smaller bags)!


[…] the success of my felted purse, I decided to try to make another to give as a gift. I saw some beautiful multi-colored wool […]