Posted by Kathy Torrence on Oct 11, 2007 in
Cards,
Crafts Finally, last night I demonstrated this amazing star made from nested tag punches.
I won’t even begin to explain it here – I was just so impressed that SplitCoastStampers member Shadow Mill was able to develop this wonderful design!
Here’s a link to her original design on SplitCoastStampers (which also has a link to her instructions)…
And here’s my attempt at making the star:

I NEVER would have thought of this, but it really is beautiful. These stars would also be really pretty hanging as holiday decorations. Give it a try! 🙂
Posted by Kathy Torrence on Oct 11, 2007 in
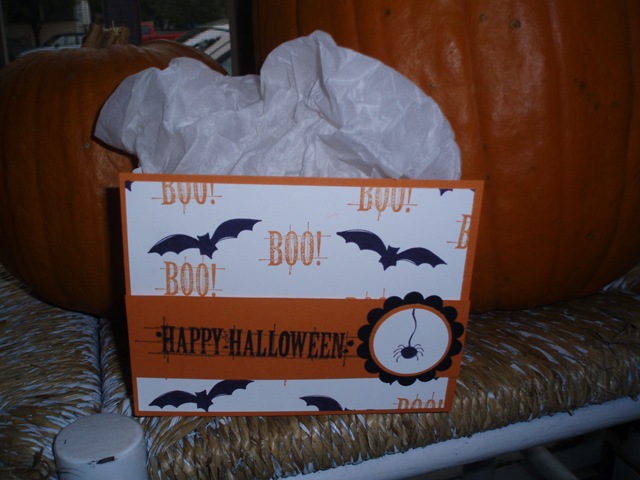
Crafts Also at Stamp Club last night, we made two make-and-take projects with very different feels from the same stamp set, Autumn Apparitions from the Holiday Mini.
First, we made this adorable genie bag, perfect for Halloween party favors:
These are simple to make – start with a plain lunch bag (I used a white bag for this project) and cut off the top (as much as you’d like to fit your treats).
Then cut two pieces of cardstock slightly larger than the bag and adhere one to the front and the other to the back. For this bag, I cut my cardstock to the standard card size (5 1/2 X 4 1/4) so that I could get four from each piece of 8 1/2 X 11 cardstock.
That’s really all there is to it – you can embellish the front (and back if you’d like) with whatever design you’d like. The nice part is that these bags will lie flat even after they are decorated which makes them easy to store and transport.
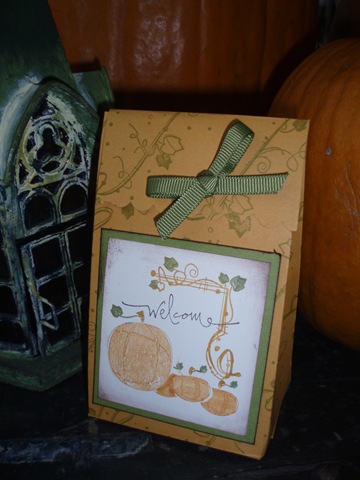
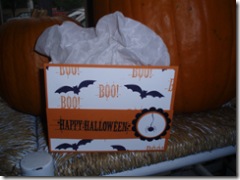
With the same stamp set, we also made this 2-5-7-10 box from a piece of 8 1/2 X 11 cardstock:

There is also a great tutorial on these boxes on SplitCoastStampers (did I mention that’s my favorite stamping website?) by Jenn Balcer. I met Jenn last year at Stampin’ Up! Leadership in Houston – what a wonderful girl! And a VERY talented stamper as well… 🙂
For this box, I also wanted to showcase a the matching Autumn Leaves wheel and work a little bit with masking. These boxes are perfect for filling with little treats as a small gift – with the holidays coming up, these are an easy and inexpensive way to create something special and heartfelt.
Posted by Kathy Torrence on Oct 11, 2007 in
Cards,
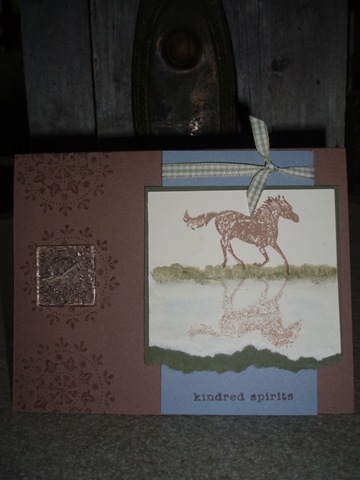
Crafts This is another very easy and yet very beautiful technique for creating what appears to be a reflection below a stamped image.
There’s another fabulous tutorial for this technique on SplitCoastStampers – this one is by Beate Johns. Although I have never actually met Beate in person, I have been a HUGE fan of her work for a long time.
Basically, you stamp your image onto cardstock, then stamp the same image onto a piece of acetate (a generic overhead transparency). Turn the acetate ink-side down and line it up under the first image. Then press down on the acetate, transferring the ink onto the cardstock.
Here’s Beate’s tutorial.
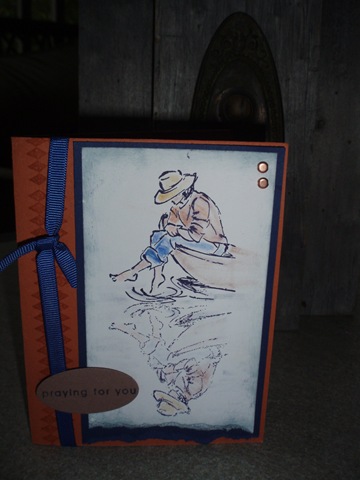
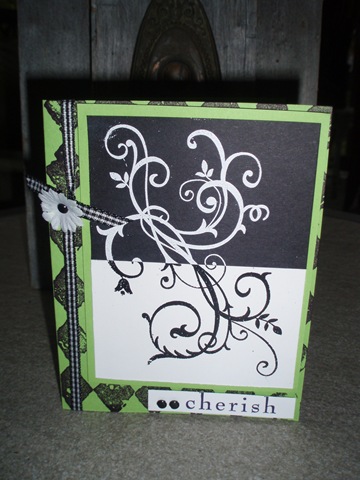
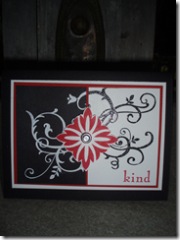
And here are my attempts at this technique:
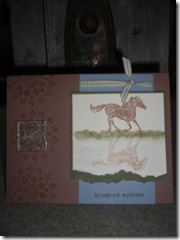
This card also uses a technique to emboss on a button. Using Versamark ink, I stamped the same image on the button as the background and then heat embossed it with clear embossing powder. It creates almost an etched effect. This card was also a make-and-take at Stamp Club last night. (I was so proud of myself using the ‘kindred spirits’ sentiment with the horse and the reflection…) 🙂
Here’s another card using the same technique but with a different stamp set, Summer by the Sea:
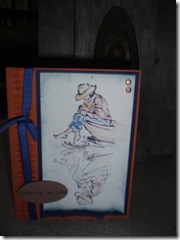
This just didn’t turn out the way I wanted – I was trying to go for some masculine, fall colors, but somewhere along the way, I lost my creative juices.
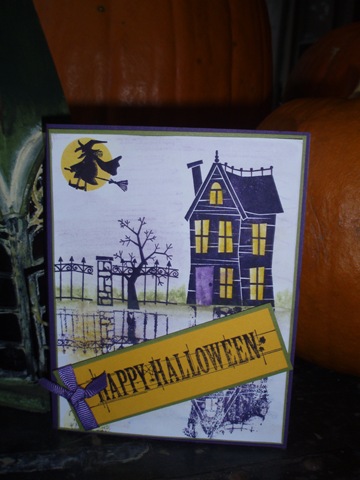
I also tried the technique with some spooky Halloween stamps:
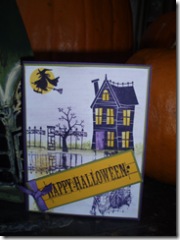
This is an addictive technique – once you start, you’ll want to try all sorts of images!
Posted by Kathy Torrence on Oct 11, 2007 in
Cards,
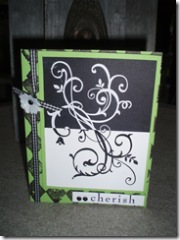
Crafts At Stamp Club this month, I also demonstrated the Split Negative stamping technique. The tutorial for the technique is wonderfully done on SplitCoastStampers by a dear stamper, Lori Craig.
Here’s a link to Lori’s tutorial.
I met Lori at Stampin’ Up! Leadership last year and I must say, she bears an extremely strong resemblance to my ex-husband’s wife, Clare. In fact, I kept calling Lori, “Clare”, all weekend at Leadership. And Lori was still kind enough to send me a beautiful RAK card after Leadership was over -thanks, Lori! 🙂
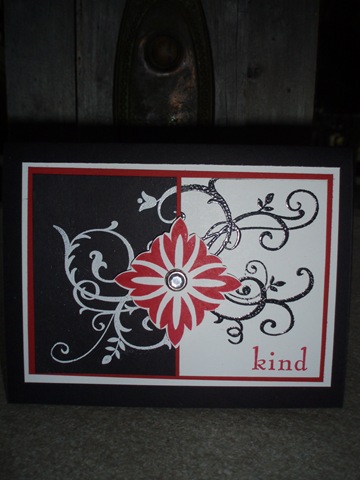
Anyway, here are my attempts at this technique:
Posted by Kathy Torrence on Oct 11, 2007 in
Cards,
Crafts,
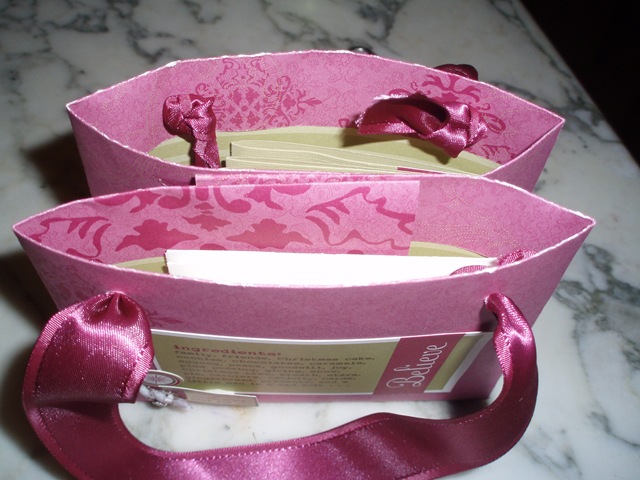
Other items This adorable project was shown to us at Regionals in Philadelphia in September.
I couldn’t find any instructions online, so I made these up out of my cryptic notes from the Seminar… 🙂
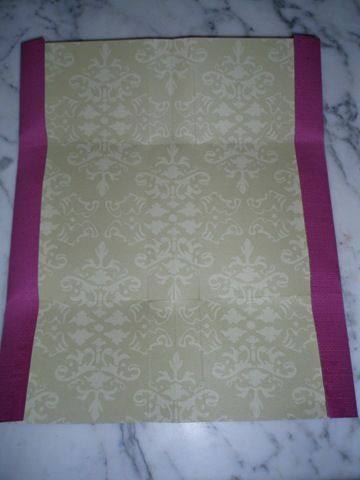
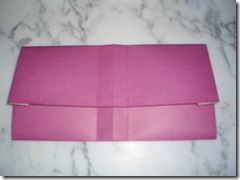
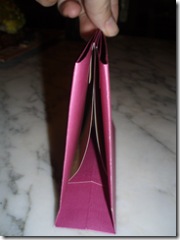
Here is a finished purse with 8 love notes and envelopes:

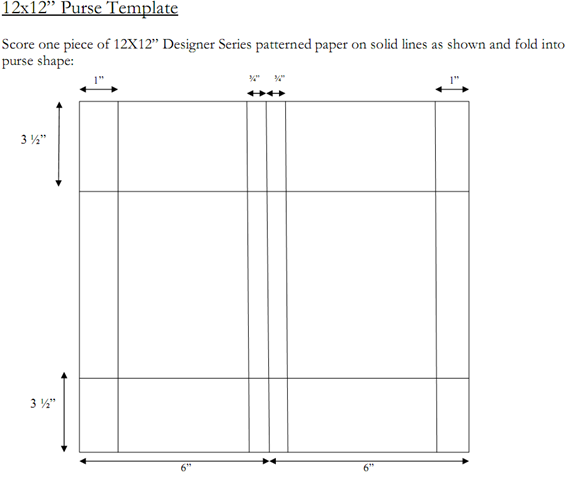
And here is the template for folding the paper for the purse:
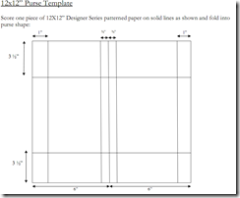
Essentially, you begin with a 12X12 piece of designer paper and score two ends at 1″ and the other ends at 3 1/2″. Fold the 1″ sides in first for a clean edge:
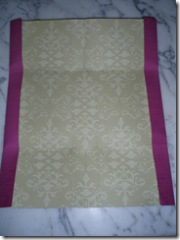
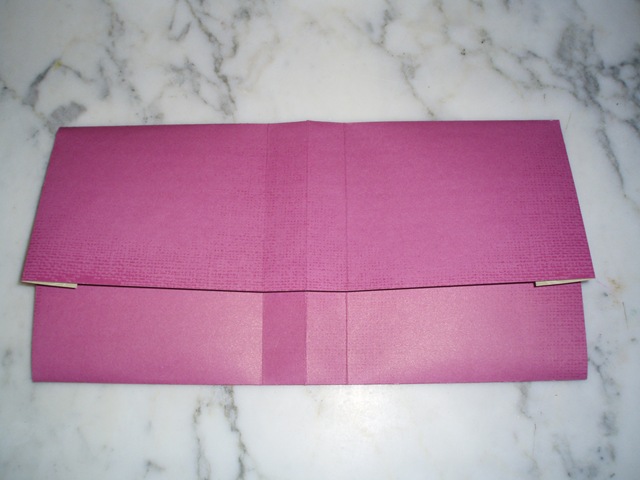
Then fold in the 3 1/2″ sides:
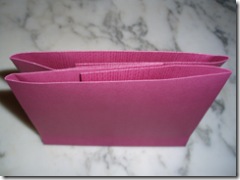
Next, fold in half to form the purse (all the other folds will be on the inside):

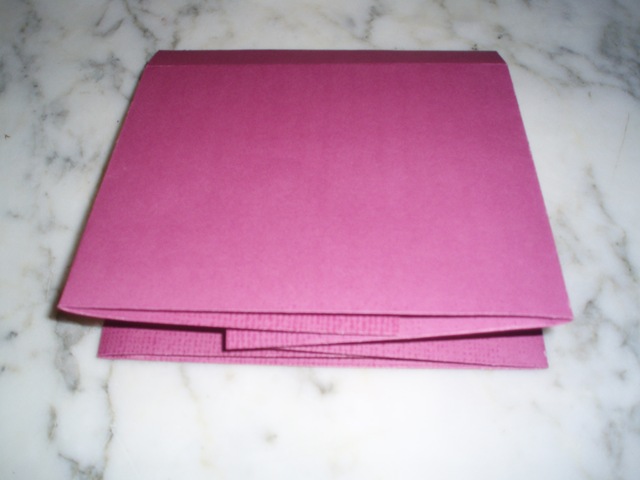
For a flat bottom, score out about 3/4 inch from the center fold on each side and fold:
This give you two pockets on the top of the purse:
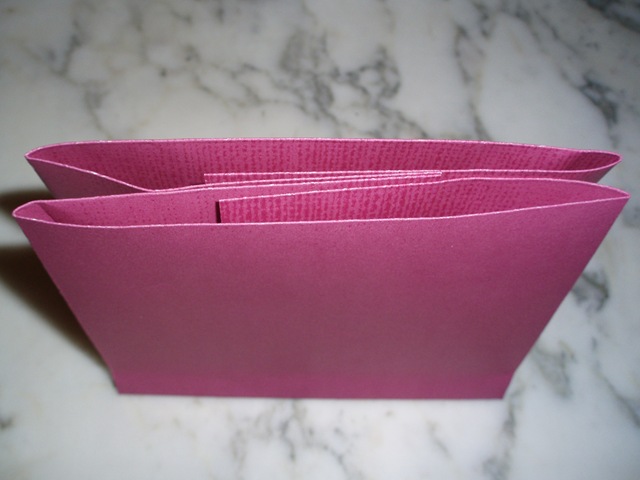
You can adhere the TOP of the inside (not inside the pockets – adhere the folded sides) to keep the purse together. If you go too low with your adhesive, you’ll ruin the shape of the purse.
At this point, you can add a handle with ribbon, embellish the front and place your love notes inside:

To create the love notes, cut a 12X12 piece of cardstock into eight 3X6 pieces. Fold each in half for a sweet little card, easy to decorate and embellish. I used the Hand Selected Accents and Elements from the Holiday Mini catalog.
Have fun!
Posted by Kathy Torrence on Oct 11, 2007 in
Uncategorized Starting this year, I’ve changed the format of my stamp clubs. Last night was the first meeting.
At my stamp clubs in previous years, everyone brought their own supplies and used the meetings as sort of a ‘card crop’ – working on whatever projects they were currently creating and borrowing my stamps and ink, if needed. I also provided one or two make-and-takes at each meeting for those who were interested in trying the project.
All the members were obligated to make a purchase every month and everyone took a turn as the hostess with the combined orders (all members had to commit to the club until all the ladies had a turn as the hostess).
I was having some trouble with people who couldn’t attend the meetings and then placed their orders late or gave me their orders but then didn’t have a chance to pay for them. As a result, I had to pay for a lot of orders up front out of my own pocket. And most months, the group orders were delayed a long time because I had wait to for all the orders to come in.
Not to mention that after two years of stamp clubs, I have so many members that keep buying supplies, meeting after meeting, and have no idea of all the things they can do with them.
One of my stamp club members recently held an outside workshop with some stamp club members there too. I realized that some of the club members had never even been to an actual ‘workshop’ before – they seemed to really enjoy the ideas and demonstrations.
But I find that that stamp club members are hesitant to hold an outside workshop because most of their stamping friends are also in the stamp club and purchase their supplies at the club meetings.
So…I decided to change the clubs this year to more of a workshop format. I charge $10 for the club meeting to cover the supplies and my time. I also take $5 off any purchase of $25 or more (if they decide to make a purchase), and put all the orders together for a ‘mystery’ hostess drawn at random each month. We’ll meet once a month and there’s no obligation to come every month. All orders will be placed that night so there will be no delay – I think it’s going to work out well.
I may have to limit the size of the club, I think. I had 11 women here last night, and it was a full house! It did take quite a while to complete all the projects, too – I may have to either simplify the projects or break the larger group up into two smaller groups.
I’m going to post the projects that we made in several different posts so this doesn’t get too long…
Posted by Kathy Torrence on Oct 11, 2007 in
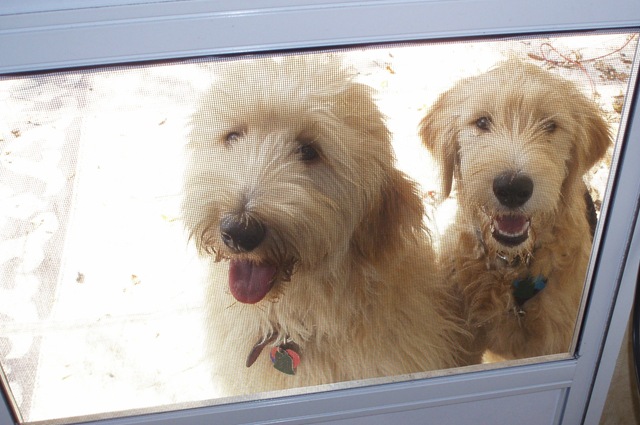
Our Goldendoodle Puppies Big news in our family – Geddy learned to sit and lay down!
Just look…Geddy….SIT!
Geddy…DOWN!
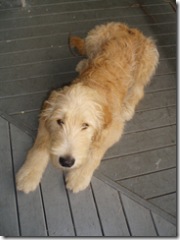
Hey – this is real progress from a dog that wouldn’t even come to us a few weeks ago! 🙂
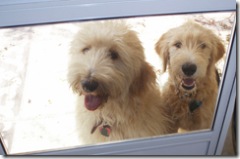
And he LOVES camping…look at these two cuties waiting at the door of the camper…
Although…apparently, Geddy is not too fond of the car. On the way to Lake-In-Wood last weekend, he drooled like crazy the whole way up and back. And I mean RIVERS of drool – soaked the whole dog bed in the back of the truck.
This weekend, we thought he would do better in the middle seat – and he did – no drool. Except…just as we pulled into the campground entrance, he threw up right on Matt’s lap!
So on the way home, we took the suggestion of another camper and gave him half of a Dramamine tablet before we left. Again – he did great – no drool. Except…just as predicted, he threw up right in Matt’s lap again just as we entered Mullica Hill (this time, Matt’s lap was protected with a large towel).
Any other suggestions for carsick dogs?
Posted by Kathy Torrence on Oct 9, 2007 in
Family Stuff I’d love to show you photos of all the fun we had camping this weekend. We planned on going to the corn maze, the New Holland fair, on a buggy ride, back to Shupp’s Grove, yardsaling, swimming in the pool and visiting with family while camping on this long holiday weekend…but then I got the flu and spent most of the weekend in bed IN THE CAMPER!
I did manage to go out to the Rubberbuggy Art Stamps and Supply store in Strasburg, PA on Saturday afternoon for a bit. I met my friends Denise and Marie there for dinner and some shopping. I bought some cool unmounted rubber stamp sheets and some Cuttlebug embossing folders – I’ll try some projects with them later this week when I feel better. The store also had some great demonstrations going on, but I felt so bad that I left early and went back to the campground – you KNOW I’m sick when I leave a stamp store early!
Posted by Kathy Torrence on Oct 4, 2007 in
Cards,
Crafts,
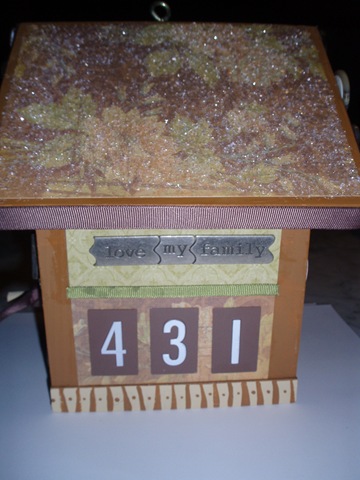
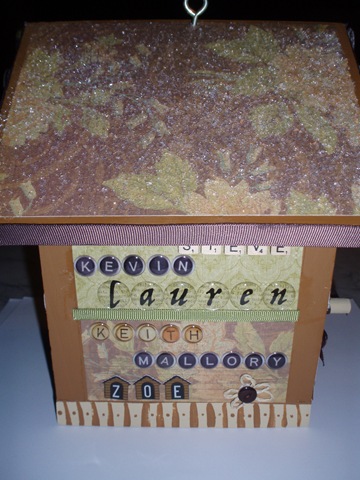
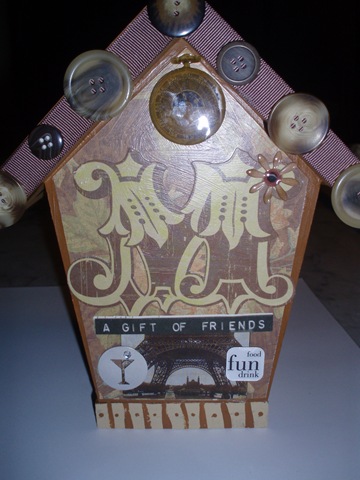
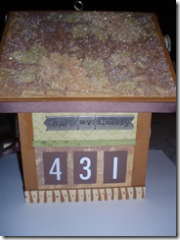
Other items It’s my friend Marie’s birthday tomorrow (Happy Birthday, Marie!) and I wanted to give her something special but something that didn’t cost a lot of money (I didn’t want to set that ‘gift precedent’ where she feels obligated to buy something for me on my birthday). I had a plain wooden birdhouse that I picked up a while ago and decided to alter it for her.
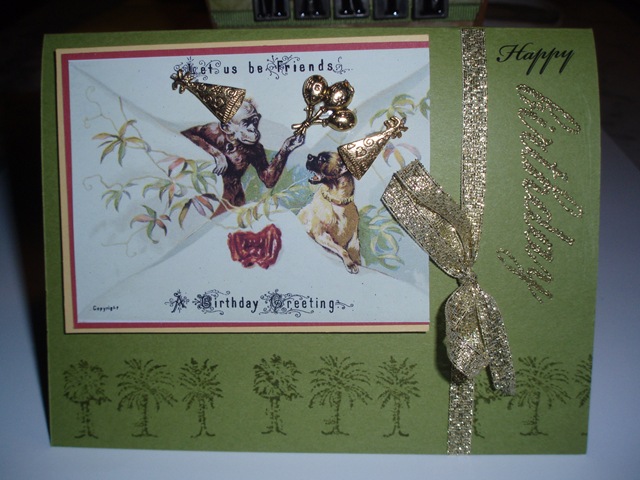
But wait – first, let me show you the card. I’ve mentioned before how much I love Paula’s Kit Club – I had a GREAT reproduction vintage postcard and some charms that I’ve been wanting to use from her birthday kit:
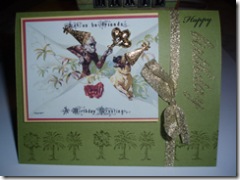
I just LOVE this monkey and dog! And I thought they needed some party hats and balloons, too.
But back to the birdhouse – I started by painting it a coffee color. Then I took some K & Co. paper and decoupaged all the sides and the roof, leaving a border around the edges for the paint to show through. I also painted the bottom border with a sand color and added some stripes and polka dots.
Once the birdhouse was covered with paper, that’s when the real fun began – embellishing! I also added some thick, grosgrain ribbon around the edge of the roof and some thinner grosgrain ribbon to the front and sides. I added some glass glitter to the roof top and some buttons to the front and back edges.
I wanted to make the birdhouse about Marie, so I put her name on the front on top of a little frame around the bird hole:
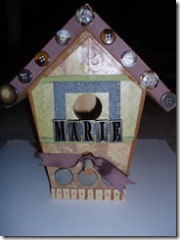
The colors look a little dull in the photos, but they are much softer in person.
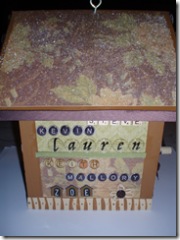
On one side, I added some tiles with her address and a little family embellishment:
And I added the names of her family and dog on the other side:
On the back, I put her initial, a repro postcard of the Eiffel Tower (she loves Paris), a little martini glass charm (need I say more?) and even a little watch sticker because she and her husband run a watch repair business:
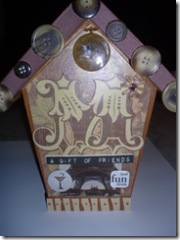
I had WAY too much fun making this project – it was nice to get to play with some of my other supplies and embellishments.
Watch out – who knows what I will be embellishing next!
Posted by Kathy Torrence on Oct 2, 2007 in
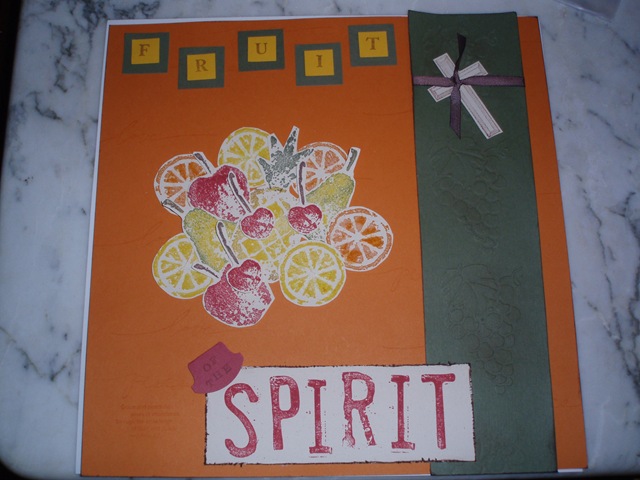
Scrapbooks As I’ve mentioned before (at least I think I mentioned it), I coordinate a monthly Scrapbooking Ministry at my church.
We are scrapbooking the “Fruits of the Spirit” this year and last month, we made the title page for our scrapbook:
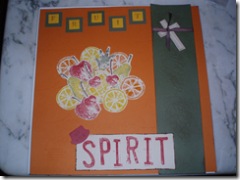
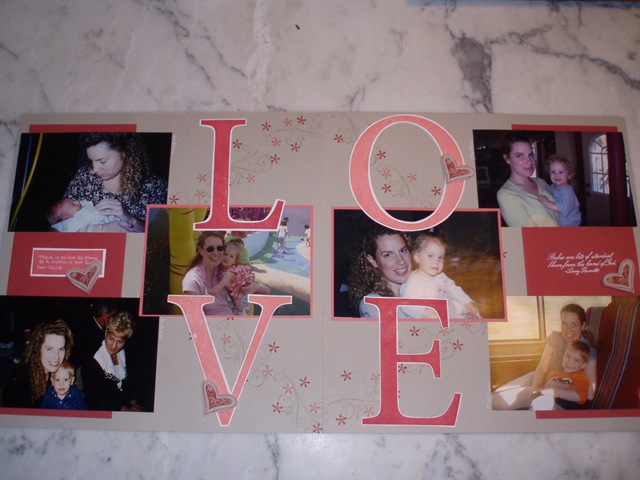
This month, we will be talking about “love” and I designed a make-and-take scrapbook layout depicting love in our lives. I decided to design all the layouts to use whole 4X6 photos uncropped to make it easy for attendees to just drop their photos right on the page after we’re done.
Because I don’t know exactly how many people will attend, I have to be very flexible on my make-and-takes – I usually use just cardstock with few embellishments (I may not have enough for everyone).
I sat down this morning to design my layout and decided to use photos that show the love between a mother and child – photos of me with each of my children as babies.
Here’s what I came up with:
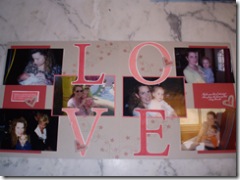
The two photos on the left are me and Andrew, the two photos on the right are me and Matt and the two photos in the center are me and Emily.
I used the Priceless Stampin’ Up! stamp set (LOVE that set) and stamped swirls and flowers onto Sahara Sand cardstock. I stamped the monogram letters and cut them out for the title and added a little bit of journaling and some cut-out hearts popped up on some dimensionals for a little texture.
This layout could also be used to showcase other ‘love’ photos – husbands and wives, pets, things we love, places we love…whatever love means to you.
But I had so much fun looking at photos of my children as babies! I may try to finally catch up on their baby books someday soon…