Posted by Kathy Torrence on Feb 23, 2007 in
Cards Here are the cards I will be offering at my Stamp-A-Stack on Monday, February 26th. Remember, these are purposefully simple, quick and easy cards so that all of my attendees can move around from station to station quickly. I also have to use few embellishments since I make so many cards (I made 100 this morning) – it’s almost impossible to have that many of any one embellishment. Another criteria – no two cards can use the same colors of ink or markers so that I can keep the stations separate. It can be quite a challenge when making these cards!
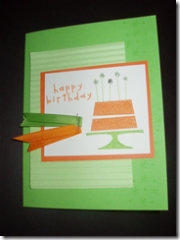
I like this bright and cheery card using the Eat Cake stamp set. It works for a young boy or girl and will even work for an adult birthday too. This card uses Green Galore, Gable Green and Only Orange.
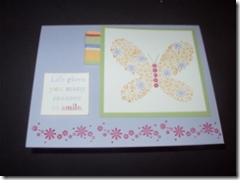
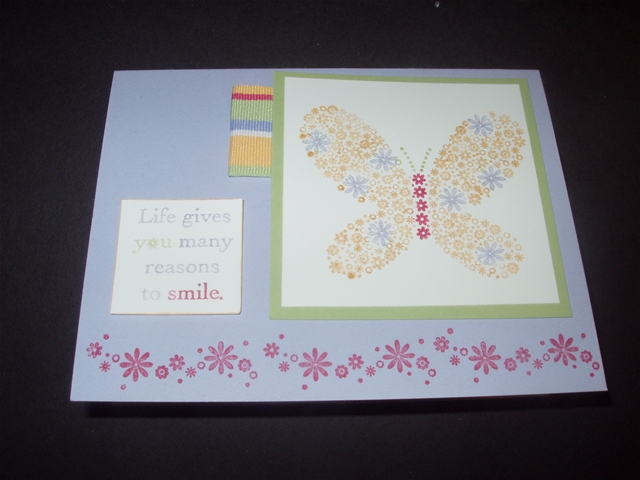
This card has such beautiful colors. I colored in the butterfly and sentiment using markers. Here’s a hint for this card – stamp OFF the images before stamping them onto the paper. The markers tend to be a little juicier than the ink pads. This card uses Almost Amethyst, Apricot Appeal, Rose Red and Certainly Celery.
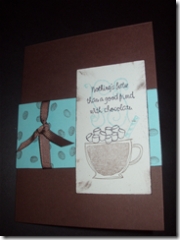
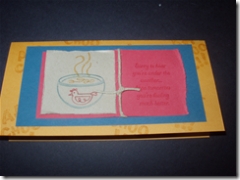
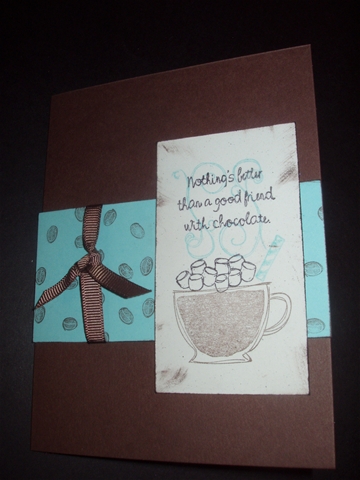
I just love this Like It a Latte stamp set – I’ll miss it when it’s gone! This card uses Chocolate Chip, Cool Caribbean and White Naturals.
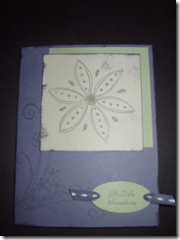
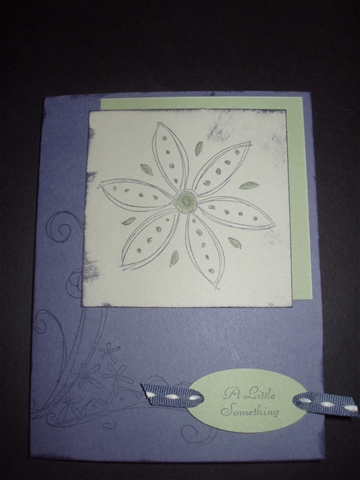
I love the Doodle This stamp set – I can’t wait to start demo-ing the Spring Mini! I also had a bunch of the Vintage Violet paper (I ordered an extra pack by mistake) so I wanted to try to use it up. This card combines Vintage Violet, Sahara Sand and Mellow Moss.
This was my favorite card from the Stamp-A-stack. I love the colors together(More Mustard, Not Quite Navy and Ruby Red). The card is a 3X6 size which will fit in the small open-end envelope.
I have 10 ladies coming and everyone will make 2 of each of these cards. I have the pieces cut and ready to go – I hope they like the cards!
Posted by Kathy Torrence on Feb 23, 2007 in
Crafts I’m going to be holding a Pearl Ex Technique Class on Sunday, and I thought I’d share some of the info here.
My technique classes are quick and simple – we don’t make any projects; we just go over 4-5 different ways to use the product or technique. Then each person makes a small sample using technique and puts them onto the front of large tags. On the back of the tags, I give each person a set of written instructions for how to achieve the effect on the other side. Then they are putting all the tags onto key rings (given out by me) so that they’ll have all the info available when they’re looking for a technique to use on a project. This is the 5th class in the series.
I have so many customers who have no idea how to use Pearl Ex – and it lends such a beautiful effect to projects! So here are a few simple how-tos.
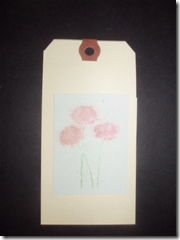
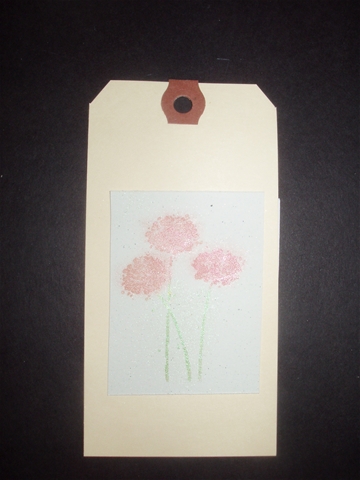
First, a simple way to use it is a technique I call “Poppin’ Pearl Ex” – similar to the “Poppin’ Pastels” technique. To do this, you stamp an image onto cardstock using Versamark ink, then rub the Pearl Ex powder over the image with either a sponge dauber, paint brush or Q-tip. The Pearl Ex powder will stick to the inked image and you’ll get a result like this on white paper (I used an amber Pearl Ex on the flowers and a green Pearl Ex on the stems in this example):
Or a result like this on dark paper:
The image shows up like magic – it’s a really fun technique.
The Versamark ink acts as a fixative – you don’t need to seal the image when using this technique.
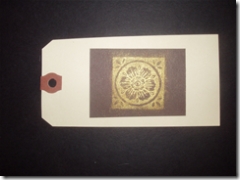
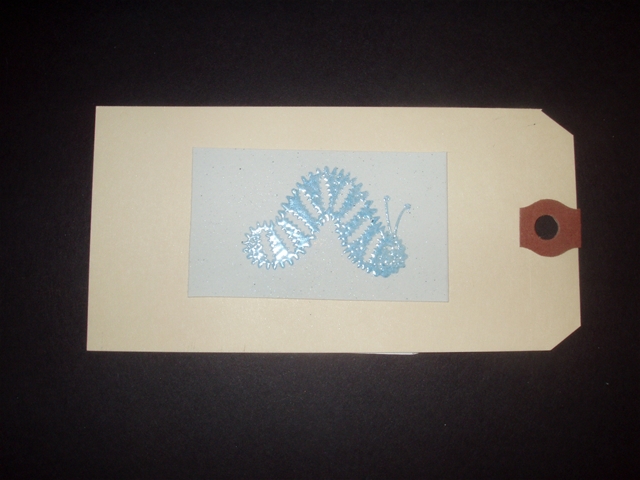
Another way to use Pearl Ex is to mix it with embossing powder. For this sample, I’ve mixed blue Pearl Ex with clear embossing powder and applied it to an image stamped with Versamark and heat embossed it:
It gives a really pretty pearly effect to the embossed image. Again, the Pearl Ex does not need to be sealed for this technique.
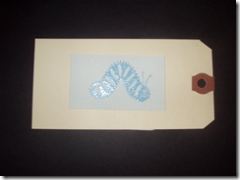
You can also ‘paint’ with Pearl Ex by either mixing it with plain water as I’ve done here:

I embossed the image with black embossing powder, then just dipped my damp Aquapainter directly in the Pearl Ex powder and applied it to the image. It looks messy in the photo (I must have some stray powder that caught the camera’s flash), but it looks really pretty in person. In this case, you do need to apply something to adhere the powder to the paper (cheap hairspray works well).
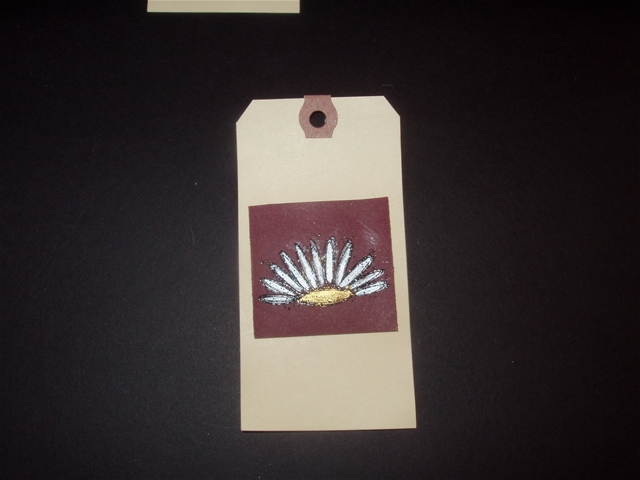
Finally, you can also mix Pearl Ex powder with a paint such as Lumiere and water and apply it with a watercolor brush:
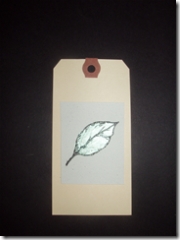
It’s kind of hard to tell in this photo, but the leaf is embossed with black embossing powder and is colored in with a beautiful pearlescent glow (I used green Pearl Ex for the leaf). In a small bowl, I mixed a little bit of Lumiere with enough Pearl Ex until I got the color I wanted. Then I added just a few drops of water to make it easy to paint with. I applied it to the leaf with a small paint brush in small strokes, then set it aside to dry. No fixative required here either – the paint will hold the powder.
I hope my technique class goes well!
Posted by Kathy Torrence on Feb 23, 2007 in
Cards,
Crafts,
Other items,
Scrapbooks This has been some crazy week for me! After I finished putting the floor in, there was this one little piece that was not quite perfect and it was really bugging me. Of course, I can’t leave well enough alone, so I had to try to fix it – and that was when I cut my finger! I should have gotten stitches, I guess (it’s been bleeding now for almost 3 days), but I really don’t have time – here’s why…
First, my daughter Emily and I both have the flu and feel crummy.
And I think I’ve slightly overextended myself as far as stamping events go – in fact, I’ve done so much, I’m going to have to post my samples in at least 3 different posts today.
I have a workshop tonight (someone called last minute and in my sick delirium, I said I’d do it) and another tomorrow afternoon. Then I have a Pearl Ex Technique class on Sunday afternoon and a Stamp-A-Stack on Monday night. Am I crazy!?!?!
But…after focusing on everything today while my poor sick daughter was vegging out by the TV, I am now prepared for all the events.
Oh, and I got an email from one of my friends that several of my cards are in the Spring issue of Take Ten Stamper’s Sampler – but I didn’t get a comp copy and I can’t find it in any of the stores. I called them this morning and they said they had a mistake with my zip code, so they’ll be mailing it out shortly. I’ll post which pages I’m on as soon as I get it.
Meanwhile…I thought I’d first post the projects I’m going to be using at my workshops this weekend. I’m going to do the same projects at both workshops, and my focus is going to be ‘quick and easy’ cards and scrapbooking.
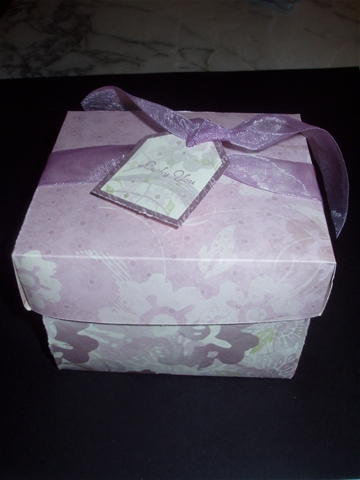
First, here’s a little box I made that I’m going to use as a door prize with an incentive stamp inside:

No adhesive required on this one -just score and fold. I used the GORGEOUS Enchante paper from the SU! Winter Mini – I’m really going to miss it when it’s gone next month!
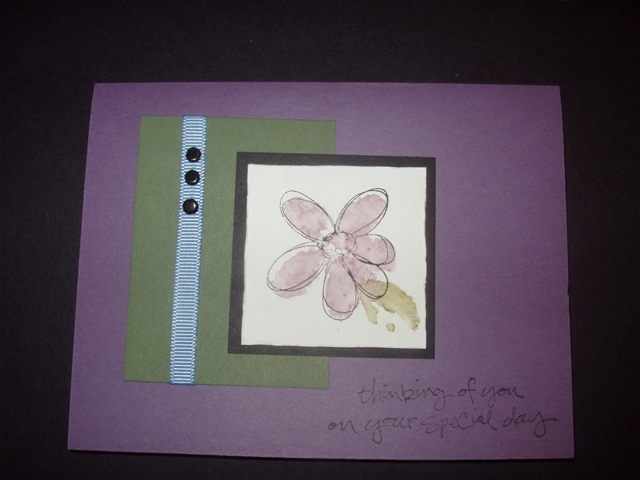
Next, I’m going to show off our Simply Sent kits and show how easy it is to make the completed card for this kit:

I haven’t been selling many of these, and I think they’re a good deal for those who just want to make some quick and easy cards. Plus, this particular one gives me a chance to demo how to use the watercolor crayons.
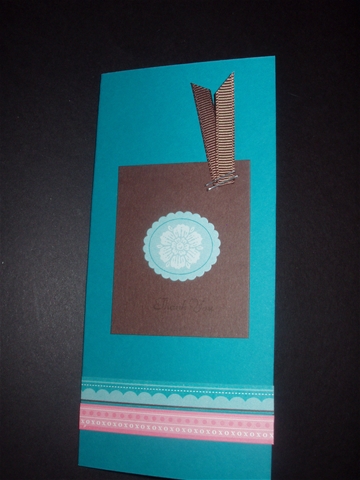
Then, talk about easy, I’m going to make a simple card using the stuff from Accents and Elements:
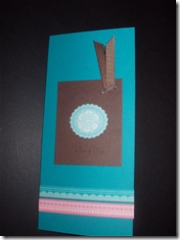
This card goes together in about 2 minutes and is simple, but pretty. The size of this card is different – 3X6 – perfect for the small open-ended envelope.
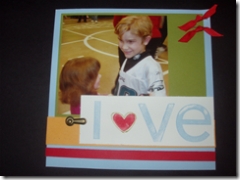
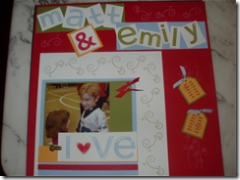
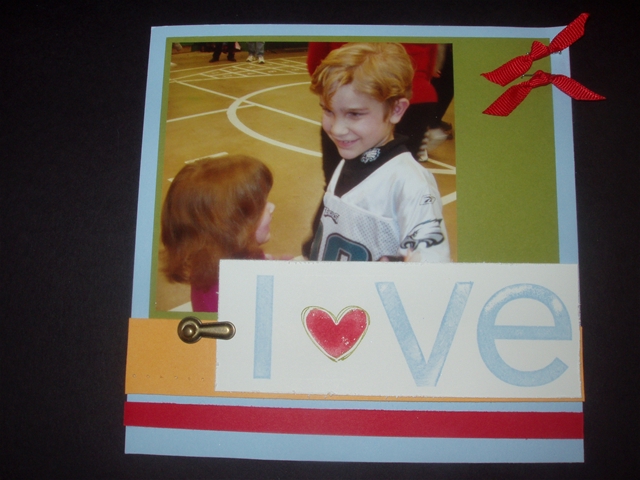
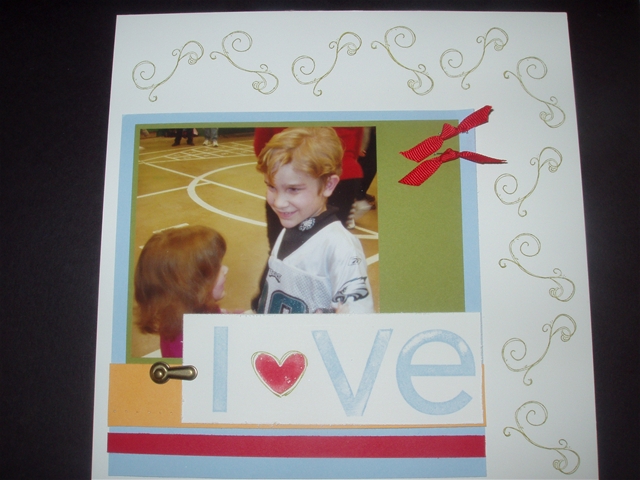
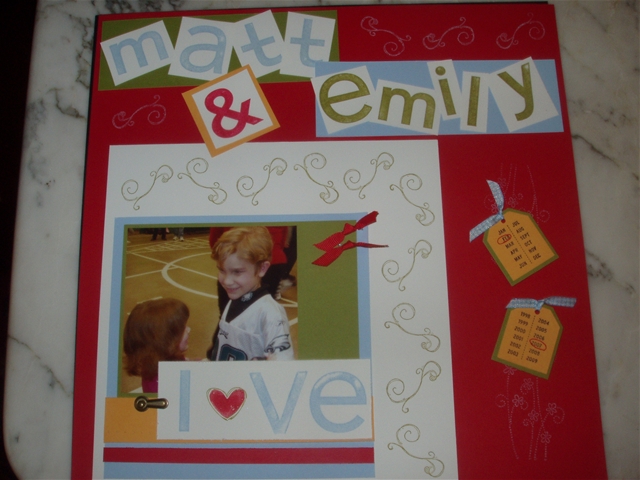
Then for the make-and-takes, we’re going to make a small 6X6 scrapbook page:
Then I’m going to show how to easily convert it to an 8X8 page:
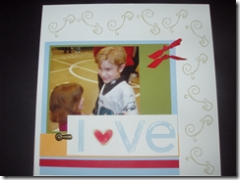
(Those doodles are the steam swirls from Like It a Latte) And then to a 12X12:
Then we’re also going to do beaded pens for a make-and-take:
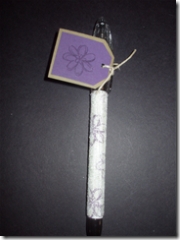
These are so simple and so much fun! You stamp an address label and wrap it around the base of the pen then cover it with double sided tape and roll it into clear microbeads. These ladies have a demo every year and I thought I’d try to do something besides the normal card make-and-takes.
Hopefully, the workshops go well. Now I’m going to post some samples/tutorials for my Pearl Ex Technique class…


