Posted by Kathy Torrence on Nov 19, 2007 in
Cards,
Crafts,
Other items I haven’t posted for a while, but I’ve certainly been busy! I’ll do a few posts to catch you up on my latest projects…
I’ve been trying to keep up with all of the SplitCoastStampers challenges this week – I just haven’t had time to post the cards. So here they are…
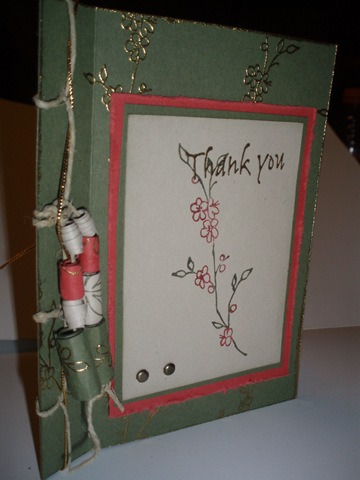
First, last week’s technique challenge was to use “Japanese stab binding” on a card. Here is my sample:
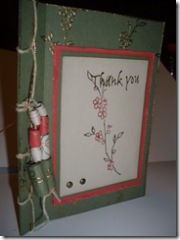
Once you get the hang of it, this is an easy technique, but I have to admit – it took me quite a few tries to finish the binding! I used hemp twine for the binding and then decided to dangle a few beads from the twine to keep with the Asian feel of the card.
Of course, these are no ordinary beads – they are made of rolled paper! I took some small strips of cardstock (1X5 inches for the largest bead) and stamped them or inked them, depending on the look I was going for. Some papers were also stamped and embossed with gold embossing powder. Then I conditioned them between my thumb and forefinger to make them easy to roll. I applied glue to the backs of the paper strips (bookbinding glue from www.ClubScrap.com) and then rolled the strips around a thin wooden dowel to form the bead. It’s amazing – after they dry, they harden so much that it’s impossible to tell that they are even made from paper!
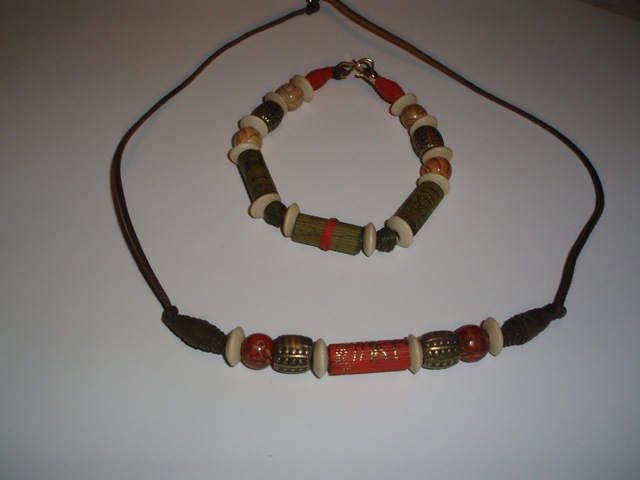
I got this idea from ClubScrap and actually used their project kit and templates to make the following necklace, bracelet and earrings:
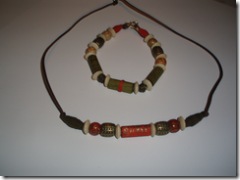

The paper beads are mixed with regular beads from the kit – it’s hard to tell them apart! I made some more paper beads this weekend using some of Stampin’ Up!’s designer patterned paper – hopefully, I’ll have a project and tutorial incorporating those to show you soon.
I have more jewelry to show you later – let’s get back to more challenge cards…
Our Featured Stamper for last week’s challenge was SplitCoastStampers member StampOwl. Such an extremely talented stamper! Here is her card that I chose to CASE and here is my CASEd card:
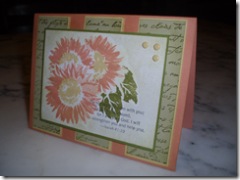
Her original used the Wild Rose stamp set and a weathered background – I substituted the Serene Sunflower stamp set and the Linen background. I like this combination of Groovy Guava, Old Olive, So Saffron and River Rock – I may use it again.
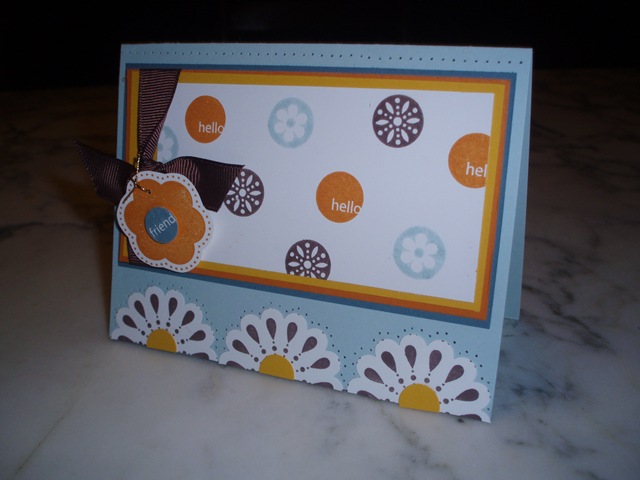
The Inspiration Challenge used an E-card as the inspiration piece: Here is my take on the piece:
Another cool color combo of Soft Sky, Chocolate Chip, Summer Sun and Pumpkin Pie – this was a fun card to make.
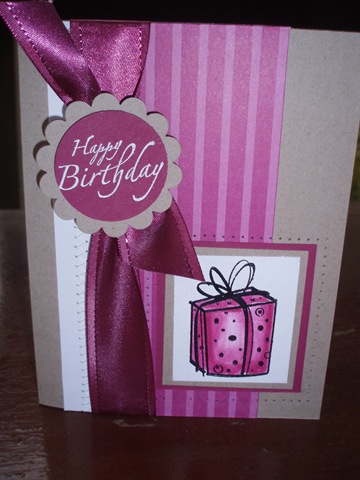
For the Color Combination challenge, we were to use Kraft, white and Purely Pomegranate on a card. Here is my sample:
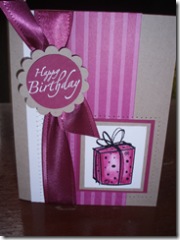
The gift image is watercolored and the white strip of cardstock is sewn with a zigzag stitch and white thread.
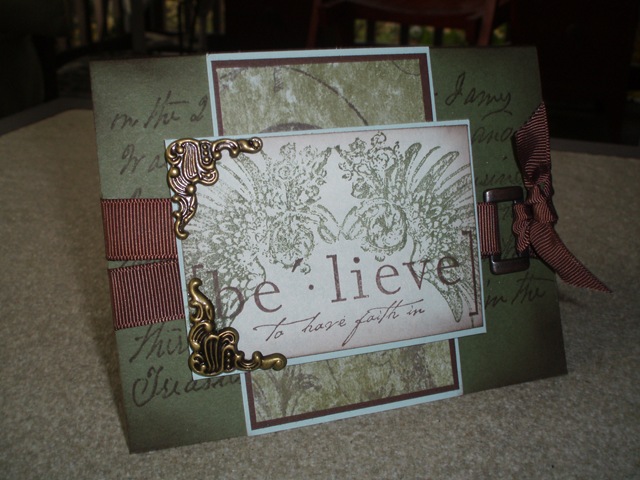
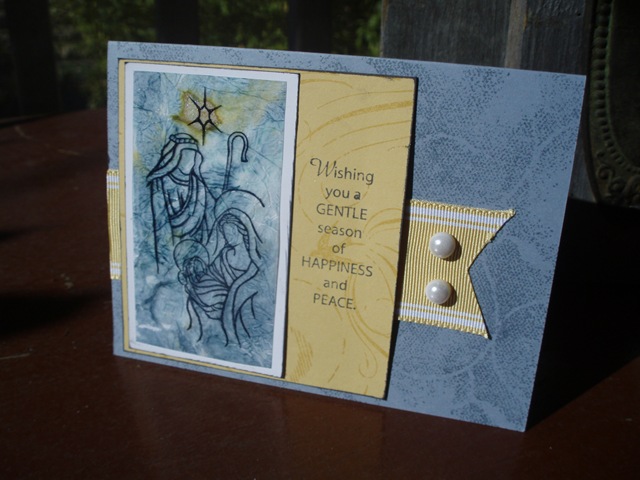
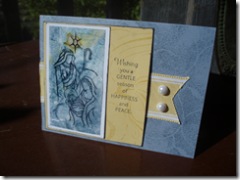
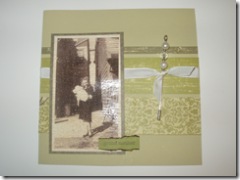
I was so inspired by the Sketch Challenge this week, I did two cards with two very different feels:

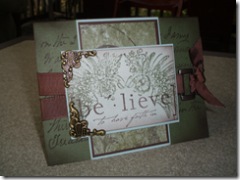
This card uses unmounted stamps from Stampers Anonymous (my first time using them) and paper from Basic Grey. I really like the way the wings combine with the sentiment and I also was happy with the way the ribbon wrapped around the buckle.
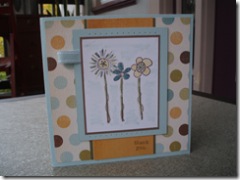
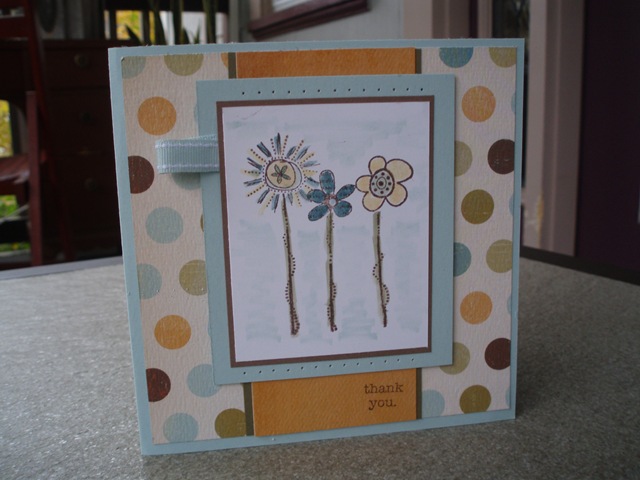
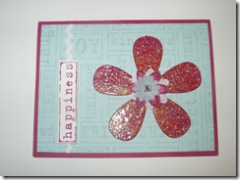
This card was made using some acrylic stamps from Autumn Leaves that I picked up from a Target clearance bin the other day for $1.63! It did take me quite a few tries to get the image to stamp nicely (I’m going to have a hard time converting from rubber stamps to acrylic), but I thought the flowers are fresh and cute. The main image is watercolored and the background paper is from My Mind’s Eye.
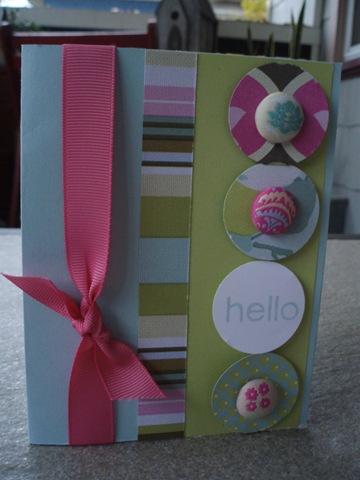
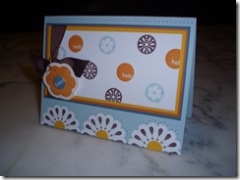
For our Ways To Use It Challenge, we were asked to use unique brads. I made this simple card:
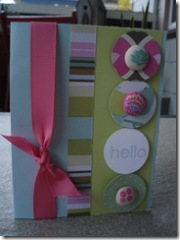
I had some brads and paper from K & Company/ Amy Butler that I purchased at the Creating Keepsakes convention this summer – I’ve wanted to use them and this was a great challenge for these supplies! I just punched out three circles from various patterned papers and inserted the brads through the middle and added a white circle with a stamped sentiment – very easy!
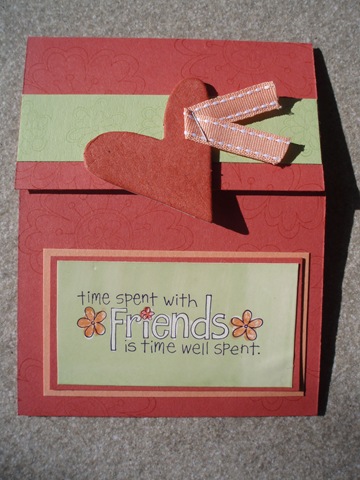
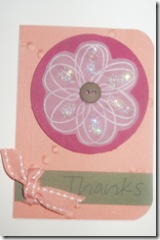
Finally, we the Limited Supply Challenge was to make a ‘Pick Me Up’ card using a heart image, no more than three stamps and limited layers with one embellishment. Here’s my card:
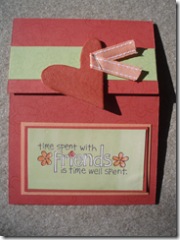
I decided to use the new Time Well Spent stamp set that all Stampin’ Up! demonstrators received for free last week – thanks, SU! I used the wax resist technique for my main image. For this technique, I stamped the sentiment on glossy cardstock with regular classic black ink and then highlighted the words and flowers with a white crayon. I brayered Certainly Celery ink on top of the whole thing and then wiped the ink from the parts colored with the crayon. I also went back and added some color to the flowers and adhered the matted piece onto the bottom fold of the card.
I also stamped a large flower on the entire card (hard to see in the picture) as well as a small flower on the celery strip of cardstock. I then added a chipboard heart inked with Ruby Red ink as a closure for the card.
Whew! Now that we’re caught up on last week’s challenges, I’ll show you what else I’ve been up to…
Posted by Kathy Torrence on Nov 6, 2007 in
Cards,
Crafts,
Other items At our last stamp club meeting, I demonstrated the ‘reflection’ technique using a piece of acetate (AKA – an overhead transparency). My friend Denise mentioned that she has a whole stock of acetate sheets at home – I promised her that this month’s stamp club would give her some new ideas on how to use them. I’m calling it “All About Acetate”!
Note: If you are attending my stamp club meeting tomorrow night and want to be surprised with the projects, read no further! 🙂
First, I’m going to show a simple make-and-take acetate card. Here’s the project they will be making:
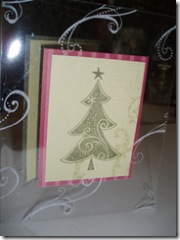
To make this card, we’ll take a sheet of acetate and fold it in half, stamping the swirls with white StazOn ink. Then we’ll stamp the tree image onto the smallest piece of paper. We will adhere the paper to the front of the card, then adhere a slightly larger piece of paper behind it to the OTHER side of the acetate – this way, no adhesive will show. Next, we’ll add a slightly larger piece of paper to the right side of the open card as a place to write a greeting. Finally, we’ll add an even slightly larger piece of paper to the very back of the card – again, to the other side to hide the adhesive.
I am also going to demonstrate the ‘acetate and tissue’ technique with this card that I’ve posted before:
For this technique, stamp your image onto a piece of acetate with StazOn ink. Then on the reverse side, add some color with a few drops of re-inkers, then coat the back with Crystal Effects. Rub it around with your fingers, then add a little glitter, if you’d like. Apply a piece of crinkled tissue paper on top of the glue/ink mixture and allow it to dry. Then trim the tissue paper and adhere to your card.
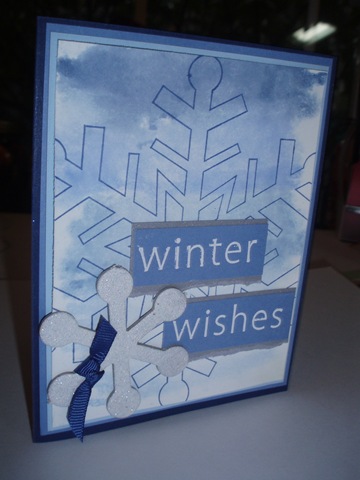
Another way to use acetate is with the “smackin’ acetate” technique. Here’s the card I’m going to demonstrate:
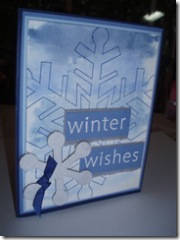
For this technique, take your acetate and scribble on the back with several colors of markers. Then spritz the acetate with water and press onto a piece of neutral colored cardstock. You’ll get a nice watercolor background. You can keep the acetate on top, or just stamp right on top of your background as I’ve done here.
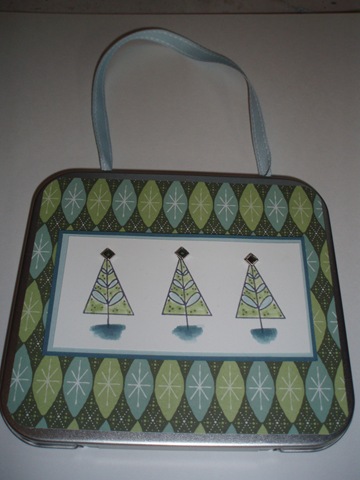
You’ll notice that I’m using a lot of blue for Christmas this year – I’m just trying to branch out from the usual green and red. In fact, I’m also going to show this little purse I made out of a Stampin’ Up! tin:
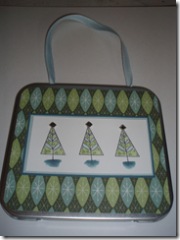
The Crop-A-Dile is great – it just punches right through so I can add a ribbon handle!
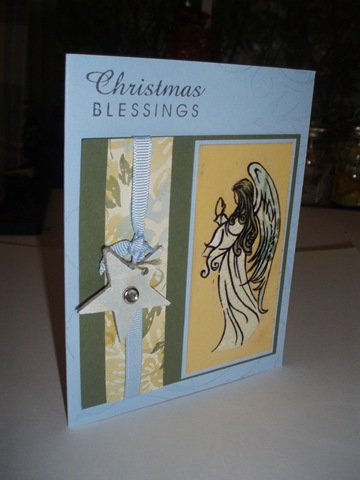
Anyway, back to acetate. I am also going to demo this card:

If you look closely, you’ll see that the angel is stamped on acetate and her hair, robe and wings are each made up of different patterns. To achieve this effect, I stamped the angel on several different types of patterned paper in addition to the acetate. Then I carefully cut out the different pieces from the patterned paper and adhered them behind the acetate, lining up the pieces. Here’s a hint – stamp the patterned paper on the REVERSE side so that you won’t see the stamped lines under the acetate. To get the pieces to stick to the acetate, I ran the acetate angel through my Xyron machine. It’s kind of a interesting, stained glass look, but with patterns instead of solids.
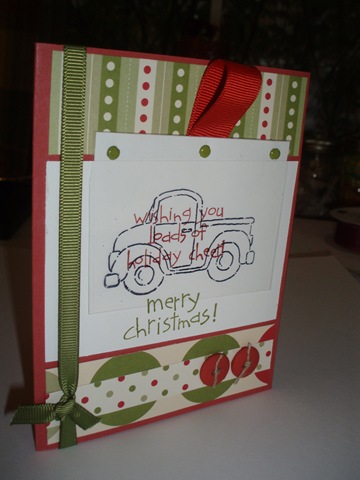
Here’s another way to use acetate – “magic cards”. On these cards, the image stamped on the acetate is black and white, but when you pull it up, it appears to be colored in.
Here’s my sample with no color:
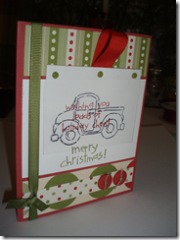
The sentiments are stamped behind the clear acetate panel with the truck. When you pull it up…
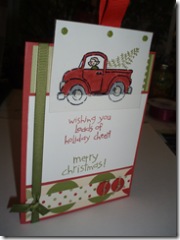
The truck is colored in. To achieve this look, you stamp the truck twice – once on the acetate panel and again on a neutral cardstock. Color in the image on the neutral cardstock and place another piece of cardstock between them to hide the colored image, attaching the acetate and colored image at the top. When you pull the piece, the acetate will lay on top of the colored piece (make sure they line up), coloring it in like magic!
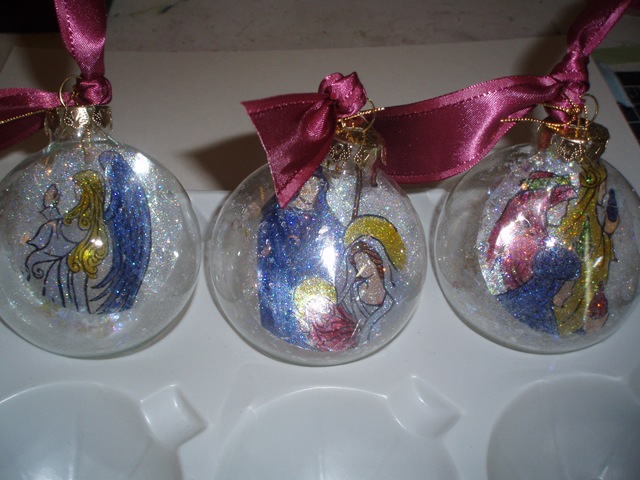
For a second make-and-take, we will make a Christmas ornament using acetate. The make-and-take will be a simplified version of these:
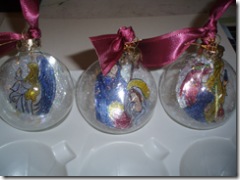
The first step is to stamp your image onto a piece of acetate using StazOn ink. Cut the image into a circle slightly smaller than the ornament (I used a Coluzzle for this step). Next, color in the reverse side of the image with permanent markers (I recommend Sharpies). You can stop here, or for a little extra bling, coat the back of the image with a thin layer of Crystal Effects and sprinkle on a little Dazzling Diamonds glitter.
After the glue has dried, roll the image into a tube shape and insert it into the ornament. If your acetate circle is small, punch a hole in the top of the circle and tie it to the top of the ornament with some ribbon or cord to keep it from falling over.
You can also add a little glitter, snow or whatever other embellishment you’d like inside the ornament.
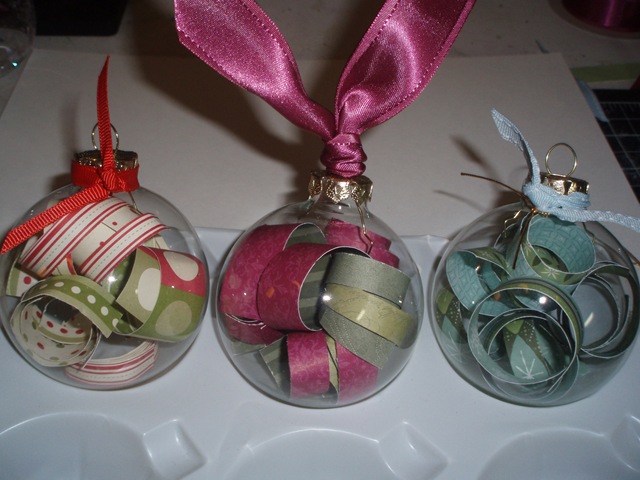
Here’s another idea for these glass ornaments…fill them with rolled patterned paper! Just roll the paper around a pencil and insert the rolls into the ornament:
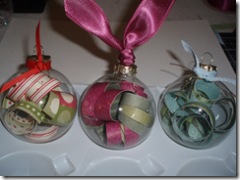
How fun and easy is that?!?! I think I’m going to make a centerpiece with these for the holidays this year.
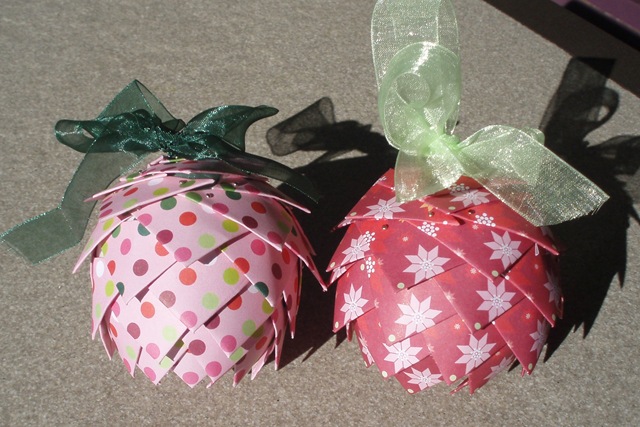
Slightly off topic, but another easy ornament idea – take a foam ball and some pins and tack in small pieces (1″ X 2″) of paper folded into points:
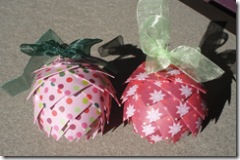
The result is an ornament that kind of resembles a pinecone – a great project for older kids, too!
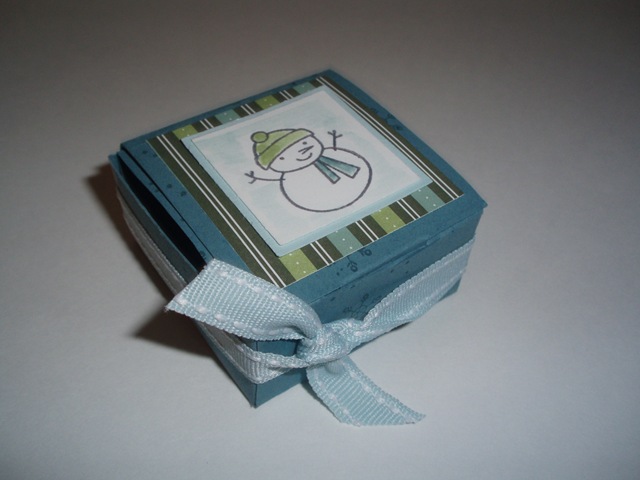
Okay – one more acetate project…here’s the last make-and-take:
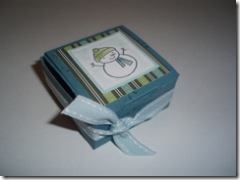
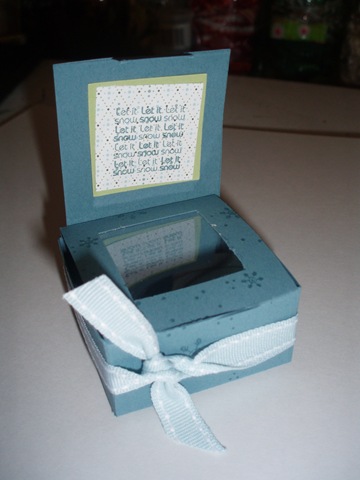
It’s this adorable little box – perfect for party favors! This box is really tiny – only about 2″ X 2″ – and on the inside:
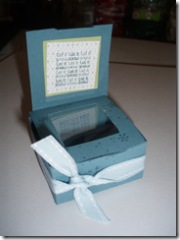
Is a little acetate peek-a-boo window to show off the treasures! I got this template from SplitCoastStampers’ user Qbee – here’s a link to the thread with the box template.
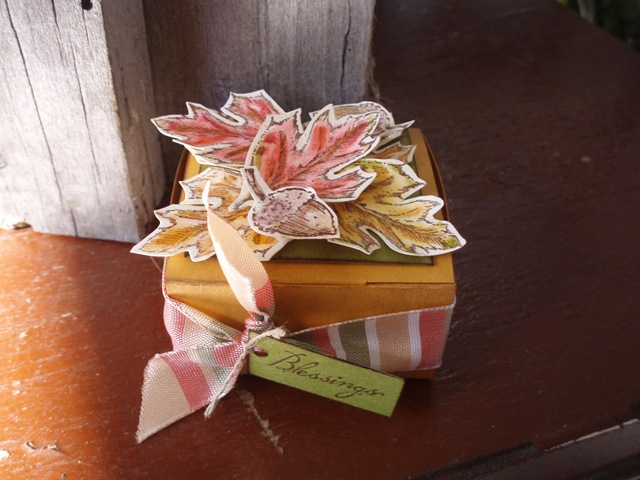
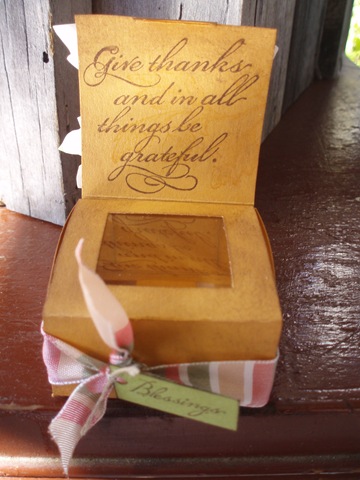
And here’s another version that I made:
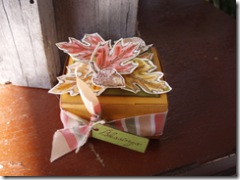
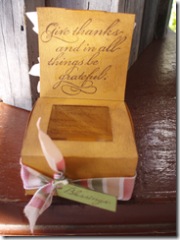
How cute would this be as a place card for Thanksgiving?
Whew! That’s a lot of projects to show – I hope we’ll end at a reasonable time this month – and I hope everyone enjoys the projects, too!
Posted by Kathy Torrence on Oct 11, 2007 in
Cards,
Crafts,
Other items This adorable project was shown to us at Regionals in Philadelphia in September.
I couldn’t find any instructions online, so I made these up out of my cryptic notes from the Seminar… 🙂
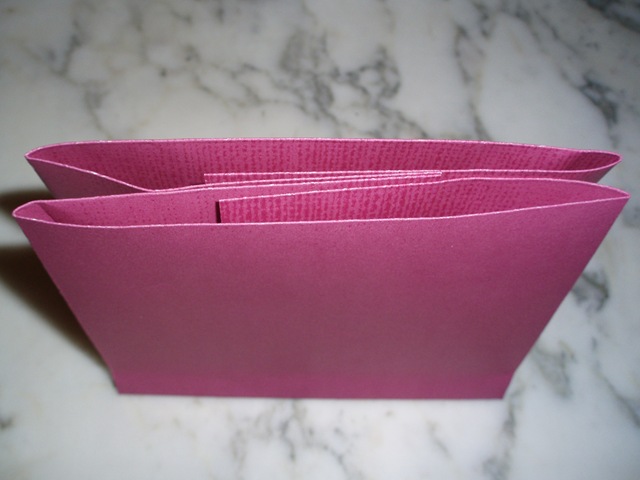
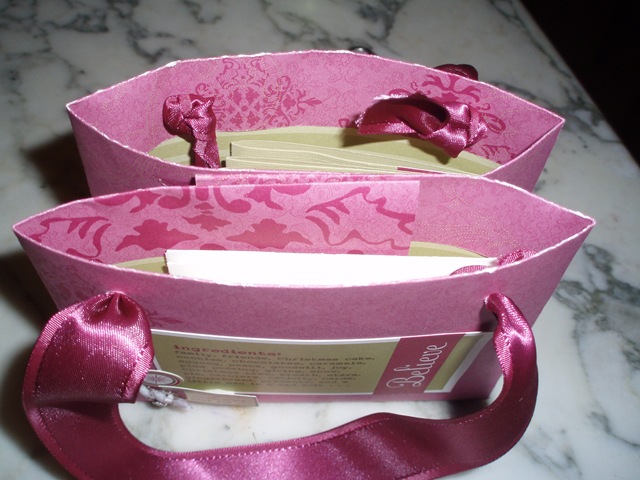
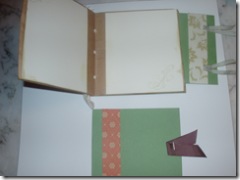
Here is a finished purse with 8 love notes and envelopes:

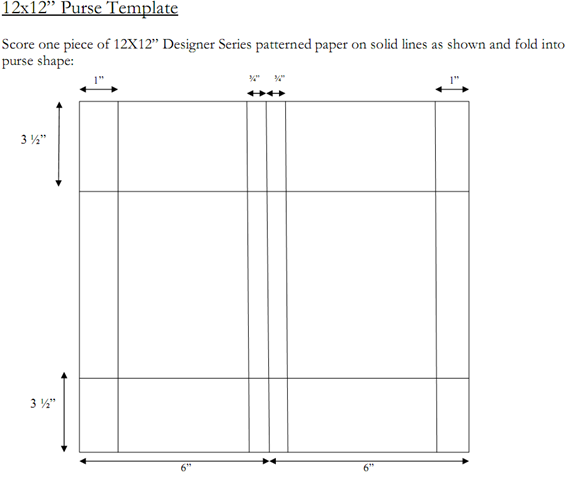
And here is the template for folding the paper for the purse:
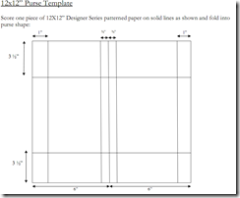
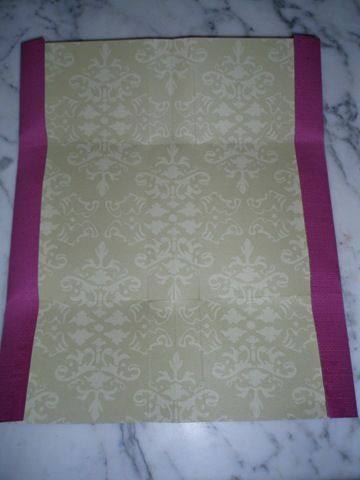
Essentially, you begin with a 12X12 piece of designer paper and score two ends at 1″ and the other ends at 3 1/2″. Fold the 1″ sides in first for a clean edge:
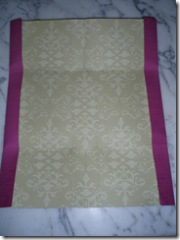
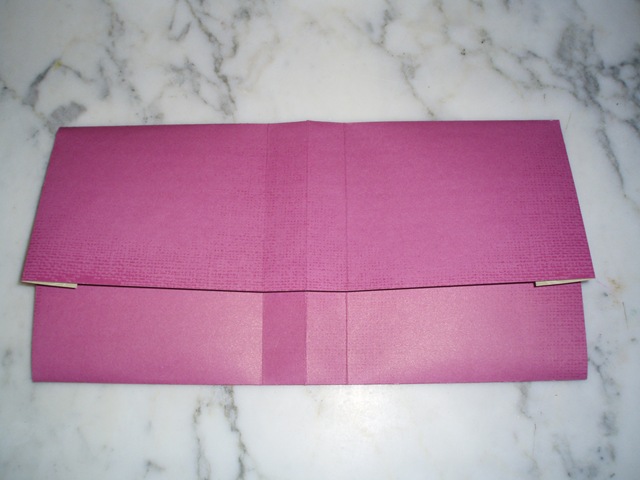
Then fold in the 3 1/2″ sides:
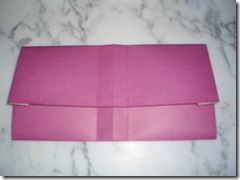
Next, fold in half to form the purse (all the other folds will be on the inside):

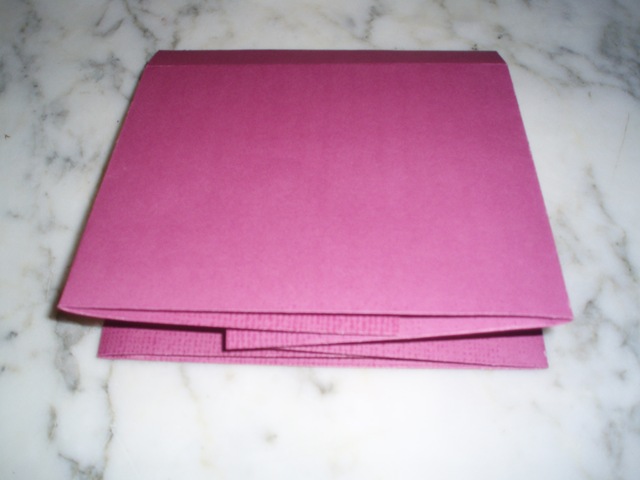
For a flat bottom, score out about 3/4 inch from the center fold on each side and fold:
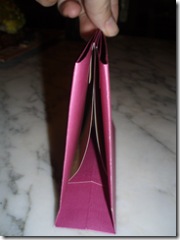
This give you two pockets on the top of the purse:
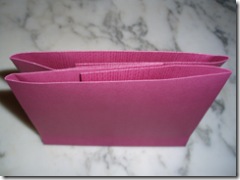
You can adhere the TOP of the inside (not inside the pockets – adhere the folded sides) to keep the purse together. If you go too low with your adhesive, you’ll ruin the shape of the purse.
At this point, you can add a handle with ribbon, embellish the front and place your love notes inside:

To create the love notes, cut a 12X12 piece of cardstock into eight 3X6 pieces. Fold each in half for a sweet little card, easy to decorate and embellish. I used the Hand Selected Accents and Elements from the Holiday Mini catalog.
Have fun!
Posted by Kathy Torrence on Oct 4, 2007 in
Cards,
Crafts,
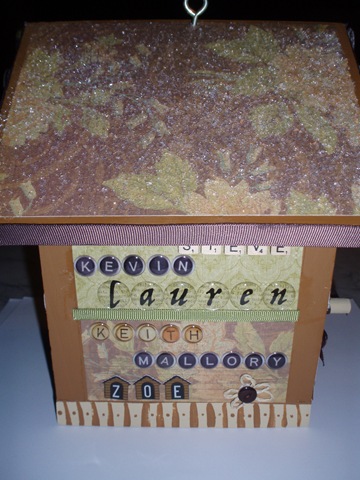
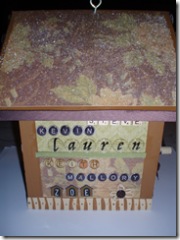
Other items It’s my friend Marie’s birthday tomorrow (Happy Birthday, Marie!) and I wanted to give her something special but something that didn’t cost a lot of money (I didn’t want to set that ‘gift precedent’ where she feels obligated to buy something for me on my birthday). I had a plain wooden birdhouse that I picked up a while ago and decided to alter it for her.
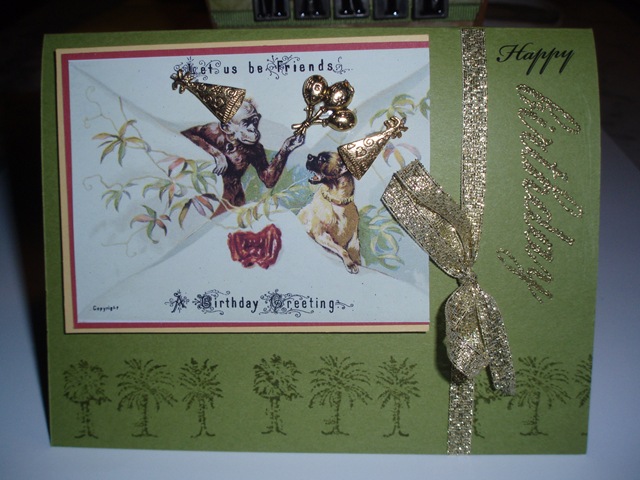
But wait – first, let me show you the card. I’ve mentioned before how much I love Paula’s Kit Club – I had a GREAT reproduction vintage postcard and some charms that I’ve been wanting to use from her birthday kit:
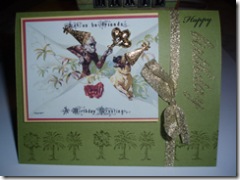
I just LOVE this monkey and dog! And I thought they needed some party hats and balloons, too.
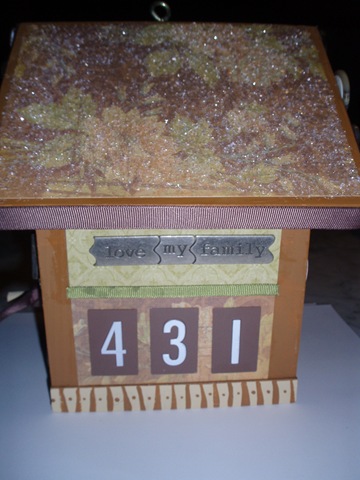
But back to the birdhouse – I started by painting it a coffee color. Then I took some K & Co. paper and decoupaged all the sides and the roof, leaving a border around the edges for the paint to show through. I also painted the bottom border with a sand color and added some stripes and polka dots.
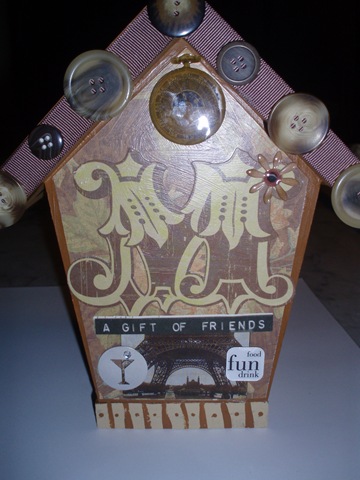
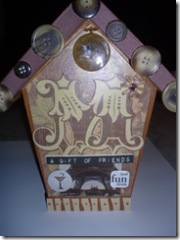
Once the birdhouse was covered with paper, that’s when the real fun began – embellishing! I also added some thick, grosgrain ribbon around the edge of the roof and some thinner grosgrain ribbon to the front and sides. I added some glass glitter to the roof top and some buttons to the front and back edges.
I wanted to make the birdhouse about Marie, so I put her name on the front on top of a little frame around the bird hole:
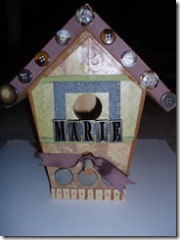
The colors look a little dull in the photos, but they are much softer in person.
On one side, I added some tiles with her address and a little family embellishment:
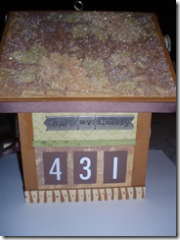
And I added the names of her family and dog on the other side:
On the back, I put her initial, a repro postcard of the Eiffel Tower (she loves Paris), a little martini glass charm (need I say more?) and even a little watch sticker because she and her husband run a watch repair business:
I had WAY too much fun making this project – it was nice to get to play with some of my other supplies and embellishments.
Watch out – who knows what I will be embellishing next!
Posted by Kathy Torrence on Sep 28, 2007 in
Crafts,
Other items I finally got myself in gear and made two baby gifts that I’ve been meaning to put together for a few weeks now. We’ve had a baby explosion in our community in the last few months – it seems like there are new babies EVERYWHERE!
I saw this cute idea on a craft show a few months ago and have been meaning to make a few as gifts – just haven’t had the time!
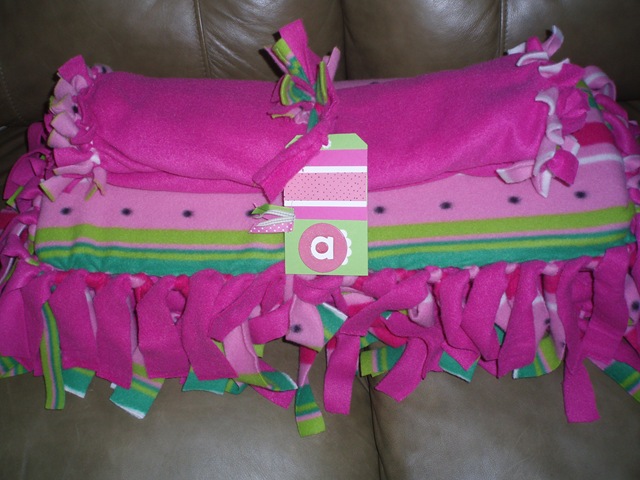
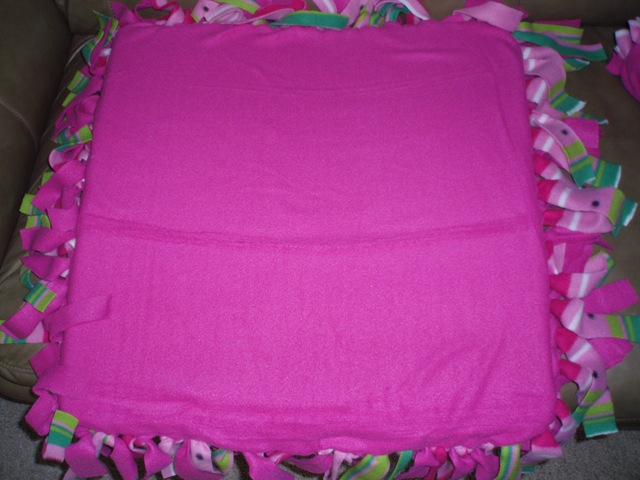
Here’s a gift for a baby girl:
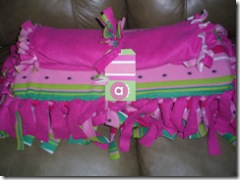
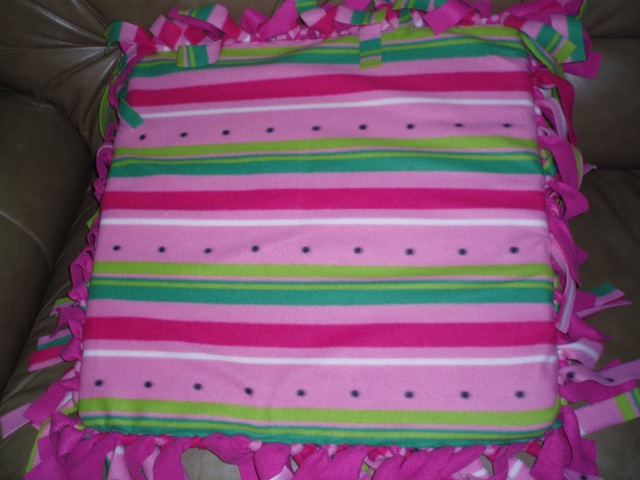
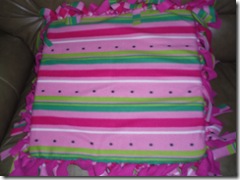
The bottom of the gift bundle has a baby play mat – solid on one side, patterned on the other:

These are very simple to make – and no sewing is involved!
You start with a piece of foam – these were square and were 22″ X 22″:
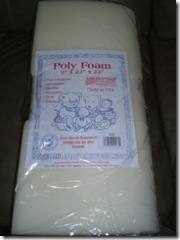
Then you take two pieces of fleece – I used one pattern and one solid – and cut them 8 inches longer than the foam on all sides. I chose 8″ because the fleece came in bolts that were exactly 8″ longer than the foam on each side – less measuring and cutting for me!
Put the solid piece under the foam and the patterned piece on top. Then go around all four sides, cutting fringe slits through both pieces of fleece approximately 1 1/2 inches apart. You don’t have to be incredibly precise – the fleece is very forgiving. It also helps to cut away the corners of the fleece so that it ties nice and neatly.
Next, tie double knots in each set of fringe – and that’s it! This mat is great for play or using as a changing pad…and when it gets dirty, you can untie the edges and throw it in the wash.
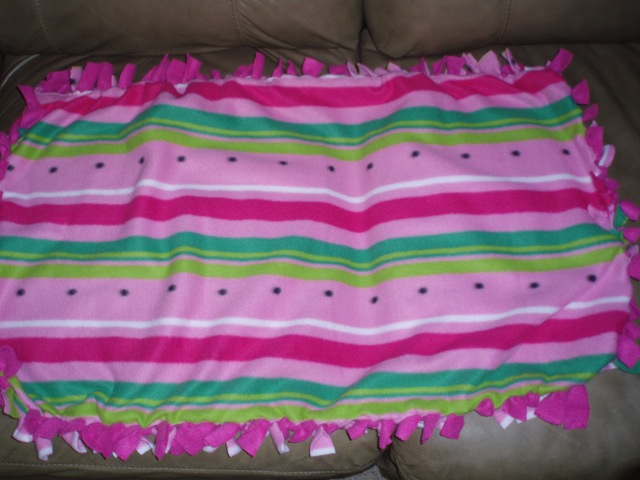
I only had to buy one yard of each fabric and after I covered the foam, I had a large piece of fleece left over…so I decided to use the leftover piece to make a small baby blanket using the same technique (but without the foam in the center).
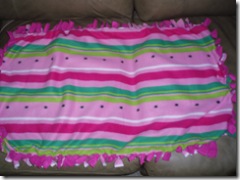
This is not so much for use as a blanket (it’s pretty small), but more for snuggling and carrying around. It is also patterned on one side and solid on the other.
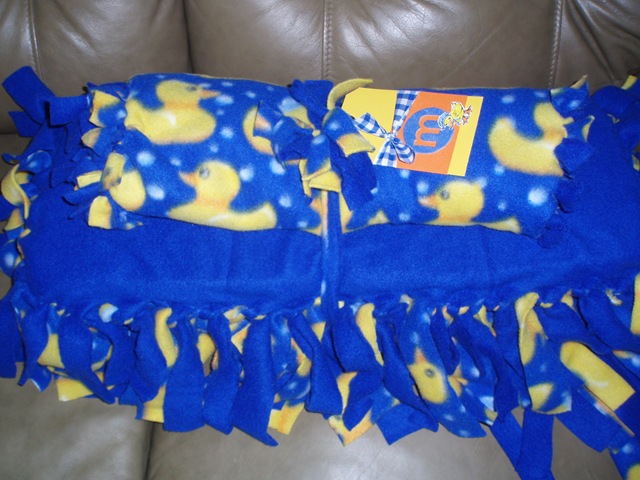
I also made one for a baby boy using a duck pattern and solid blue fleece:

I folded the mat in half and rolled up the blanket and put it on top. I tied the bundle together using strips that I cut from the fleece. I also made a little matching cardstock tag with the initial of the baby and some other embellishments.
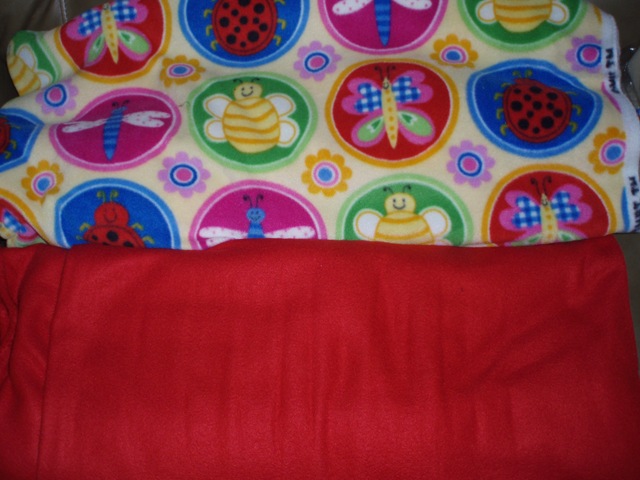
I still have three more sets to make (I told you there was a baby explosion!), but we’re not sure of the gender of the other babies yet, so I picked up this patterned fleece and will use solid red for the reverse side:
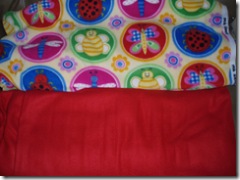
A quick, cute, simple and inexpensive baby gift – hope this give you inspiration!
Posted by Kathy Torrence on Sep 4, 2007 in
Cards,
Crafts,
Other items,
Scrapbooks As I mentioned before, I will be attending the Stampin’ Up! Regional Seminar in Philadelphia later this month. It’s tradition to bring some cards and other projects to swap with other demonstrators at our events, so I’ve been working on a few.
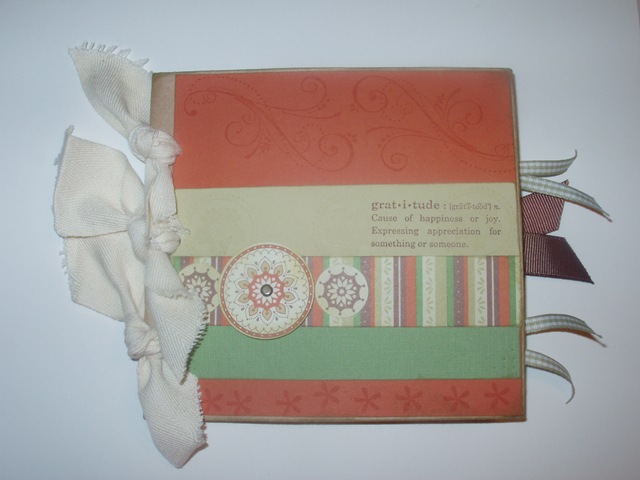
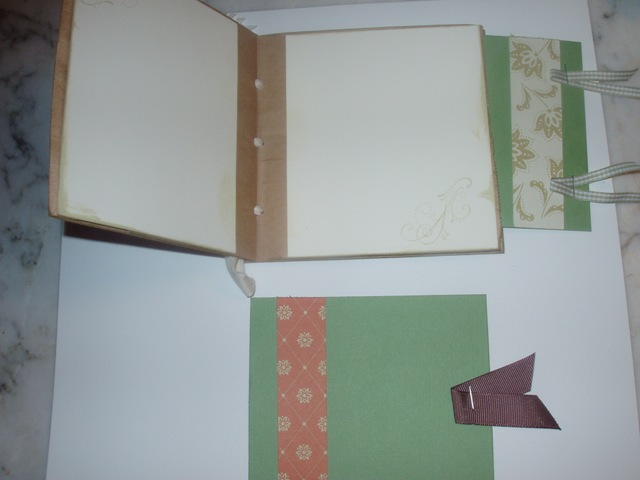
I signed up for one swap where we are exchanging fall holiday ideas. I chose Thanksgiving and decided to make gratitude journals for my swaps.
I made these using paper lunch bags and the new Apple Cider designer paper from the Holiday Mini Catalog. I bound the book using the Crop-A-Dile and twill tape, and added a few Wild Wasabi page inserts to fit in the book openings as well.
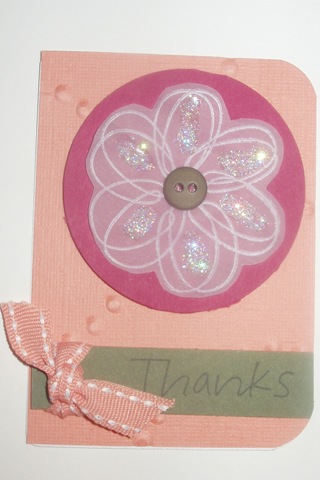
I also signed up for an ATC swap and I decided to make a card front-type ATC using the free stamp set, “So Much”, that we will be receiving at the seminar.
I stamped the flower image on vellum using white StazOn and then added some Dazzling Diamonds on the petals. I also used the Crop-A-Dile to emboss small circles on the textured Groovy Guava paper as done on one of the seminar projects.
How did I get the free stamp set and see the Regional Seminar projects, you ask? I am going to be a Make-And-Take helper at the seminar and received my goody package the other day!
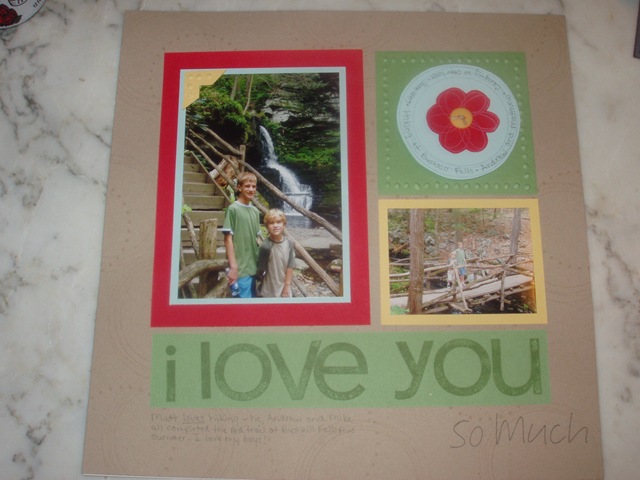
Here are two of the scrapbook pages we will be making, modified slightly to include my photos and use other stamp sets I currently have (unfortunately, SU! didn’t provide us with ALL of the sets that will be available at the seminar).
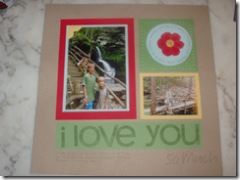
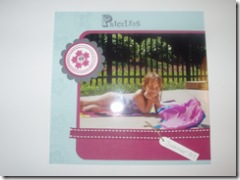
I had SO much fun making these – I can’t wait to get there!
Posted by Kathy Torrence on Aug 5, 2007 in
Crafts,
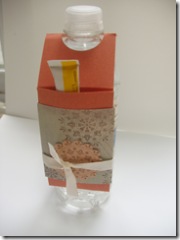
Other items As promised, here are a few quick photos of the make-and-take projects I had at my New Catalog Open House the other night.
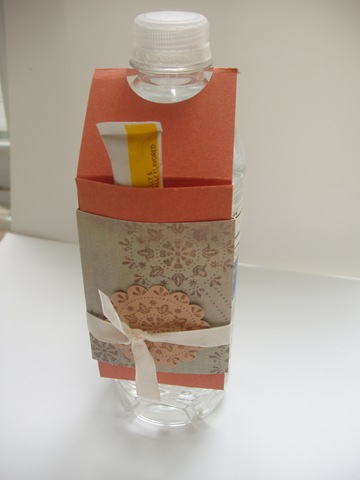
First, we made a VERY simple embellishment for a water bottle. It holds a pack of powdered drink mix that can be poured into the bottle. This design is very generic (it uses SU!’s Outlaw paper and Really Rust cardstock), but you could adapt the idea for a birthday party, picnic, meeting…whatever event you need.
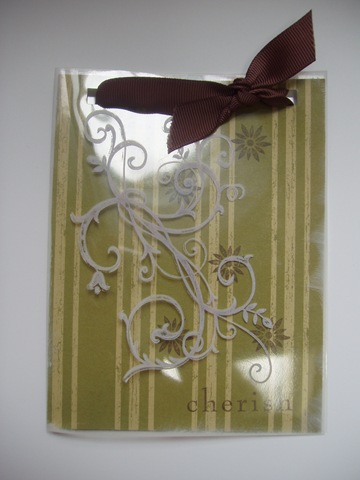
Next, we made a card out of a transparency. This idea is very big right now in scrapbooking and card making magazines. I scraplifted the design from Sencie, a SplitCoastStampers user – here’s a link to her original design on SCS. Thanks so much for the inspiration, Sencie! 🙂
And here is my version:
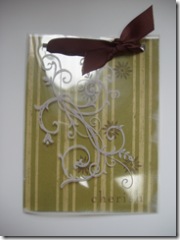
The card base is a clear transparency and the patterned paper is held in place by the bow tied at the top of the card. I stamped the flourish with white StazOn ink and used white ink on the edges as well. The greeting can be written on the reverse side of the patterned paper or on the transparency itself with a Sharpie.
Posted by Kathy Torrence on Jul 30, 2007 in
Cards,
Crafts,
Other items,
Scrapbooks Whew! I’ve been working like crazy to get ready for my Stampin’ Up! New Catalog Open House tomorrow night. I thought I’d post some of the projects here for those who won’t be able to make it…and if you ARE coming and think you don’t need to now that you’ve seen it all…I’m not going to post photos of the two REALLY cute FREE make-and-takes to my blog until after the Open House! 🙂
When I set out to do these new projects to show some of the new stamps, colors and accessories, I decided to use some new embossing techniques given to demos at the Stampin’ Up! Convention going on right now in Denver. Even though I’m not there 🙁 , other demos were kind enough to post some of the things they learned – and I was just dying to try them! I won’t demo all of these at the Open House – just a few – and not the entire projects – just the embossing parts.
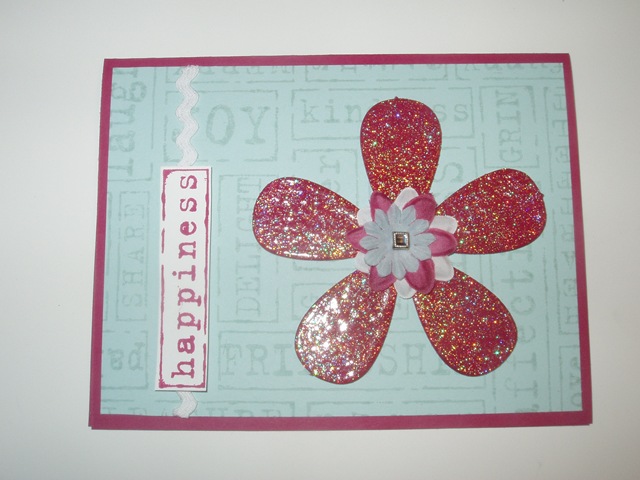
To start, I made a card that uses a mixture of embossing powder and Dazzling Diamonds. I stamped the image with Perfect Plum craft ink, then used the mixture to emboss the image in the center of the flower…
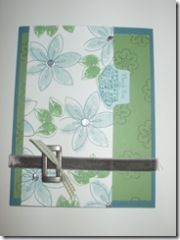
I also used the new Pretties Kit and left the flower white. The cardstock is Sage Shadow and I used the Baroque Motifs swirl (LOVE that stamp!) behind the flower.
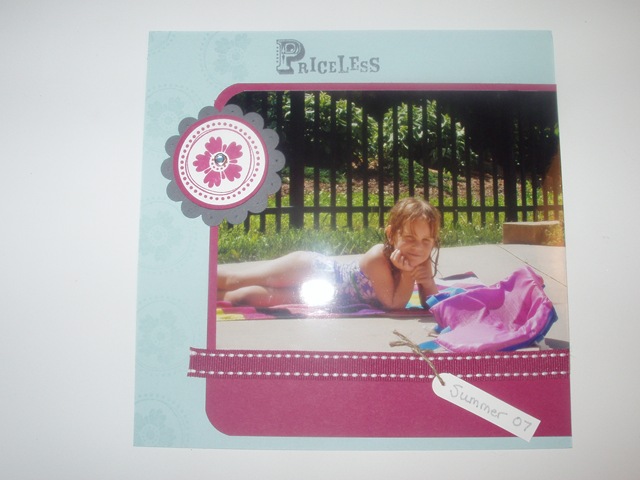
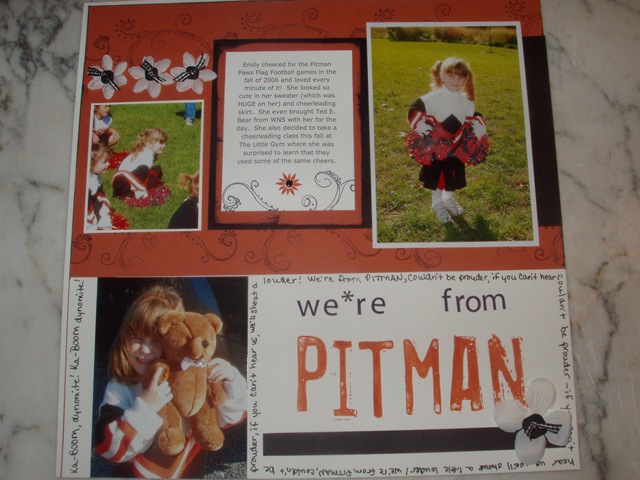
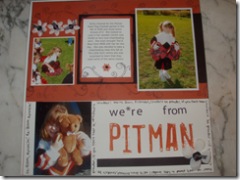
Next, I tried a technique where you take a photograph and add Dazzling Diamonds to areas you would like to highlight. I used a VersaMarker to highlight my daughter’s pom-poms and the teddy bear’s bow tie and then heat embossed with Heat & Stick powder. I added the DD on top – I think it looks really cute in person. but you may not be able to see it as well in the photo (see? that’s why you need to come to my Open House 😉 .
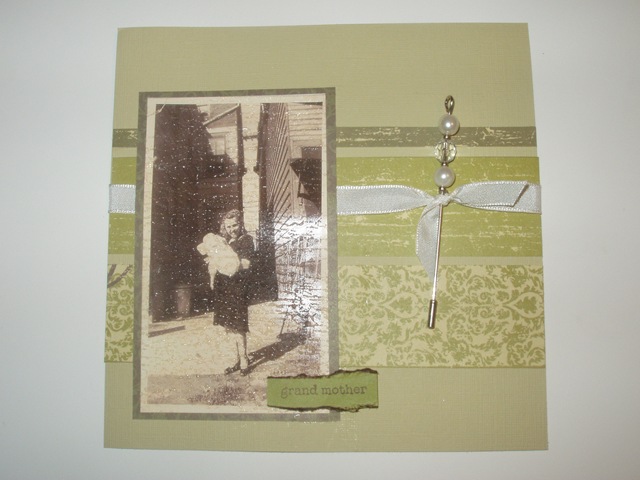
I also used a technique where you take the Weathered background stamp and use it with VersaMark on top of a photograph. Then you heat emboss with Glossy Glaze embossing powder for a cracked-glass look…
This is a copy of a photo of my grandmother. I also used one of the Pretties pins on this layout. The cardstock is the River Rock textured cardstock and the patterned paper is Brocade Backgrounds.
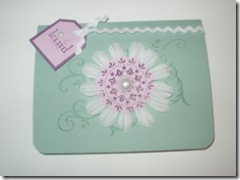
Next, I made a card using a chipboard accent. I used Rose Red craft ink to ink the chipboard flower, then embossed using iridescent embossing powder. Next, I inked the entire flower with VersaMark and heat embossed again with Glossy Glaze embossing powder – what a GREAT effect!
On the rest of the card, I used soft sky and Purely Pomegranate. It’s funny – once I was done with the chipboard, the color darkened quite a bit and didn’t look like Rose Red anymore. I also used three flowers from the pretties. I dyed them using ink refills and an aquapainter.
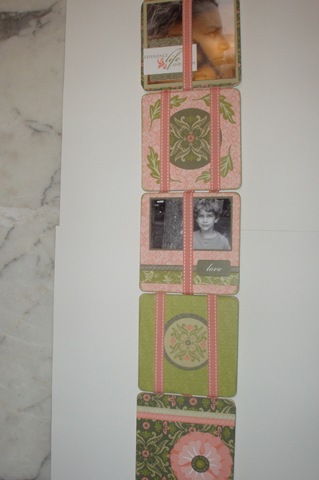
I used the same technique for the star on this scrapbook page of my dog, Daisy. For this, I used Blue Bayou ink then just coated it with Versamark the first and second time I embossed it since I don’t have the corresponding craft ink.
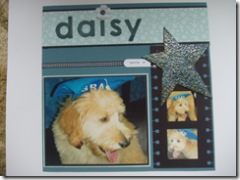
The filmstrip effect is done with a piece of black cardstock, the spiral punch and the square punch. I like how this turned out!
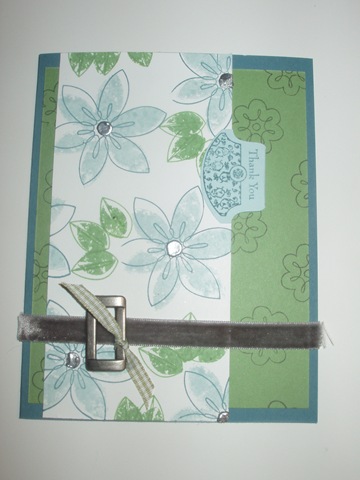
Finally, I used some glue dots in the centers of some stamped flowers, then embossed them with silver embossing powder:
I used a combo of Wild Wasabi, Blue Bayou and Soft Sky on this card – makes a nice combination.
Tune in later to see the Open House make-and-takes…
Posted by Kathy Torrence on Jul 30, 2007 in
Crafts,
Other items,
Scrapbooks I just finished another project – this one is WAY easier than it looks.
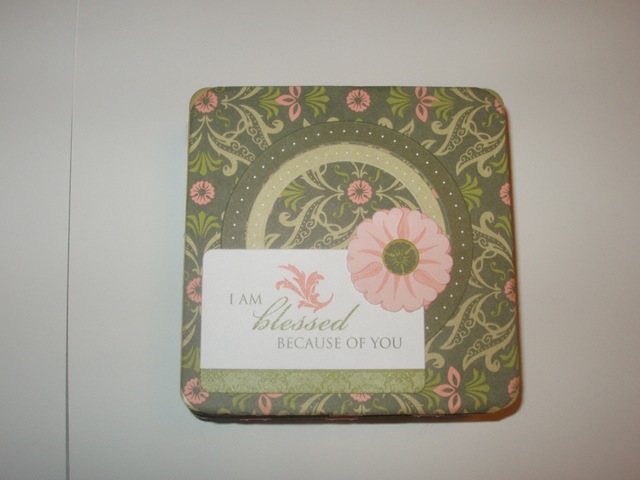
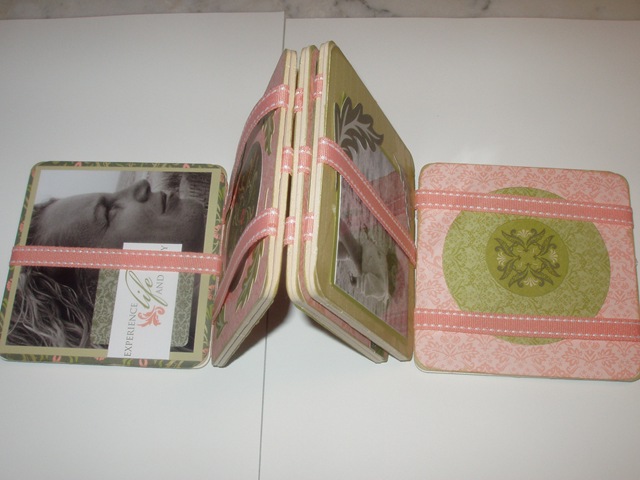
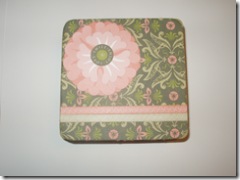
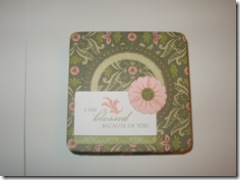
I used some 4X4 square chipboard coasters to make a Jacob’s Ladder toy – these are the toys that flip down one way and then the other. I made it into a little mini scrapbook.
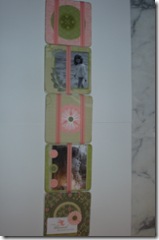
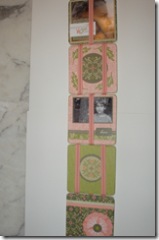
These are SO much fun to play with – my kids love them!
I used the Stampin’ Up! Secret Garden Simply Scrappin’ Kit and kept the embellishments to a minimum so as not to interfere with the folding mechanism.
I found the instructions for these on Craft Weekly TV here.
I may try to schedule a class with these soon…
Posted by Kathy Torrence on Jul 29, 2007 in
Crafts,
Other items,
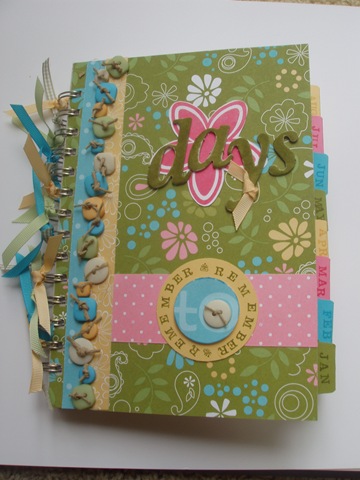
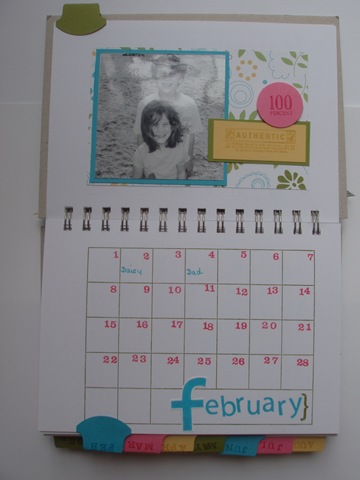
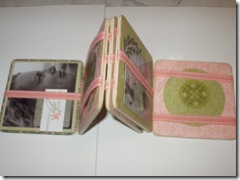
Scrapbooks I wanted to design a project using the new Calendar background stamp set, so I decided to make a ‘Days to Remember’ book. The recipient can use this book to record special days such as birthdays, anniversaries and other holidays. Since the dates are not calendar specific (each month in the book starts on a Sunday and ends whenever), this can be used year after year. It’s just the dates that are important, not the days (hey…I guess I should have called this ‘Dates to Remember’ instead!).
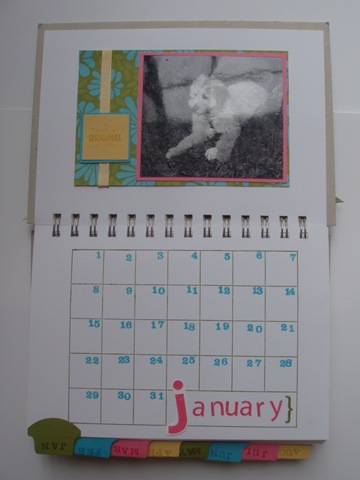
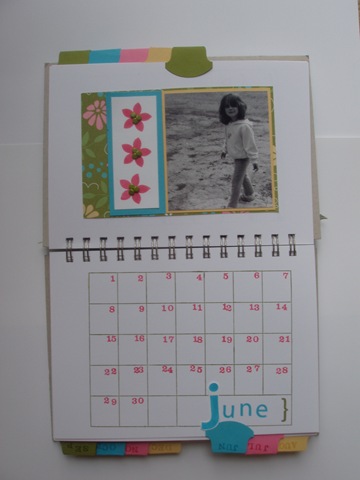
This project took a VERY long time – there is a LOT of stamping to do. By the time I got to the inside pages, I decided to keep them very simple and just use a series of black and white photos taken from one day at the beach. But you could use a photo each month of someone whose birthday is in that month – that would be a wonderful gift!
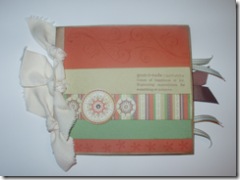
So…here’s how it turned out:
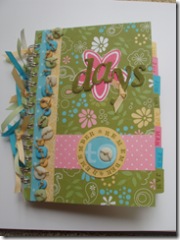
I realized that I should have oriented the book cover sideways to match the inside calendars, but I think it’s cute anyway.
Instead of varying the color scheme of the months (which would look REALLY good), I kept the colors the same throughout the book. Like I said, this was a LOT of work.
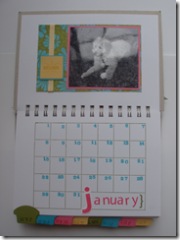
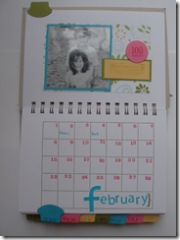
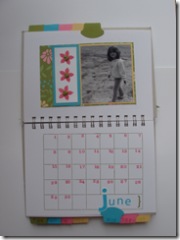
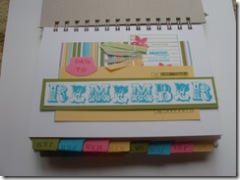
Just a couple of pages to give you an idea of the inside…I couldn’t use too many embellishments because I didn’t want the book to be too thick.
I used a Stampin’ Up! art journal as the basis of the book and have MANY more blank pages at the back. Maybe you could use these for notes or as a journal – or to record the gifts received and given for each occasion.