Posted by Kathy Torrence on Nov 13, 2008 in
Crafts,
Other items,
Today's Photo So yesterday I posted my Thanksgiving-themed frame – today I’ll show you another frame that I did with a Christmas theme (also using a 60 cent Target Halloween frame I found on clearance).

This frame is my own design – and I’m pretty happy with how it turned out. All the products used are from Stampin’ Up!
Again, I removed the glass from the frame and started with a piece of Ruby Red Stampin’ Up! cardstock as the main piece. I added some snowflake rub-ons in the background and also some white "Season’s Greetings" rub-ons directly on the black frame.
I used my Sizzix machine with a Christmas tree die (you could also trace and cut any Christmas tree outline) and cut out three trees from SU! patterned paper. I folded the trees in half and glued the edges together to make a 3-D effect.
Again, this is a very simple project – at the bottom of the frame opening, I added a few more strips of patterned paper and cardstock along with some additional rub-ons and a piece of HodgePodge Hardware with a few stamped letters spelling out "JOY".
This would make a great, inexpensive gift – just keep your eye out for some more clearance frames (and you’d better get to them before I find them first)…
Tomorrow – another Thanksgiving idea…
Posted by Kathy Torrence on Nov 12, 2008 in
Cards,
Crafts,
Other items,
Today's Photo In an effort to get ready for the WCK Walls School “Shop ‘til You Drop” event this Friday night (6-9pm in Pitman, NJ if you’re interested in stopping by), I have been in an absolute crafting frenzy for the last few days! I am hoping to show some new ideas using some of the latest Stampin’ Up! products and stamp sets…and I had sequestered myself to my craft room for a few days…
Tonight I have finally emerged and I’d like to show you some of the projects I finished. I could do SO much more…but my family is hungry and wearing mis-matched clothing – I suppose it’s time to get back to reality and finally do some grocery shopping and laundry.
Instead of overwhelming you with all the projects and cards in one post, I’ll break them up and post a new one (or two) for the next few days.
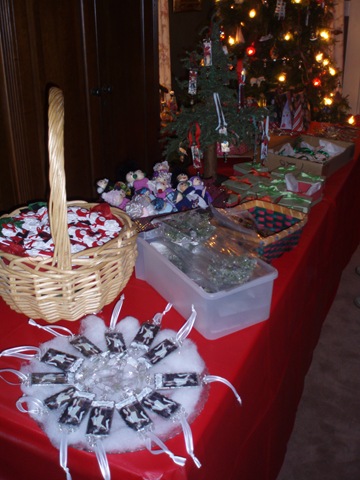
For the first post, I’ll show you the “Chinese Auction” prize that I put together (each vendor has to supply one for the event):

In the basket is a Stampin’ Up! catalog (of course!), an SU! gift certificate, some new, unmounted stamps (in a pretty little bag with a cute tag):

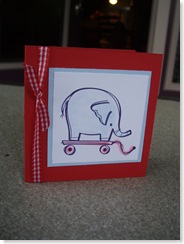
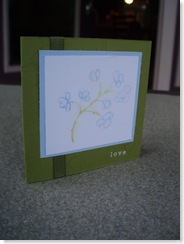
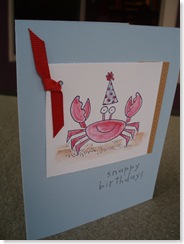
and a box of five all-occasion stamped cards and envelopes:

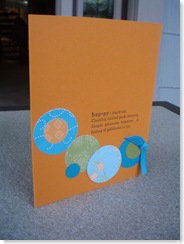
I used the stamp set, Enjoy Every Moment, to make the cards and tags for the basket. I kept with an Pumpkin Pie/Chocolate Chip/Old Olive color palette to make it seem ”autumn-ish" – plus I just loved the little orange basket. 🙂
I also included an embellished frame with a Thanksgiving theme – I actually made two of them – one for the prize basket and one for a table display (and to use in my own home for the Thanksgiving holiday):


Because I only had a limited number of chipboard letters, the end results are slightly different. This project was inspired by an idea that I saw in Stampin’ Success magazine, but was modified to match the supplies and frame that I had on hand. By the way, I picked up these plain orange frames at Target on the 90 percent off Halloween aisle the other day (they cost me all of 60 cents).
I removed the glass and started with a background of plain Chocolate Chip cardstock. The leaves were cut from Stampin’ Up! Designer Series paper using my Sizzix machine and were sewn on my sewing machine, inked and crinkled for dimension. That’s really all there is too this project – a few more pieces of cardstock, some twine and ribbon and a few chipboard letters – simple, but I love how these turned out!
Now I bet you’re going to come to the Shop ’til You Drop night just to bid on this Chinese auction prize, aren’t you? 😉
Tune in tomorrow for a similar idea for a Christmas frame…
Posted by Kathy Torrence on Sep 10, 2008 in
Cards,
Crafts,
Other items,
Scrapbooks Good news – you can FINALLY order Stampin’ Up! products online – and it’s about time!
Just visit my Stampin’ Up! website (a link can also be found down below in my Blogroll) and click on the “Shop Now” button.
Feel free to email me with any questions – happy shopping!!!!
Posted by Kathy Torrence on Aug 5, 2008 in
Crafts,
Other items After I gushed in my post yesterday about how much I was enjoying my new job, I walked into a not-so-great day today. The team is just a little bit stressed and I think it’s starting to show…
So after a bad day like that, I was overjoyed to see two Stampin’ Up! boxes sitting on my porch when I got home. And one of the boxes contained my copies of the new Fall/Winter Idea Book and Catalog!
There’s nothing that will relax you more than flipping through page after shiny page of great stamps, bright colors and original project ideas! I’m impressed with the new collection – lots of modern stamps and the new In Colors are great! I just wish that there were a few more vintage-style and ‘artsy’ images – but there are MANY others that I’m in falling love with!
By the way, the ‘in’ thing this fall seems to be scallops – scallop punches, scallop stamps, scallop edged cards…
The other box contained my pre-order of the new In Color stamp pads and cardstock – as well as a new stamp set and the new scallop punch too. Maybe I’ll have a chance to play and post a few creations made with my new stuff.
I’ve already started to compile a wish list from the new catalog – now I just have to figure out how to pay for it. Maybe I’ll clean out my craft room and sell some of my old stamps…but the question is, can I stand to part with any of them?????
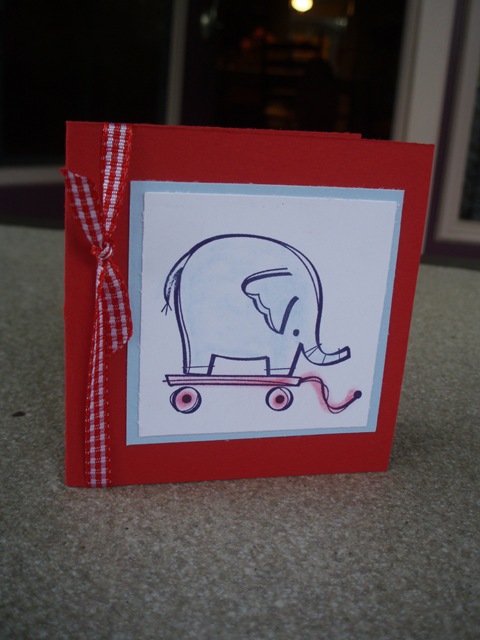
Posted by Kathy Torrence on May 9, 2008 in
Cards,
Crafts,
Other items I think I mentioned that I did a Stampin’ Up! workshop for the first time in a long time a few weeks ago – I thought I’d share some of the projects with you.
I made up some simple demos and make-and-takes for the workshop – and I’m ashamed to say that I pretty much CASEd these directly from some Stampin’ Success magazine with some small modifications. But that’s what the magazine is there for, right? Hey – I’m a working mom now! I didn’t have time to wait for the creativity to flow that week… 🙂
I did two small 3X3 cards to demonstrate some techniques using Stampin’ Pastels (’cause that’s what was featured in Stampin’ Success last month…).
The first card is simply colored directly with pastels and Q-tips.
The second little card uses the Poppin’ Pastels technique (stamp image in Versamark ink and use a Q-tip to rub the pastels on top of the stamped image). This card was also a make-and-take.
I also demonstrated how to use Blender Pens to color with pastels:
How to use pastels directly on accessories like the flowers in the Pretties Kit:
And how to use pastels on top of white embossing powder:
I also demo’ed how to use pastels on the edges of cardstock to create an aged effect:
I demonstrated a scrapbook page featuring a flower made with the dahlia fold that was featured on SplitCoastStampers:
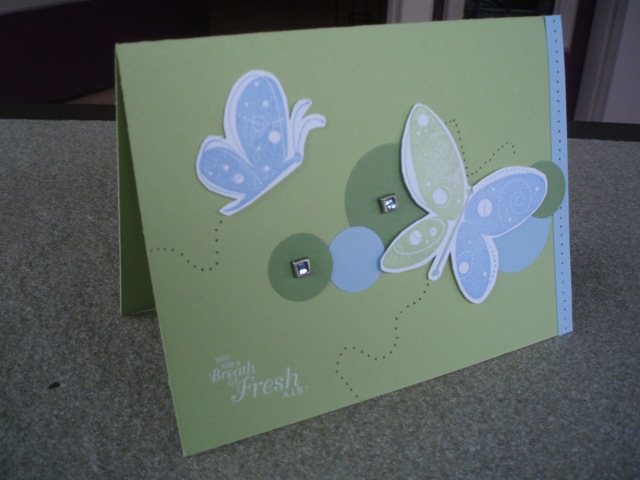
And I showed two cards that were similar to the template featured in Stampin’ Success (I know, I know…I was lazy!).
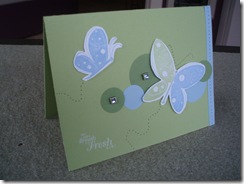
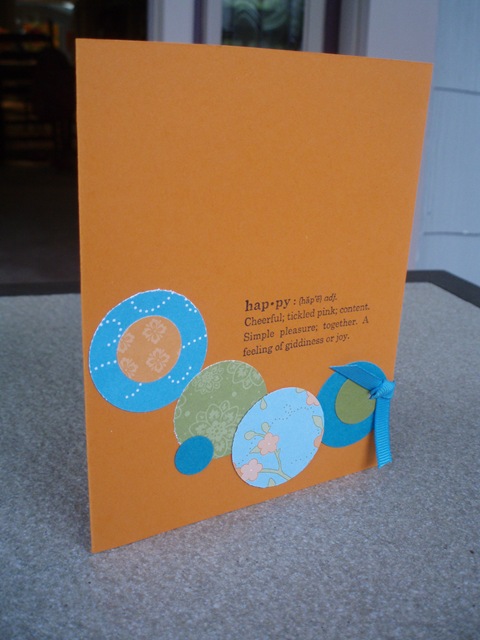
The card on the left I used as a make-and-take because it is a simple, quick and easy card to make. It’s especially nice because you can use up all of your patterned paper scraps – just punch out circles of varying sizes and make up your own design.
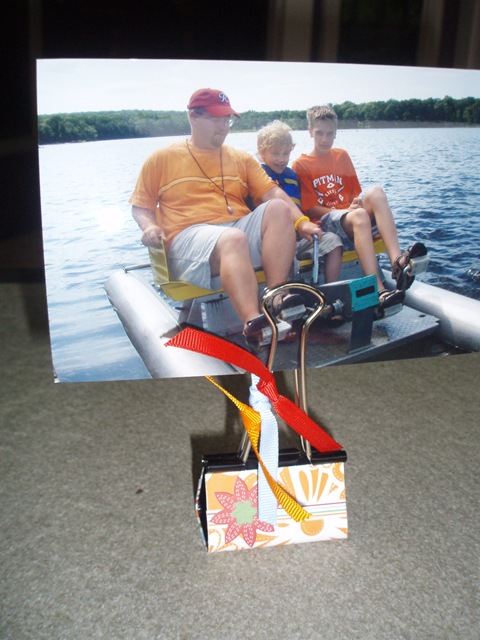
Finally, I CASEd yet another project idea from SplitCoastStampers (sorry – I’m not sure who was the very first person that came up with this idea, but I know for sure that it wasn’t me) – embellished binder clips. You can find lots of these in the SplitCoastStampers gallery. I did this as a make-and-take too:
This is another quick and easy project. Start with any size binder clip and cut a piece of patterned paper to fit around the outside. For these, I used paper from the Summer Days Simply Scrappin’ Kit. Then I just added some stickers from the same kit and a few pieces of coordinating ribbon for a cute photo holder.
These were a big hit at the workshop – and even though I can’t take credit for these original ideas, I had lots of fun making them and sharing them with others – that has to count for something, doesn’t it?
Posted by Kathy Torrence on May 6, 2008 in
Crafts,
Other items,
Today's Photo Emily had a wonderful birthday party this weekend at Build-A-Bear! I would highly recommend their children’s parties both for the ease of having someone else run the party and the cost as well.
I also thought I’d post a project I did the weekend before Emily and I went to Florida. I did a Stampin’ Up! workshop a few weekends ago – the first one I’ve done in a LONG time!
I made a project for the hostess and thought I’d share it with you:
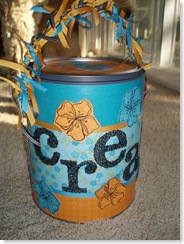
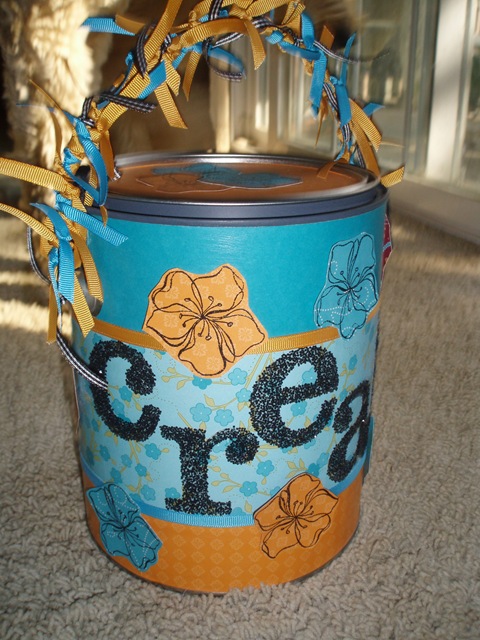
I used the new Bali Breeze double sided paper as well as the Sticky Cuts letters and chunky glitter – I love these colors (the can says "Create" – a great way to be inspired while storing your craft supplies!).
Paint cans like this are a snap to make – here’s a simple pattern to use:
Supplies:
First, start with a new, clean gallon paint can. You can purchase these for under $3 at your local paint store.
Cut three strips of 12X12 patterned paper –
-
One at 1 1/4 inches wide (the bottom strip)
-
One at 4 inches wide (the center strip)
-
One at 2 1/2 inches wide (the top strip)
The strips on this pattern will overlap slightly on the ends – unless you’re incredibly anal about it, just let them overlap – I promise you, no one will notice. 🙂
Apply a thin coat of ModPodge to the back of the bottom strip of paper. Line up the strip with the bottom lip of the can and adhere, allowing the strip to overlap itself on the edges.
Do the same for the center strip of paper, aligning it against the bottom of the handles of the can.
For the top strip of paper, punch two holes with the 1 inch circle punch (a 1 1/4 inch punch will work as well) – punch one hole about 1/4 way into each strip such that the bottom of the hole remains open – this will allow the strip to slide over the handles. Since the strips will overlap, so you don’t have to go crazy lining up the holes – pretty much anywhere on the strip will work as long as you do them both the same way.
Apply ModPodge the same way to the top strip and adhere it against the top lip of the can.
For the lid to the can, measure a circle about the same size as the inside (again – you don’t have to go crazy – a little smaller is fine) and use your circle cutter to cut a circle from the remaining paper. Apply ModPodge and glue to lid.
At this point, you can apply a thin coat of ModPodge over all the top of all the paper on the can. This will make it very durable and give it a nice, even sheen.
After the ModPodge dries, take a thin line of Fabri-Tac and go around the seams between the strips of paper. Apply a piece of ribbon all the way around the seams for a nice, finished edge.
Take small pieces (about 3-4 inches long) of ribbon and tie them randomly around the handle of the can – this is the part that really gives the paint can the "WOW" factor. Don’t skimp – the more ribbon, the more WOW!
Finally, you can take the can and apply whatever embellishments you like – for this can, I took the Sticky Cuts letters and added some black chunky glitter. I also do cans for children’s birthdays and spell out their names with stickers, stamped letters, chipboard…whatever I can find.
Because there is such a huge variety of patterned paper available, you can make a can for any occasion – here are a few ideas to get you going:
Birthday – how about a party in a can? Include candles, party hats, streamers, noise-makers…
Wedding ‘Survival Kit’ – Include clear nail polish, a tampon, hair pins, a Tide-To-Go pen, mints…
Get Well Soon – Include tea bags, a tea cup, tissues, soup, some puzzles and pencils…
Baby – Include a onsie, baby blanket, pacifier, energy bars for mom…
Mother’s Day – Include flower seeds, gardening gloves, a garden journal, garden shears…
I used to do these at craft shows and had great responses.
Let me know if you try this project…have fun!
Posted by Kathy Torrence on Jan 17, 2008 in
Crafts,
Jewelry,
Other items,
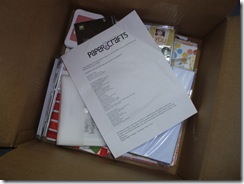
Today's Photo I received my PaperCrafts prize the other day:
Such cool stuff! I finally had a chance to put it all away yesterday after kicking off a whole cleaning effort…
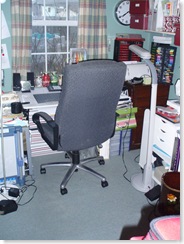
My craft room has been a disaster for a while now – I haven’t even been able to vacuum because I couldn’t get to the floor! But since I’ll be going back to work soon (God willing – that’s a story for another post), I figured I’d better do it now. So I reluctantly decided to clean it up and reorganize. It looks better now – not perfect, but it meets my “better than it was before” cleaning criteria (if I set the bar low enough, I’m assured success):
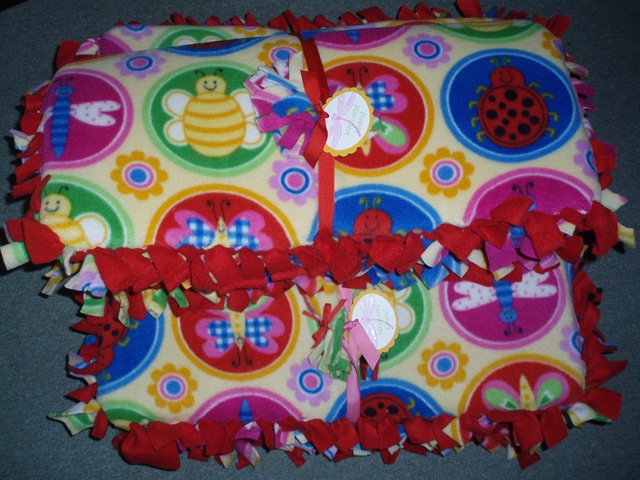
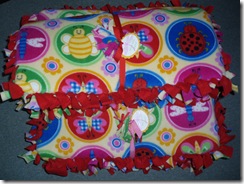
During the cleanup process, I was also inspired to finally finish some baby gift projects I’ve been meaning to work on (out of the three babies, one is about 3 months old now, one was just born and the other is due in a few weeks – so I’m not THAT far behind).
I made some more of those baby play/changing/nap mats that I’ve posted before:
But this time, instead of giving the mat and a blanket, I made these cute little fleece booties:
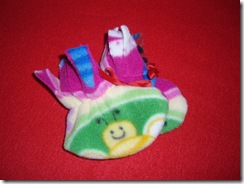
These are super-simple to make – I saw the project on Creative Juice on DIY. Here’s link to the instructions – they are easy even for a non-sewer like me (and their photos are better – I should have stuffed the little toes for the picture).
Basically, you cut the pattern (on the DIY site) from a small piece of folded fleece, add the elastic, sew around the edges, add a ribbon and cut the fringe at the top. Cute and easy.
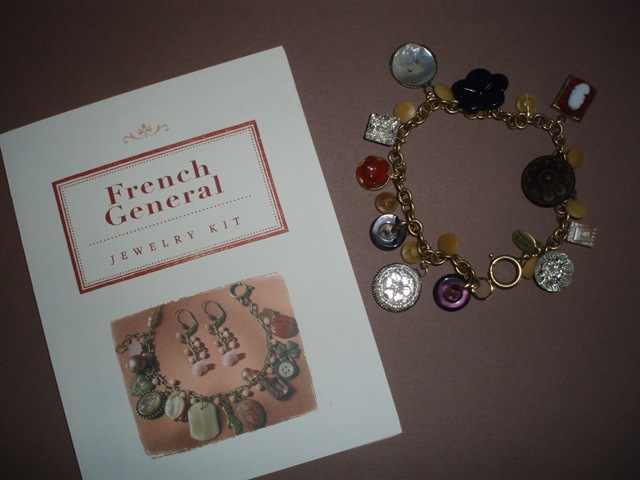
I also received my latest Paula’s Kit Club shipment yesterday – I didn’t cancel it because a) I LOVE her stuff, and b) I thought I’d be working by now (again – I’ll save that for another post). In addition to the usual paper stuff, she has now included small jewelry kits from French General. LOVE IT!!!! This month’s was a bracelet made from vintage buttons and other pieces (which of course, I HAD to make right away):
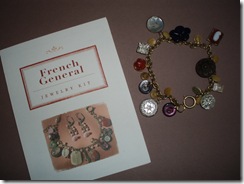
Cool, cool, cool!!!! And now that I’ve done this project, I may try to take some of the buttons from my own vintage stash and make some designs of my own.
And I can do that now that my craft room is clean (and I’m STILL not working)…
Posted by Kathy Torrence on Dec 31, 2007 in
Crafts,
Jewelry,
Other items,
Soldered Art I FINALLY had a chance to finish gifts for my friend Linda (who lives in Florida) the other day. Okay – I know – they’re late. But that’s the great thing about old friends – they love you anyway!
So…Linda, if you’re reading this and you haven’t received your package yet – DON’T READ ANY FURTHER or you’ll spoil your surprise!!!!
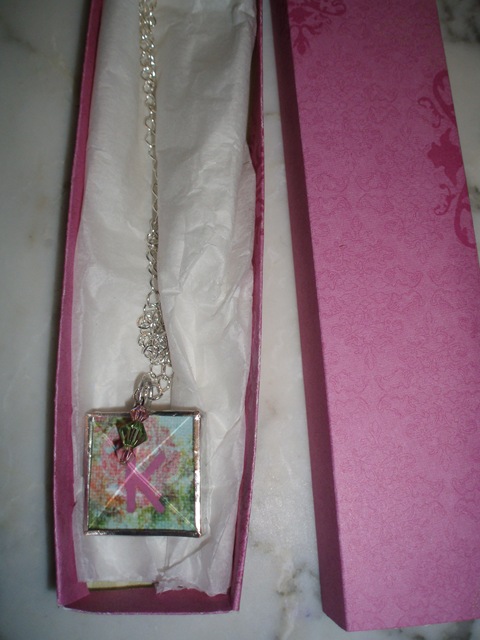
For Linda’s daughter Kylee, I created one of those "little girl" initial necklaces I posted previously:
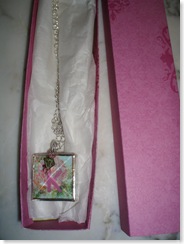
I used a small piece of patterned paper, an letter ‘k’ rub-on and sandwiched it between two 1X1 pieces of beveled glass. I forgot to take a picture of the back, but I thought it turned out pretty cool – I took a small piece of a doily and adhered it over the back side of the double sided paper for a lace effect.
Oh – by the way – I also made all these gift boxes. These are the ‘nugget’ boxes that are so popular on SplitCoastStampers this season. They are made to fit Hershey’s Nuggets, but they also fit small items like jewelry.
For Linda, I made a bracelet from green turquoise and red carnelian beads as well as some silver filigree pieces:
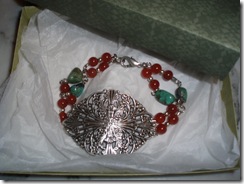
I just love these colors together!
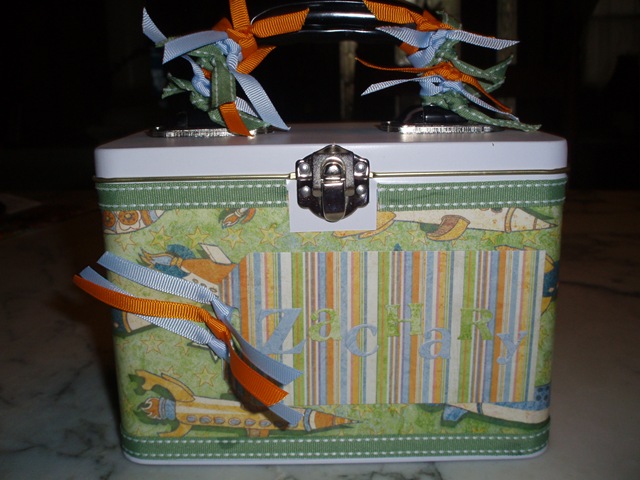
For Linda’s son Zachary, I made a little lunch tin that he can use for lunches or to store crayons and other art supplies:
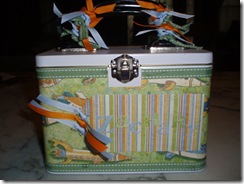
I used some Basic Gray paper with a little ModPodge to adhere it to the tin. I also used some Stampin’ Up! double stitched and grosgrain ribbon as well.
For her husband Tom, I sent some cigars from Mike’s collection – no photos there! But I did package them in a paper towel tube then wrapped it like a ‘cracker’ – hmm…maybe I should have taken some photos of that.
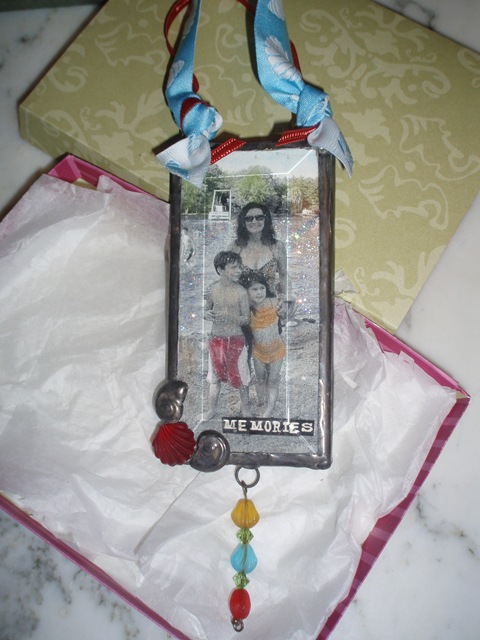
Finally, I sent a gift for the whole family. I made a Christmas ornament using a photo taken while Linda was here visiting this summer:
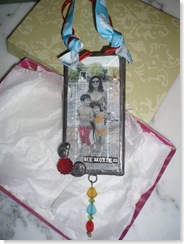
I printed the photo in black and white on cardstock and then colored in the images with chalks in colors to match my color scheme of orange, red, turquoise and green. I added some glitter to the water in the photo and added the word "memories". I love the way this turned out – it really looks like a vintage photo.
Then I sandwiched the photo between some pieces of beveled glass (the back side is a really pretty orange handmade paper with tiny white polka dots) and taped and soldered the edges. On the bottom corner, I added some metal seashells (brads from which I cut the back) and a glass scallop shell. Then I hung some more glass shells and crystal beads from a jump ring on the bottom and used a seashell ribbon as the hanger at the top.
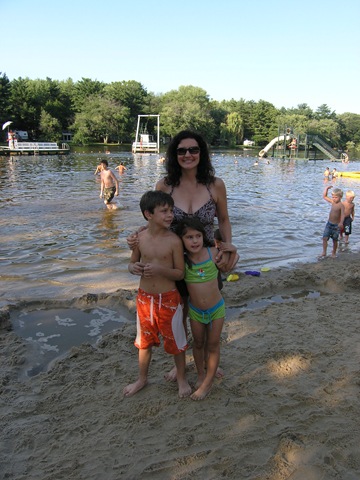
Just as a comparison, here is the original photo I used:

In fact, I liked this idea so much, I made more ornaments for Mike’s family using the same technique and this family photo:

Unfortunately, I forgot to take photos of the ornaments before I gave them out… 🙁
But I used the same technique, using red and green for everyone’s clothing and adding a Christmas sentiment at the bottom.
I love that I can modify the black and white photos to match any color scheme – no matter what the people were actually wearing!
Posted by Kathy Torrence on Dec 16, 2007 in
Crafts,
Other items While I was waiting to go to the doctor’s office the other day, I had about 20 minutes to waste and I was really close to The Scrapbook Station in Voorhees, NJ. I haven’t been there in a very long time, and I have to say that I was pleasantly surprised. The store used to mainly focus on stickers and die cuts, but they have vastly improved their stamping supplies.
In fact, I was drawn to a display for scratch-art clay stamp board pieces – and I just had to try them out! I bought a little sample pack and had a chance to play with it the other night.
I used them to make more ornaments – this time, for Emily’s dance teachers. Here’s how they turned out:
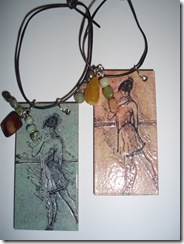
This stuff is SO cool to play with! I stippled the background with different color inks then stamped the dancer image (En Pointe from Stampin’ Up!) with black StazOn ink. Then – and here is the cool part – I used a sharp tool to scratch out highlights on the image. The highlights show up white against the background – so fun!
After I finished with the highlights, I added some chalk shading then coated the surface with VersaMark ink and embossed the whole thing with clear embossing powder.
I used my Crop-A-Dile to punch two holes in the top and added jump rings for a piece of thin leather cord. I also added some gem dangles from the left jump ring – turquoise, jasper and also some amber. I can’t wait to try some more techniques with stamp board!
Posted by Kathy Torrence on Dec 16, 2007 in
Crafts,
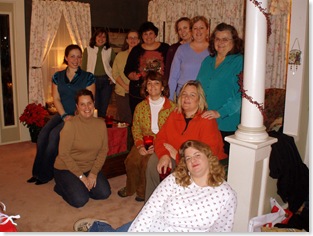
Other items Last week, we held our first (annual?) ornament exchange. I thought it was FANTASTIC! The talent was amazing and all of the ornaments were unique and gorgeous!
We had eleven participants in all (that means we exchanged 11 different ornaments!) – here is a photo of everyone (taken very reluctantly, I might add):
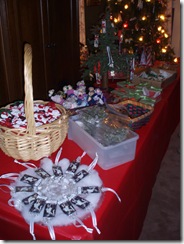
And here are our ornaments:
Thanks to everyone who participated!