Posted by Kathy Torrence on Jul 30, 2007 in
Crafts,
Other items,
Scrapbooks I just finished another project – this one is WAY easier than it looks.
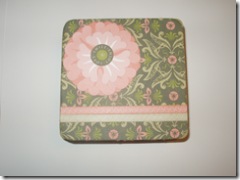
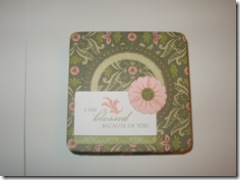
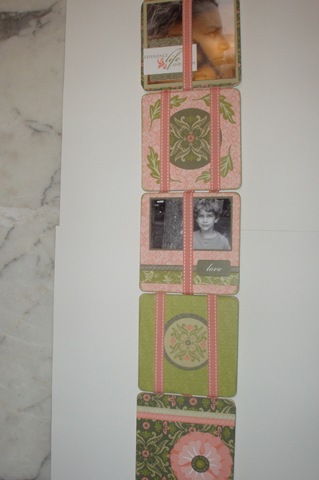
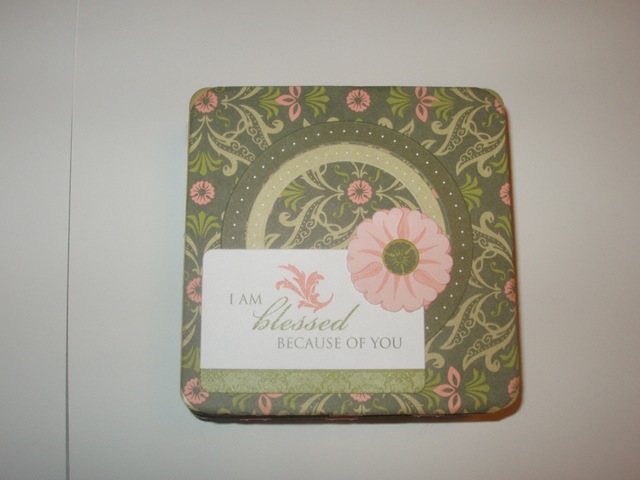
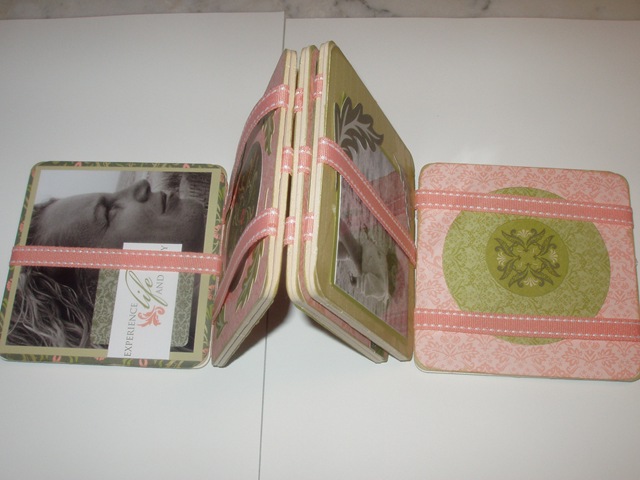
I used some 4X4 square chipboard coasters to make a Jacob’s Ladder toy – these are the toys that flip down one way and then the other. I made it into a little mini scrapbook.
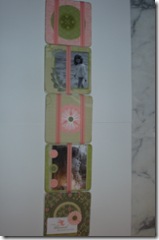
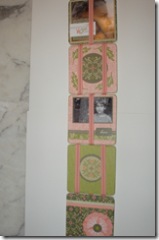
These are SO much fun to play with – my kids love them!
I used the Stampin’ Up! Secret Garden Simply Scrappin’ Kit and kept the embellishments to a minimum so as not to interfere with the folding mechanism.
I found the instructions for these on Craft Weekly TV here.
I may try to schedule a class with these soon…
Posted by Kathy Torrence on Jul 29, 2007 in
Crafts,
Other items,
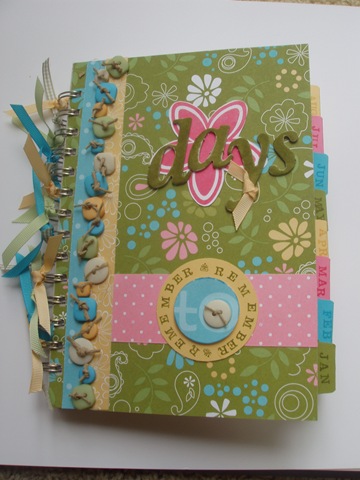
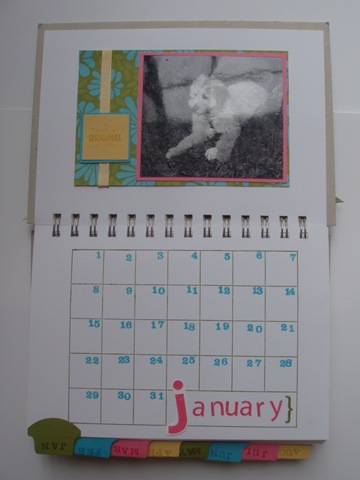
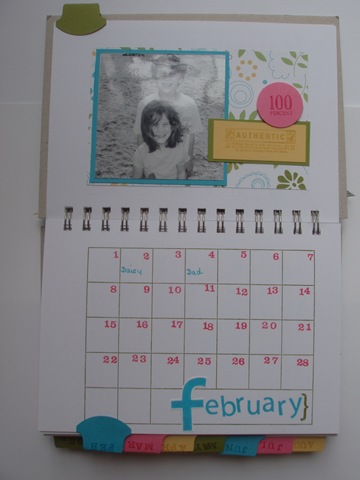
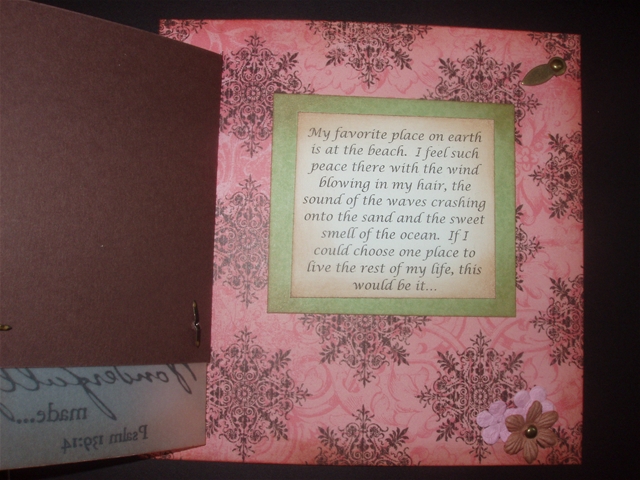
Scrapbooks I wanted to design a project using the new Calendar background stamp set, so I decided to make a ‘Days to Remember’ book. The recipient can use this book to record special days such as birthdays, anniversaries and other holidays. Since the dates are not calendar specific (each month in the book starts on a Sunday and ends whenever), this can be used year after year. It’s just the dates that are important, not the days (hey…I guess I should have called this ‘Dates to Remember’ instead!).
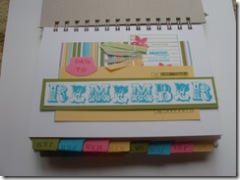
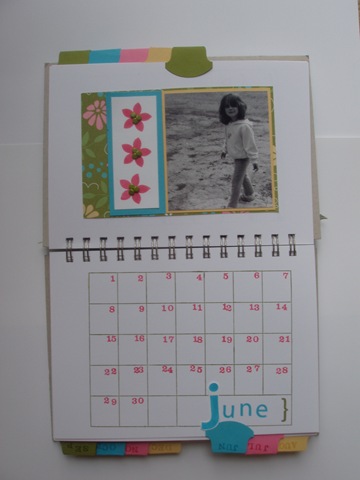
This project took a VERY long time – there is a LOT of stamping to do. By the time I got to the inside pages, I decided to keep them very simple and just use a series of black and white photos taken from one day at the beach. But you could use a photo each month of someone whose birthday is in that month – that would be a wonderful gift!
So…here’s how it turned out:
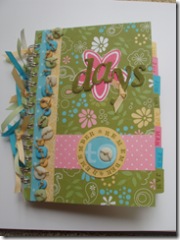
I realized that I should have oriented the book cover sideways to match the inside calendars, but I think it’s cute anyway.
Instead of varying the color scheme of the months (which would look REALLY good), I kept the colors the same throughout the book. Like I said, this was a LOT of work.
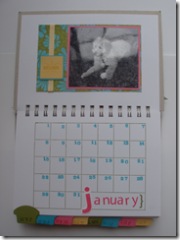
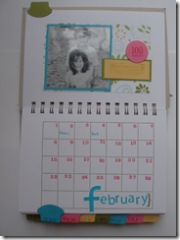
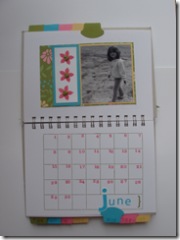
Just a couple of pages to give you an idea of the inside…I couldn’t use too many embellishments because I didn’t want the book to be too thick.
I used a Stampin’ Up! art journal as the basis of the book and have MANY more blank pages at the back. Maybe you could use these for notes or as a journal – or to record the gifts received and given for each occasion.
Posted by Kathy Torrence on May 31, 2007 in
Crafts,
Other items,
Scrapbooks At my Stampin’ Up! retirement party last night, I had two make-and-take projects for my guests.
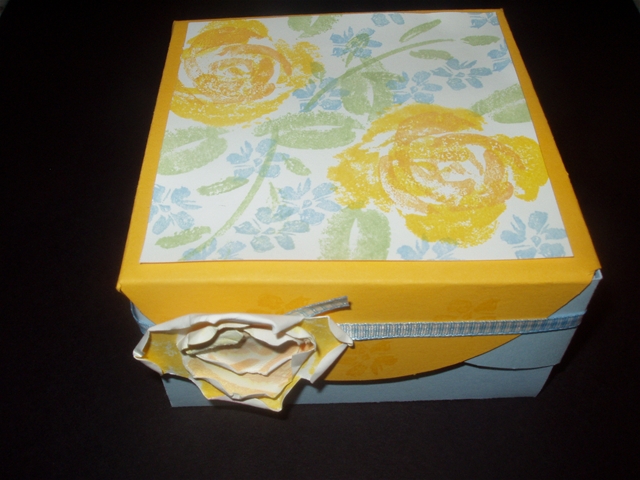
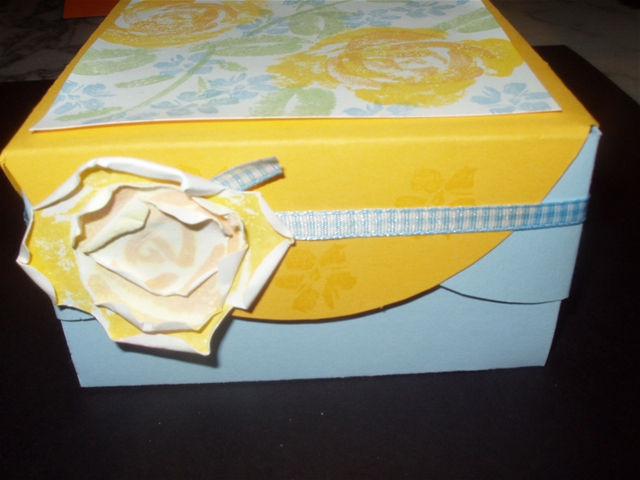
One was this scallop box:
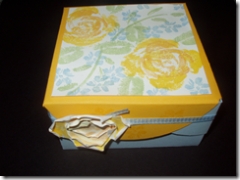
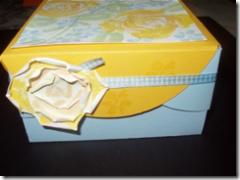
Instructions can be found on SplitCoastStampers resources page (a link to SCS is on the right of this page). I used Roses in Winter – another great set that is retiring – what am I going to stamp with in July!?!?!
I also showed how to include a little three dimensional rose on the side of the box. You just stamp the three different size rose images (once each) onto white cardstock and cut out the images. Then you spritz them with water, roll the edges and adhere them to each other. You can also add in a few more layers if you want a fuller rose.
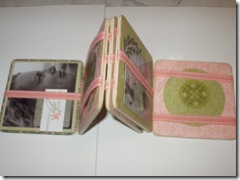
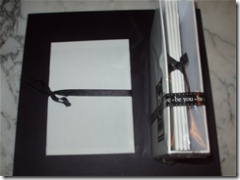
The other project was a little scrapbook/photo album made from Stampin’ Up!’s clear envelopes:

I used Sparkling Summer (need I say it again? RETIRING!) and A is for Adorable to stamp the cover and added a strip of Au Chocolate and some ribbons as a binding.
The inside is a stack of clear envelopes adhered to each other by the tabs and attached to the two covers with the ribbon bindings:
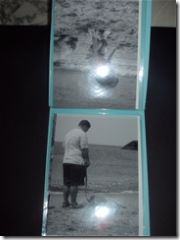
I just threw in some photos of my family at the beach, but I could change them out since the edge of the envelope is accessible.
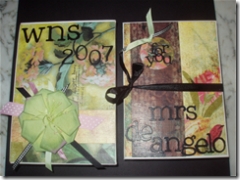
This inspired me to create another little scrapbook for our church secretary who is retiring this week. My pastor gave me some notecards (just 3X5 index cards) on which parishioners had written down messages for the retiring secretary. She asked me to put them together into a book and I thought I would use the same basic idea.
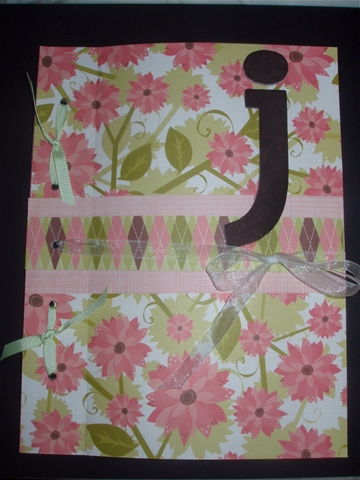
I took 2 pieces of chipboard and adhered some patterned paper to the fronts and backs. I cut the chipboard pieces just slightly larger than the width of two sets of envelopes. I added a chipboard monogram colored with Chocolate Chip ink to the cover and used ribbons to keep it together. Here’s the cover:
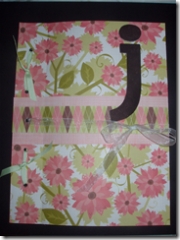
The paper is from Scrapbook Walls, I think.
Then I took the notecards and matted them onto standard card-sized pieces of Cameo Coral and Old Olive cardstock. I added just a strip of patterned paper to each one to make it a bit more detailed, but still keep it simple.
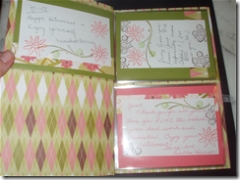
I also stamped the notecards with Mixed Bouquet in Certainly Celery, Cameo Coral, Old Olive and Chocolate Chip to make them pretty.
For those notecards with writing on the back as well, I folded the notecards about 1/4 inch from the left side and then adhered them as a ‘hinge’ inside the page so that the back is accessible.
I think this turned out really well – I hope she likes it!
Posted by Kathy Torrence on May 31, 2007 in
Cards,
Crafts,
Scrapbooks I had a Stampin’ Up! retirement party last night where I actually, gulp….sold some of my older retired stamp sets! I had such a hard time letting them go – but at least I know that they’ll be going to good homes. 🙂
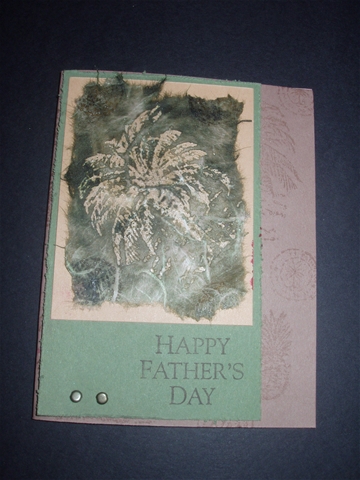
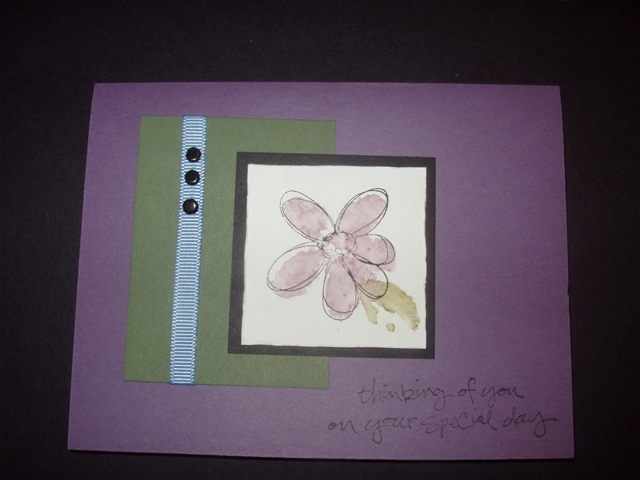
One of the techniques I demonstrated at the party was a mulberry batik technique shown in last month’s Stampin’ Success. In fact, I CASEd a card right from the magazine – I was having a stressed-out-with-too-much-to-do-to-be-original moment (but it quickly passed). Here’s the card I copied (isn’t that why they send us that magazine, anyway?):
The technique starts with white mulberry paper. The image is stamped using Versamark then heat-embossed with clear embossing powder. After spritzing the mulberry paper with water, ink was applied with a sponge. The embossed images resist the ink and end up end up sheer and translucent.
According to SU!, you should then take an iron and heat the embossed image between copy paper until the embossing powder melts and sticks to the paper. But from what I’ve heard on SCS, this part of the technique doesn’t work so well, so I skipped it and still got the effect I was looking for.
The above card uses Taken with Teal and Old Olive – sounds like an unappetizing color combo until you see them together. And there is white cardstock behind the mulberry to make the embossed images really pop.
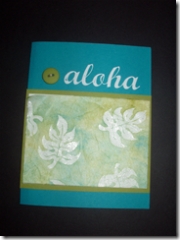
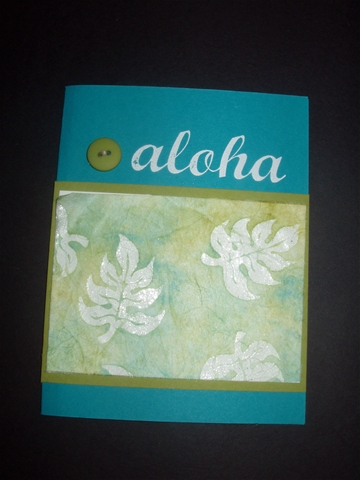
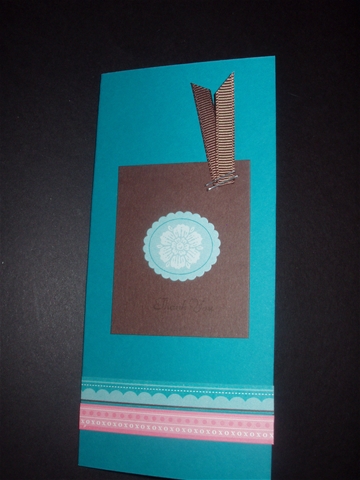
So after I got out of my panic, I tried an original card on my own using Balmy Breezes (I can’t believe that set is retiring!!!!):
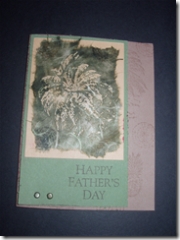
This time I used the direct-to-paper technique to apply Old Olive ink over the mulberry paper, I also wet and tore the edges and put caramel cardstock behind the palm tree image instead of white.
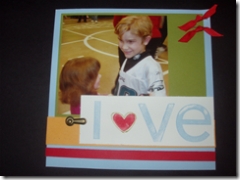
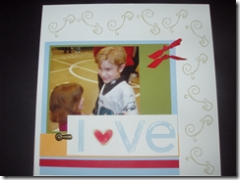
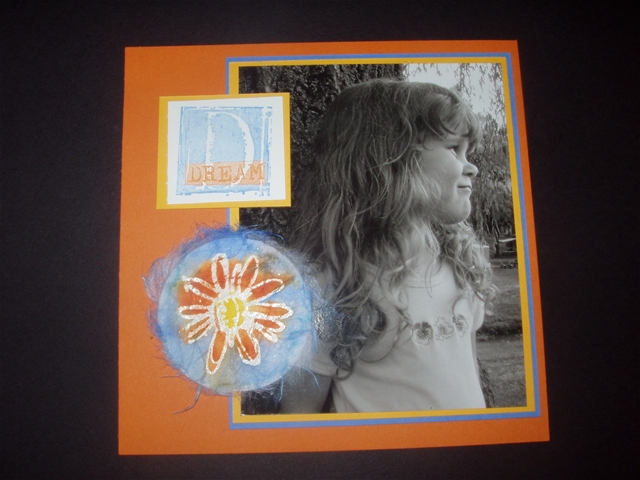
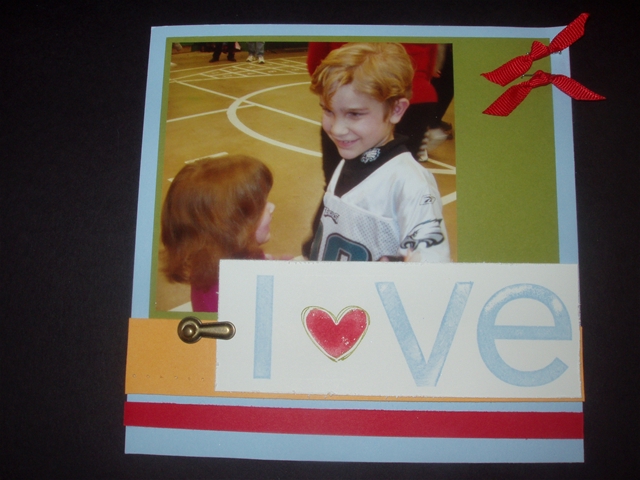
And I did an original little 6X6 scrapbook page too:
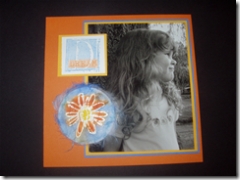
I used Petal Prints (another of my favorite sets that is retiring!) and A is For Adorable. And this time, I used re-inkers with an aquapainter to color in the flower image. I have a white circle of cardstock behind the mulberry paper so that you can see the flower outline on the finished page.
Posted by Kathy Torrence on May 22, 2007 in
Crafts,
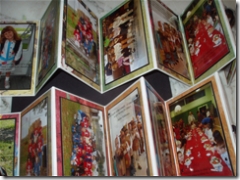
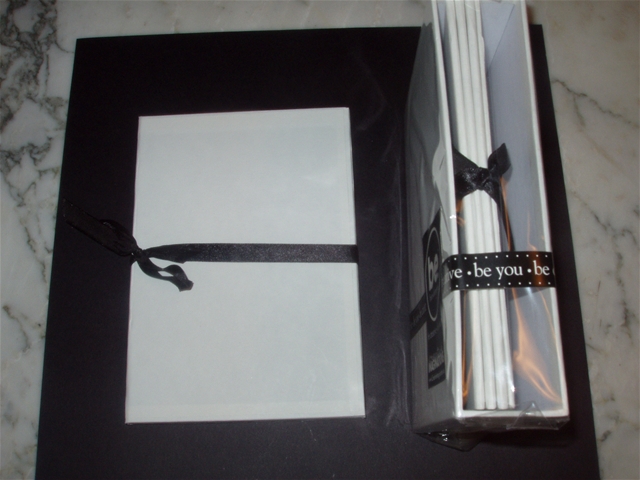
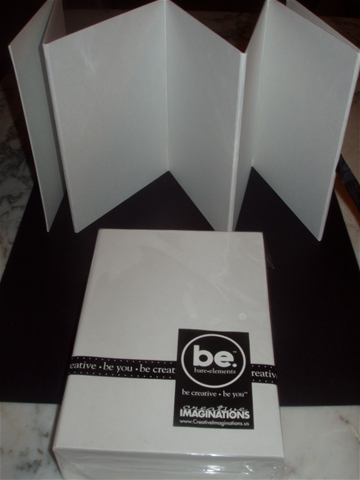
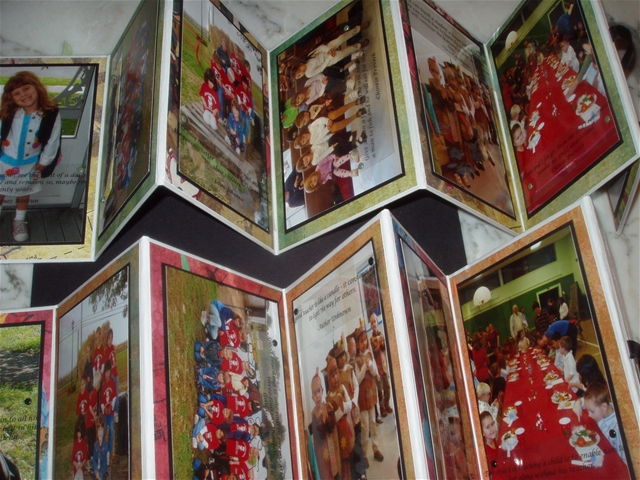
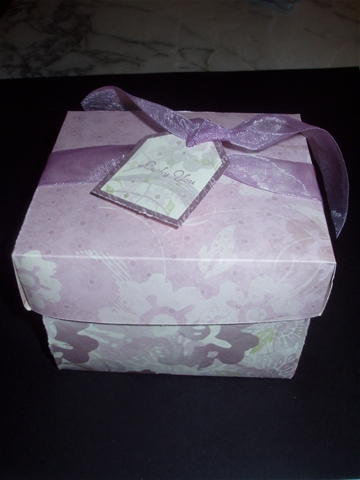
Scrapbooks While I was at the craft store the other day, I purchased two of these accordion scrapbooks-in-a-box to make for Emily’s preschool teachers. They came like this:
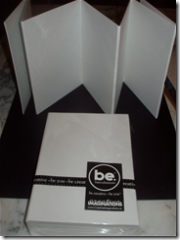
I thought that they would make great little end-of-the-year presents. I finally had a chance to work on them today – I think they turned out really cute!
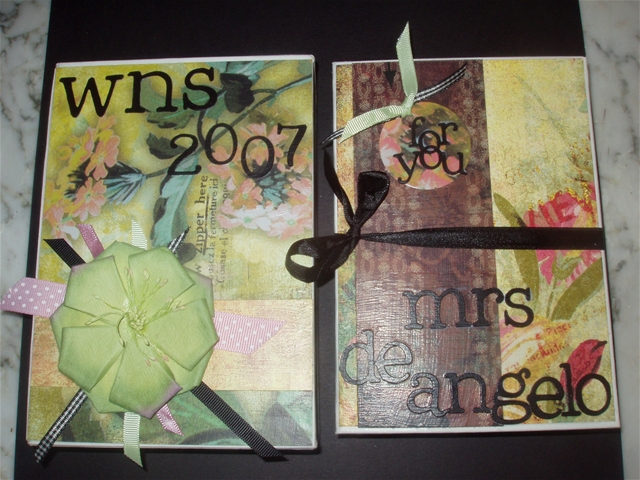
Here are the finished boxes on the left with the closed accordion books on the right. I covered the front, back and sides of the boxes with paper. The books slide into the boxes:

I used the Stella Ruby paper collection from Basic Grey along with these BEAUTIFUL, huge flowers by Prima. I love that the ribbons I put behind them makes the flowers almost look like a little corsage!
Since the boxes already had black ribbon on them, I had to find a color scheme that coordinated with the black ribbon. I think Stella Ruby worked very well.
I cut out the letters with my Cricut machine using the Doodle cartridge. The paper and letters are adhered to the box and the book with ModPodge to make it more durable.
I filled the inside of the accordion books with photos that I kept uncropped and then matted on black cardstock to make it an easier project – there were fourteen panels on each book, front and back, including the covers.
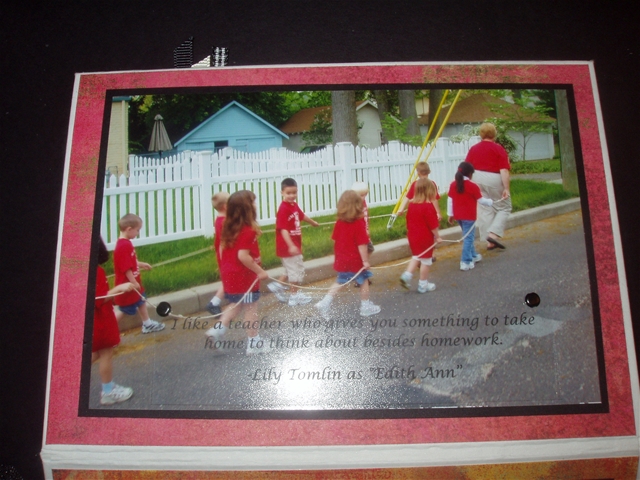
I also thought it would be nice to include some quotes about teachers, teaching and education. So I Googled some quotes (24 different quotes – 12 for each teacher), printed them out on transparencies (after a minor situation with some thin vellum melting in my laser printer), cut them apart and adhered them over each of the photos with brads. Here’s an example of one page:
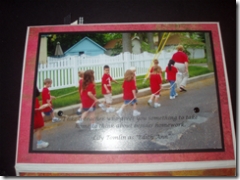
What was nice and easy about this was that by leaving the photos uncropped, each one had some empty space that I could use for the quote.
I hope the teachers like them (and that they don’t read my blog and ruin the surprise…).
Posted by Kathy Torrence on May 9, 2007 in
Cards,
Crafts,
Family Stuff,
Other items,
Scrapbooks Just wondering who’s reading this…I know my husband is NOT!
I told him I was going to give him a hard time here today, so here goes.
I asked him to read my entries yesterday to see the photos of the puppy and stuff. When he got home last night, I asked if he had read my blog. He said he looked at the pictures of the puppy, but didn’t read the words! I asked if he saw the entry with the photos of Emily’s birthday party and he said he didn’t scroll down that far! Hmmm….obviously he’s not a big fan of mine. 🙁
Since I don’t get many comments on my blog, I’m curious as to who’s out there (other than my husband who doesn’t read what I write anyway)….can I ask a favor? Could you please leave me a comment and let me know where you’re from and how you heard about my site?
Also, I’m thinking about starting a monthly or weekly challenge where I’ll give you a technique, theme, color combo or other idea to start with and then have you scan and email me a photo of your work. Then I can post the results and give out prizes (randomly, since art is subjective) to all who complete the challenge. Anyone interested? 😉
Posted by Kathy Torrence on May 8, 2007 in
Cards,
Crafts,
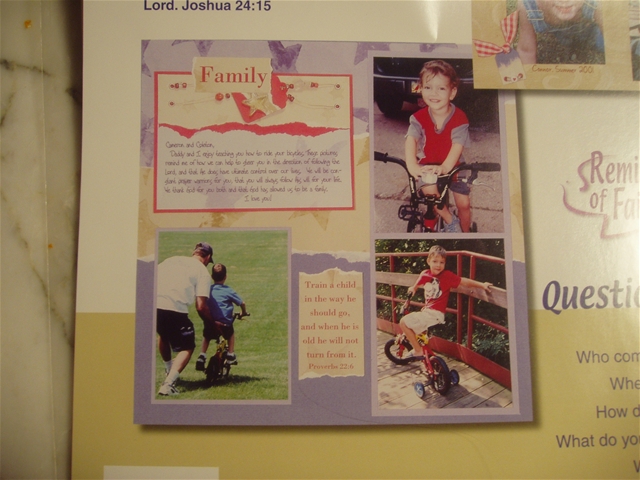
Scrapbooks I taught a scrapbooking class at our Scrapbooking Ministry in April where I instructed the attendees on the fine art of ‘scrap-lifting’ (also known as CASEing – Copy And Share Everything).
For one example, I took a layout sample from “Reminders Of Faith” scrapbooking packet:
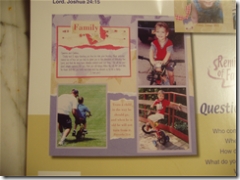
And CASEd it almost exactly…but I turned it on its side to accommodate my photos:
Most of the ladies said that they never would have thought to try it that way.
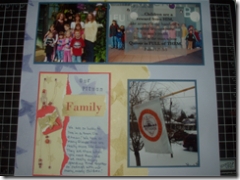
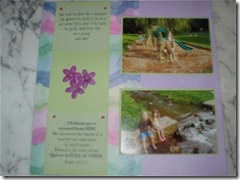
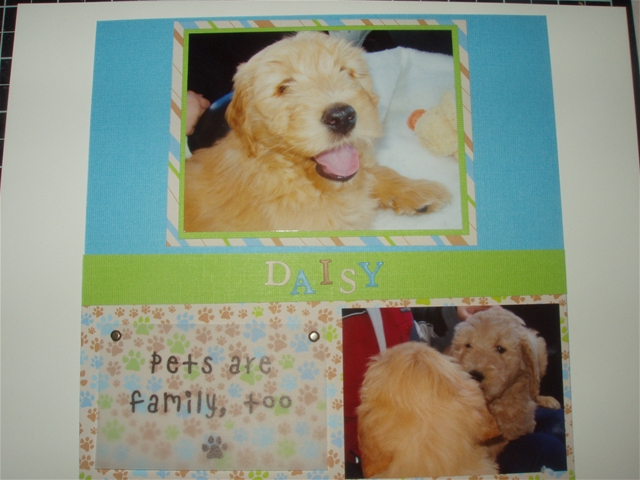
I also used a sketch from Creating Keepsakes to do the following pages:
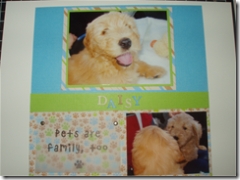
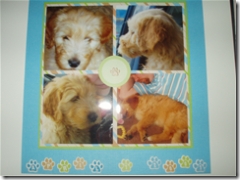
I used a scrapbooking pad from Die Cuts with a View for these pages – very easy and very cute. The theme for the month was ‘Family’, so I liked the pet/family connection with the vellum quote.
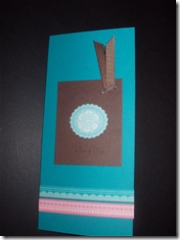
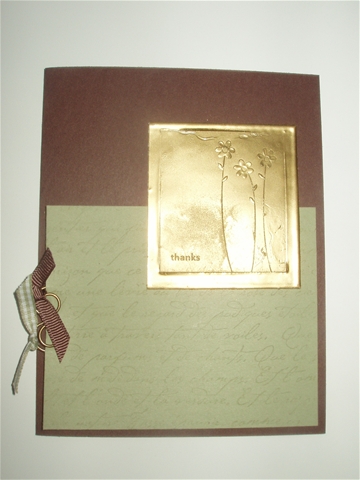
I also have a little card that I used as a make-and-take for my two stamp clubs this month:
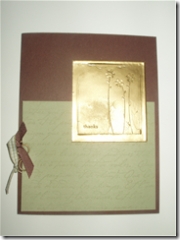
It uses a faux-metal technique described in the Stampin’ Up! demonstrator magazine, Stampin’ Success, this month.
The metal piece is made with a plain piece of cardstock as the base. It really doesn’t matter what color – it’s going to be covered up anyway.
You cover the entire piece of cardstock with VersaMark ink and sprinkle on embossing powder (gold, in this case). You then heat and melt the powder with a heat tool. You repeat this 3 or 4 times, letting the piece cool between layers.
The last time you heat the piece, press a stamp in the wet embossing powder while it is still hot.
I have done this technique many times, but what I liked about this piece is that it used an almost solid stamp (this particular stamp is from the “In Any Event” hostess stamp set). The end result is that any design in the stamp results in a raised impression in the metal – in this case, the flowers and sentiment – and the outside creates an almost frame-like effect.
My first stamp club was very impressed – they had no idea that the piece was not actual metal when I brought it out. We’ll see how my other stamp club likes it when they try it out tomorrow night…
Posted by Kathy Torrence on Mar 10, 2007 in
Scrapbooks Tomorrow I am scheduled to give a presentation to the United Methodist District Conference (66 churches!) about our Scrapbooking Ministry that I coordinate – and since none of my fellow scrapbookers volunteered to help me – I’m on my own for this one!
I’m prepared, but it took a while to get all the handouts and my notes together.
I decided to go ahead and put my pages together for March’s theme of ‘peace’ so that I could use them at the presentation (even though the crop isn’t until next week – I never work this far ahead! ). For the class I’m teaching, I want people to bring photos of a time they felt peaceful or photos that make them feel peaceful when they look at them. Then we’re going to use sketches to make our own individual pages using our photos.
Here’s one of the pages I did today – it’s a small 6X6 page:
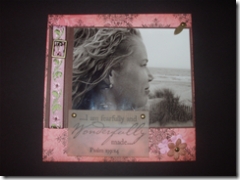
That’s me at the beach – a self- portrait, I might add. To take this photo, I held the camera away at arm’s length so that I could get a shot of myself with the beach in the background. I was on the boardwalk by myself at the time (my kids were riding the rides with Mike) and I must say, I got some VERY strange looks as I did this!
Anyway, I included a powerful vellum quote and hinged the photo so that the journaling is underneath:

The photo stays closed with a photo-turn on the page.
I like how this turned out – I used some of the paper and ribbon that I bought on clearance at Target today (have to justify my purchases SOMEHOW!).
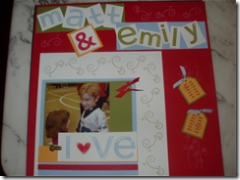
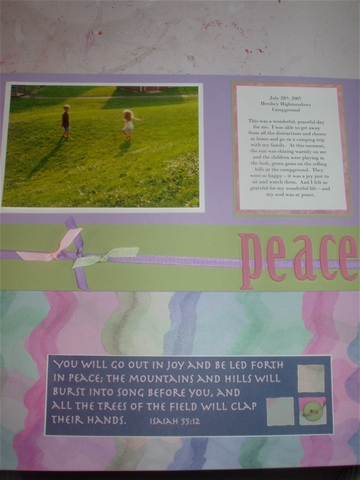
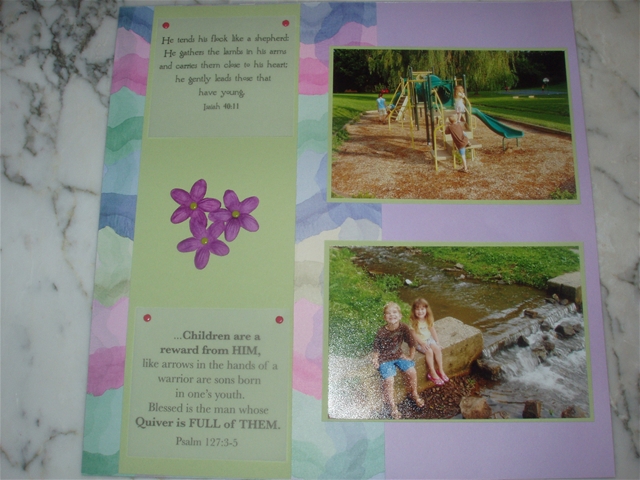
I also made a 2 page 12X12 spread based on a sketch I’m going to use at the class:
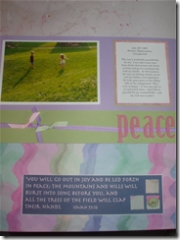
I used a scrapbook kit from a Christian-based scrapbooking company (Reminders of Faith) – I’m not crazy about the colors, but I liked the sentiments that came with it – the pack was a ‘peace’ theme – how appropriate is that?
These are photos of Matt and Emily while we were camping at Hershey. I remember it was such a beautiful day and they were getting along so well – the sun was on my face, the grass was really green, there was a babbling brook nearby – it was one of those really peaceful moments when life just seemed really good.
Of course, it’s not like that all the time – right now, Matt and Emily are fighting with each other, Mike’s upstairs sleeping because he’s sick, I’m stressed out about this presentation tomorrow…I wish I were back by the babbling brook!
Posted by Kathy Torrence on Feb 23, 2007 in
Cards,
Crafts,
Other items,
Scrapbooks This has been some crazy week for me! After I finished putting the floor in, there was this one little piece that was not quite perfect and it was really bugging me. Of course, I can’t leave well enough alone, so I had to try to fix it – and that was when I cut my finger! I should have gotten stitches, I guess (it’s been bleeding now for almost 3 days), but I really don’t have time – here’s why…
First, my daughter Emily and I both have the flu and feel crummy.
And I think I’ve slightly overextended myself as far as stamping events go – in fact, I’ve done so much, I’m going to have to post my samples in at least 3 different posts today.
I have a workshop tonight (someone called last minute and in my sick delirium, I said I’d do it) and another tomorrow afternoon. Then I have a Pearl Ex Technique class on Sunday afternoon and a Stamp-A-Stack on Monday night. Am I crazy!?!?!
But…after focusing on everything today while my poor sick daughter was vegging out by the TV, I am now prepared for all the events.
Oh, and I got an email from one of my friends that several of my cards are in the Spring issue of Take Ten Stamper’s Sampler – but I didn’t get a comp copy and I can’t find it in any of the stores. I called them this morning and they said they had a mistake with my zip code, so they’ll be mailing it out shortly. I’ll post which pages I’m on as soon as I get it.
Meanwhile…I thought I’d first post the projects I’m going to be using at my workshops this weekend. I’m going to do the same projects at both workshops, and my focus is going to be ‘quick and easy’ cards and scrapbooking.
First, here’s a little box I made that I’m going to use as a door prize with an incentive stamp inside:

No adhesive required on this one -just score and fold. I used the GORGEOUS Enchante paper from the SU! Winter Mini – I’m really going to miss it when it’s gone next month!
Next, I’m going to show off our Simply Sent kits and show how easy it is to make the completed card for this kit:

I haven’t been selling many of these, and I think they’re a good deal for those who just want to make some quick and easy cards. Plus, this particular one gives me a chance to demo how to use the watercolor crayons.
Then, talk about easy, I’m going to make a simple card using the stuff from Accents and Elements:
This card goes together in about 2 minutes and is simple, but pretty. The size of this card is different – 3X6 – perfect for the small open-ended envelope.
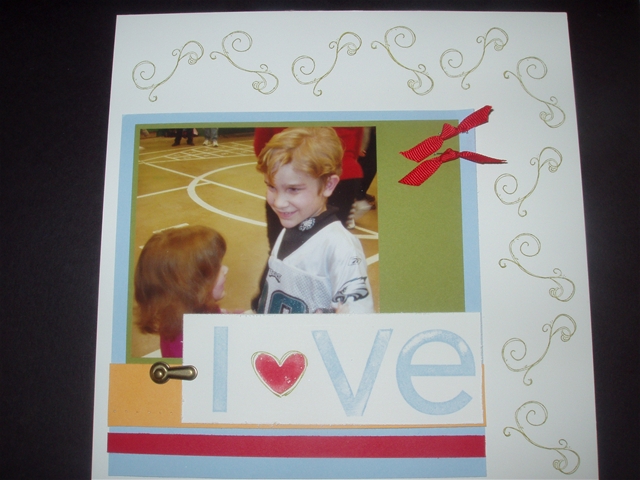
Then for the make-and-takes, we’re going to make a small 6X6 scrapbook page:
Then I’m going to show how to easily convert it to an 8X8 page:
(Those doodles are the steam swirls from Like It a Latte) And then to a 12X12:
Then we’re also going to do beaded pens for a make-and-take:
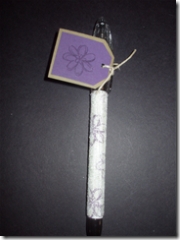
These are so simple and so much fun! You stamp an address label and wrap it around the base of the pen then cover it with double sided tape and roll it into clear microbeads. These ladies have a demo every year and I thought I’d try to do something besides the normal card make-and-takes.
Hopefully, the workshops go well. Now I’m going to post some samples/tutorials for my Pearl Ex Technique class…
Posted by Kathy Torrence on Feb 19, 2007 in
Crafts,
Scrapbooks Yesterday we had another crop with our Scrapbooking Ministry and it went very well! Everyone loved the keychain class that I taught (see my previous post for instructions). I realized yesterday morning that I was a little short on laminate chips, so I made quick trip to my local hardware store and stocked up…I just pretended that I REALLY couldn’t decide on a countertop color…
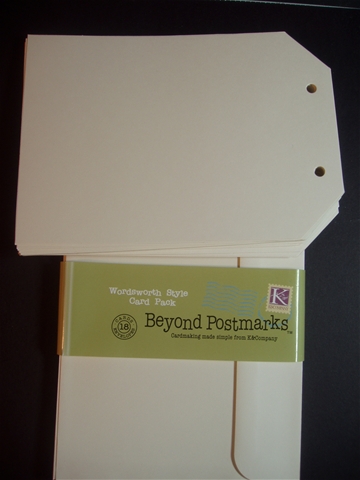
While I was at the crop, I worked on a project for my daughter’s preschool teachers. Last weekend they held a spaghetti dinner fundraiser that was so much fun! They had a DJ playing songs the kids could dance to. I was one of the few people there with a camera, so I snapped a few photos and thought I’d make up a little book as a ‘thank you’ gift for the school.
I started with some cards by K & Company that I found at Michaels:
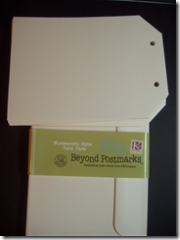
I thought these cards would make a perfect little tag scrapbook. I also bought some adorable DaisyDs paper while I was at the scrapbook retreat in Cape May – the paper has a vintage school-days theme. So I covered the some pages with the patterned paper and some with some cardstock – then I added the photos and just a few embellishments (I kept this project VERY simple):
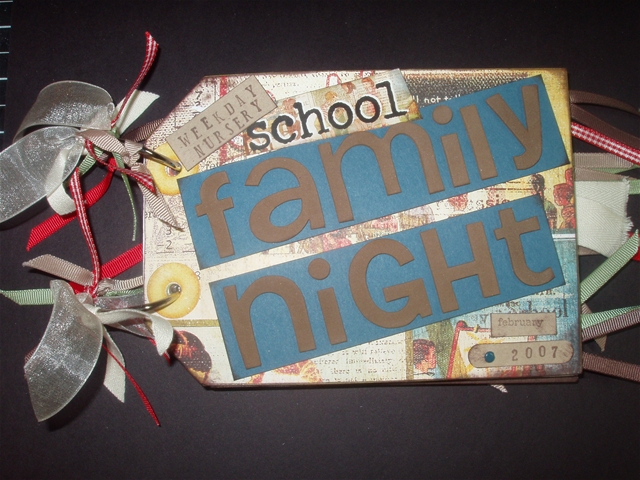
I bound the book together with some split rings that I picked up at an office supply store. Here’s the front cover:
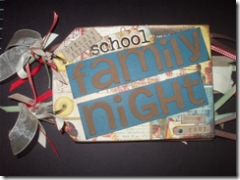
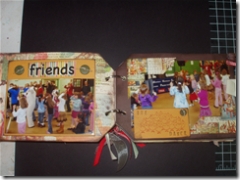
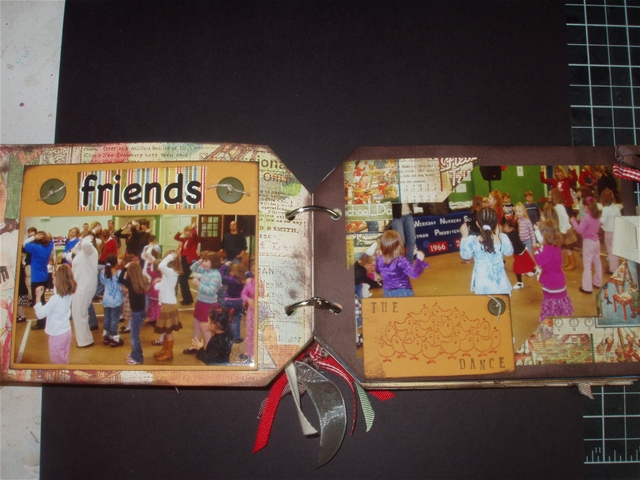
The title letters are some really cute foam sticker letters that I bought during my QVC shopping binge last week. Here’s another photo from an inside page (the book is actually made of just 3 of the tag cards – 6 pages w/2 sides for a total of 12 individual pages all together).
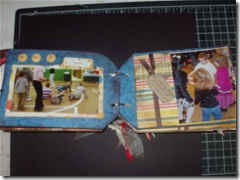
That is actually the middle of the book – you can both sides of this card. These are the only two pages with the same paper facing each other.
What I liked about this project is that I could stop anytime I wanted to – I just added pages (and could even go back and add more) until I felt like I was finished.
I hope the teachers like it! 🙂
Today, Mike and I went shopping for a replacement stove – ours stopped working right before Christmas. We went to SO many stores and looked at SO many ovens – after a while, we were so overwhelmed that we just went home and decided to look online so that we could compare the different models and features side-by-side. We did finally order one – hopefully it will be here soon.
We also picked up a new floor for our kitchen – ours is in such bad shape and we really can’t afford a nice replacement right now, so we decided to go the ‘Trading Spaces’ route and try one of those peel-and-stick floors. We found one that actually comes in planks and looks a lot like a laminate floor, so we bought that up today too. Me and my ‘Type-A’ personality wants to start installing it tonight, but Mike is trying to convince me not to put it down right now…it’s killing me to see the boxes just sitting there…they’re calling out to me….we’ll see if I can hold out until later this week…


