Posted by Kathy Torrence on Nov 17, 2008 in
Crafts,
Other items,
Today's Photo One more Christmas craft that I created during my ‘craft frenzy’ – a “JOY” Christmas banner.
To create this project, I started with plain cardstock cut into triangles. For the size pennants I used, I cut a piece of 8 1/2 X 11 cardstock into an 8 X 8 square then cut that into four equal triangles (it’s the easiest way I could think of).
I used chipboard letters to spell out the word “JOY” and added snowflakes at the beginning and end of the banner. Because it was so long, I had a difficult time photographing this project – so here are several photos to show different levels of detail:
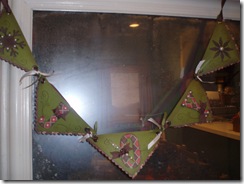
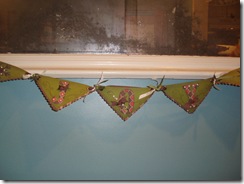
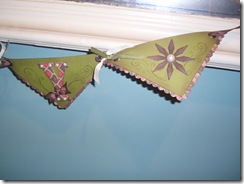
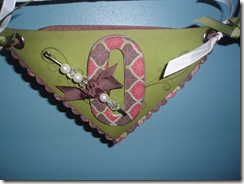
As you can see, I added scalloped patterned paper along the edges and various ribbons and pearls from the Stampin’ Up! Pretties Kit. For an aged look, I covered the letters with patterned paper and sanded and inked the edges. I also used large eyelets to reinforce the holes where the ribbon feeds through.
I think this is SO pretty…I can see hanging it either from a mirror, in a doorway or even on a mantle.
This week I’ll share some of my new card designs with you…
Posted by Kathy Torrence on Nov 16, 2008 in
Crafts,
Other items,
Today's Photo During my ‘craft frenzy’, I created a ‘Christmas Countdown’ that can hang on a wall or mirror. I used one of the new Decor Elements from Stampin’ Up! for this project.
I started with a plain white canvas (literally), and added some Old Olive ink for an aged effect.
After struggling to apply the Decor Elements to the canvas, I finally read the directions and noticed that they are not recommended for textured surfaces such as this. You can achieve the same idea by applying the elements to a piece of smooth, painted wood or even cardboard – but I wouldn’t recommend using a textured canvas for this project.
I am, however, happy with the results – but it took a lot of blood, sweat and tears to get here (well…maybe not blood – but there sure were a lot of sweat and tears as well as a frantic phone call to SU! Demonstrator Support)…
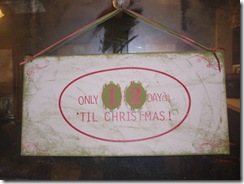
I applied the numbers for the countdown to Old Olive cardstock (which was MUCH easier than the textured canvas!!!!) cut into ovals and backed with scalloped patterned paper. The numbers are attached to the canvas with velcro – and I even adhered an envelope to the back of the canvas to hold the unused numbers:
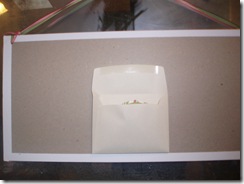
I used my Crop-A-Dile to punch holes in the canvas to string ribbon for hanging. That Crop-A-Dile will punch through ANYTHING!
One more Christmas craft tomorrow…
Posted by Kathy Torrence on Nov 15, 2008 in
Crafts,
Other items,
Today's Photo Today I’d like to show you an idea for a place setting/napkin ring for Thanksgiving using items you already have in your craft room.
For this sample, I’ve actually used a Halloween napkin (again, 90 percent off at Target – it cost me 25 cents) – it’s the right color to show you the idea if you just ignore the bats and Halloween ghouls in the brocade pattern.
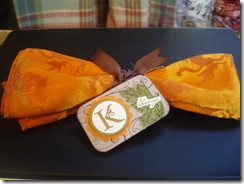
I took a wide brown grosgrain ribbon and tied it around the napkin, then added a Kraft piece of cardstock to use as a tag. I stamped the swirl pattern from the Season of Joy Stampin’ Up! stamp set and inked the edges of the tag.
Next, I used a monogram initial from the Lovely Letters stamp set and embossed it with gold embossing powder. I used a circle punch then layered it onto scallop punch, using dimensional adhesive for some added interest.
I stamped a few leaves onto Old Olive cardstock, attached them to the tag and added the word "Blessings" on top – simple and easy. I think it would also have been cute to add a bunch of twigs under the ribbon (but the weather was not cooperating with me the day I made this – they would have been some very wet branches!).
Here’s another cute place setting idea – using a chipboard ‘frame’, cover the piece of chipboard with patterned paper, add a photo behind and tie a ribbon through the top:
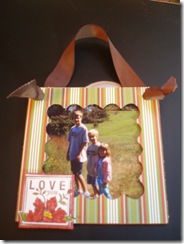
This could act as a place setting if you use a photo of the guest and add his or her initial instead of the stamped image I have here. Or as I’ve made it, this could be a Christmas ornament or other small gift.
How about some more Christmas ideas tomorrow?
Posted by Kathy Torrence on Nov 14, 2008 in
Crafts,
Other items,
Today's Photo Here are a few more simple ideas for Christmas crafts…
I had a bunch of these tiny little silver tins that were actually sitting in my craft trash can (they were originally used for some bracelet kits that I purchased, but can also be found in the wedding favor aisle of most craft stores). I picked them out of the trash (yes…I was trash-picking my own trash) and thought they would make cute little gifts for candy or mints:
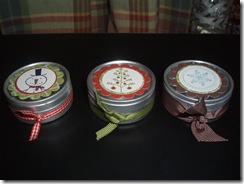
Just a few samples – these are SUPER easy! Stamp any image (color, if desired – I used the Mr. Twigster and Season of Joy stamp sets from Stampin’ Up! here), punch out with a circle punch and layer onto a piece of patterned paper punched with a scallop punch. Tie a ribbon around the tin and you have a sweet little gift tin!
If these aren’t big enough to hold your gift items, you can try the same idea with a larger glass jar:
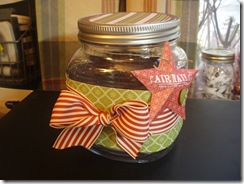
I took a piece of patterned paper and used it as a ‘belly-band’ around the jar. It wouldn’t fit all the way around, so I actually cut two pieces and overlapped them on the sides of the jar. I added a pretty red-striped ribbon and one of the new Stampin’ Up! Star Bright Designer Series Paper Ornaments from the Holiday Mini Catalog. I added a rub-on to the ornament and a piece of linen thread to tie it to the top. To top it off, I also added a circle of patterned paper cut with my Coluzzle to fit the jar lid. How cute would this be filled with homemade candy or cookies as a gift for your neighbor or teacher?
And speaking of those Star Bright ornaments, for my display at the Shop ’til You Drop night tomorrow, I assembled several of the ornaments from the kit and have them hanging from a little Christmas Tree for my table:
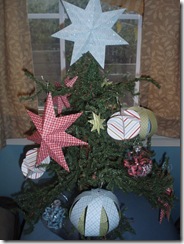
These ornaments are SO easy to make – I’m going to offer them as make-and-takes at tomorrow’s event. And not only do they work as ornaments, they also make great additions to gift packaging (as I’ve shown on the jar above).
How about another Thanksgiving idea tomorrow?
Posted by Kathy Torrence on Nov 13, 2008 in
Crafts,
Other items,
Today's Photo So yesterday I posted my Thanksgiving-themed frame – today I’ll show you another frame that I did with a Christmas theme (also using a 60 cent Target Halloween frame I found on clearance).
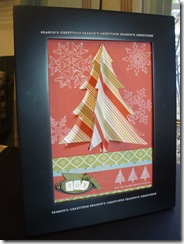
This frame is my own design – and I’m pretty happy with how it turned out. All the products used are from Stampin’ Up!
Again, I removed the glass from the frame and started with a piece of Ruby Red Stampin’ Up! cardstock as the main piece. I added some snowflake rub-ons in the background and also some white "Season’s Greetings" rub-ons directly on the black frame.
I used my Sizzix machine with a Christmas tree die (you could also trace and cut any Christmas tree outline) and cut out three trees from SU! patterned paper. I folded the trees in half and glued the edges together to make a 3-D effect.
Again, this is a very simple project – at the bottom of the frame opening, I added a few more strips of patterned paper and cardstock along with some additional rub-ons and a piece of HodgePodge Hardware with a few stamped letters spelling out "JOY".
This would make a great, inexpensive gift – just keep your eye out for some more clearance frames (and you’d better get to them before I find them first)…
Tomorrow – another Thanksgiving idea…
Posted by Kathy Torrence on Nov 12, 2008 in
Cards,
Crafts,
Other items,
Today's Photo In an effort to get ready for the WCK Walls School “Shop ‘til You Drop” event this Friday night (6-9pm in Pitman, NJ if you’re interested in stopping by), I have been in an absolute crafting frenzy for the last few days! I am hoping to show some new ideas using some of the latest Stampin’ Up! products and stamp sets…and I had sequestered myself to my craft room for a few days…
Tonight I have finally emerged and I’d like to show you some of the projects I finished. I could do SO much more…but my family is hungry and wearing mis-matched clothing – I suppose it’s time to get back to reality and finally do some grocery shopping and laundry.
Instead of overwhelming you with all the projects and cards in one post, I’ll break them up and post a new one (or two) for the next few days.
For the first post, I’ll show you the “Chinese Auction” prize that I put together (each vendor has to supply one for the event):
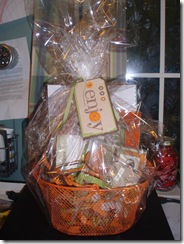
In the basket is a Stampin’ Up! catalog (of course!), an SU! gift certificate, some new, unmounted stamps (in a pretty little bag with a cute tag):
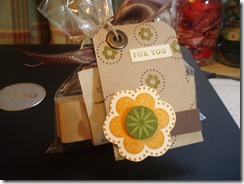
and a box of five all-occasion stamped cards and envelopes:
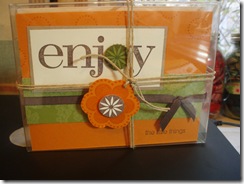
I used the stamp set, Enjoy Every Moment, to make the cards and tags for the basket. I kept with an Pumpkin Pie/Chocolate Chip/Old Olive color palette to make it seem ”autumn-ish" – plus I just loved the little orange basket. 🙂
I also included an embellished frame with a Thanksgiving theme – I actually made two of them – one for the prize basket and one for a table display (and to use in my own home for the Thanksgiving holiday):
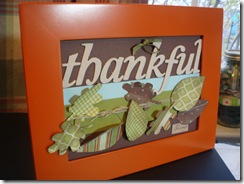
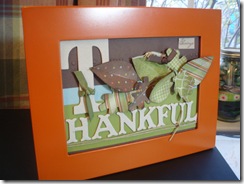
Because I only had a limited number of chipboard letters, the end results are slightly different. This project was inspired by an idea that I saw in Stampin’ Success magazine, but was modified to match the supplies and frame that I had on hand. By the way, I picked up these plain orange frames at Target on the 90 percent off Halloween aisle the other day (they cost me all of 60 cents).
I removed the glass and started with a background of plain Chocolate Chip cardstock. The leaves were cut from Stampin’ Up! Designer Series paper using my Sizzix machine and were sewn on my sewing machine, inked and crinkled for dimension. That’s really all there is too this project – a few more pieces of cardstock, some twine and ribbon and a few chipboard letters – simple, but I love how these turned out!
Now I bet you’re going to come to the Shop ’til You Drop night just to bid on this Chinese auction prize, aren’t you? 😉
Tune in tomorrow for a similar idea for a Christmas frame…
Posted by Kathy Torrence on Nov 5, 2008 in
Cards,
Crafts We went to a birthday party this weekend for a little girl turning two and I took the opportunity to make a sweet little birthday card.
I found an adorable page in a vintage children’s book that I decided to use as the main focal point. I added some chipboard, glitter and ribbon…here is the result:
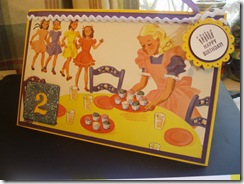
It felt so good to do something creative again! Between working, kids’ activities and everyday life, I haven’t had any time to just ‘play’ lately.
But I signed up for a booth at our school’s annual Shop ‘Til You Drop event next Friday night (if any of you are in the Pitman area and would like to stop by, we’ll be at WCK Walls School from 7-9pm on 11/14) and have to start preparing this week. I want to show off some of the new Stampin’ Up! stamps and products, so I’ll be exercising my creative muscle quite a bit between now and then…
Posted by Kathy Torrence on Oct 23, 2008 in
Scrapbooks When I did an interview with the Philadelphia Inquirer for my Scrapbooking Ministry about a year ago, I mentioned that I created my very first scrapbook based on the movie “Grease” when I was 10 years old.
Well…guess what my mother brought over this weekend? That very same scrapbook!
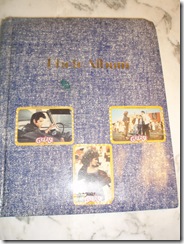
In 1978, Topps marketed “Grease” trading cards to girls – probably to compete with boys’ baseball and football cards. I collected them all and put them into this little scrapbook…
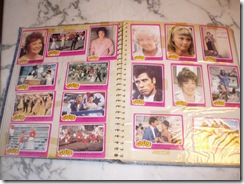
In the scrapbook, I also included magazine photos of John Travolta and Olivia Newton-John, ads for the movie…I even saved a wrapper and a piece of the bubblegum that was inside with the cards (30 year old piece of gum, anyone?)…
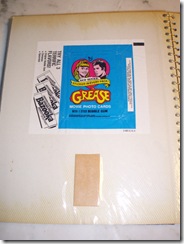
I was obsessed with this movie! I memorized every line and knew every song by heart. Of course, being only 10 years old, a lot of the jokes went right over my head…but even then, I just loved Sandy as a ‘bad girl’!
Posted by Kathy Torrence on Oct 12, 2008 in
Crafts,
Family Stuff When I asked Matt and Emily what they wanted to be for Halloween this year, they of course answered that they wanted me to make them costumes (no simple costumes from Target or Party City for my kids this year!). I do enjoy making their costumes…it’s just that this is my first year back to work and I don’t have nearly as much time as in previous years. But I thought I’d start early and give it a shot.
One of my favorite sites for Halloween costume ideas is Family Fun – they have tons of ideas and most are fairly simple and inexpensive to create.
After much discussion and debate, Emily decided to try the Pick of the Litter costume:
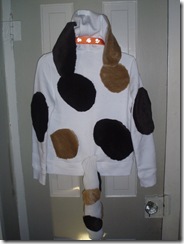
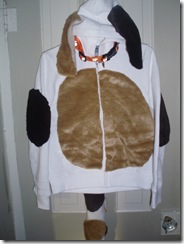
We started with a white hooded sweatshirt and then added some ‘spots’ made from cut pieces of faux fur (if you try this, let me warn you that cutting faux fur is VERY messy – the fur was certainly flying as we cut it). We attached the fur with double-sided carpet tape. We also cut out ears and a tail (stuffed leg of an old pair of tights) and pinned them on. The directions from Family Fun have you making your own dog collar – I just bought a real dog collar that I’ll use on Daisy or Geddy when Halloween is over.
So Emily will wear that doggie outfit while carrying this box over her shoulders:
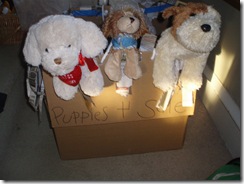
I took a cardboard box and used pipe cleaners to attach some stuffed dogs to the edges (a-la those irritating twist ties in toy packaging that drives all parents nuts on Christmas morning – these dogs certainly aren’t going anywhere). I also added some strips of newspaper to make it look even more like a box full of newborn puppies. There are some pieces of rope that will go over her shoulders – the box started to get a little heavy, so I had to watch how many puppies I used (there is also one in the back to help to counterbalance the weight of the three in the front).
I still want to make her a little doggie tag to hang from the collar, but for the most part, her costume is done.
Matt’s costume on the other hand…
He chose the Alien Encounter costume from Family Fun. I’ve wanted to try this costume before, so even though it’s a bit complicated, I figured this year I’d give it a try.
So far, I’ve only had time to create the paper mache alien head using a balloon, newspaper and a strong cardboard tube (I used one from a wrapping paper roll). The glue is created with flour and water and then you are supposed to add 3-4 layers of newspaper on top of the balloon. What they don’t tell you is that each layer takes about 24 hours to dry! So here’s our costume so far (after working on it since Friday):
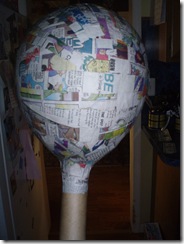
Does it look like an alien head? Maybe after I paint it? I’ll let you know how it goes…
Posted by Kathy Torrence on Sep 27, 2008 in
Crafts,
Knitting Mike and I have a long commute to work every day (one hour each way – yes, that’s TWO hours in the car together every day!) and I’ve decided to take advantage of that time in the car to work on some knitting projects. Obviously, he’s the one doing the driving – I am in no way recommending knitting while operating a motor vehicle.
After the success of my felted purse, I decided to try to make another to give as a gift. I saw some beautiful multi-colored wool yarn in blues and browns and thought I’d give it a try. I have no idea what this is going to look like once it’s felted…but that’s part of the fun, I guess. So far I’ve completed the two side panels and am working on the handle:
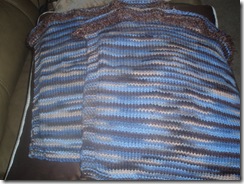
I also added some fuzzy brown yarn at the top of the purse – when the rest of the yarn felts, it should really stand out (or at least that is the hope, anyway).
The purse handle is simple, but is REALLY boring to knit (which is perfect to do in the car). But I think I want to branch out and try some new techniques on a different, slightly more complicated project that I can do at home while watching all those reality TV shows (by the way, did anyone watch Project Runway this week? What did you think of Kenley’s ‘hip-hop’ outfit??!!!??).
So I picked up some cashmere yarn the other day and am trying the pattern on the package – a scarf with some cables. Here’s the project so far:
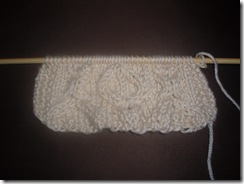
It may be tough to see in the photo, but there’s a pretty cable-knit pattern throughout the scarf. This is the first time I’ve ever tried knitting cables – they’re not hard to do (you basically knit stitches out of order), but you really have to pay attention to exactly where you are in the pattern. Not something to try while zooming down the Atlantic City Expressway…


